Page 2 - ENVIRONMENTAL TIPS; IMPORTANT SAFETY INSTRUCTIONS; RECORD MODEL AND SERIAL NUMbER HERE:
2 3 SAFETY CONTENTS TIPS & INFORMATION IMPORTANT – CHECK FOR ANY DAMAGE OR MARKS. If you find the appliance is damaged or marked, you must report it within 7 days if you wish to claim for damage/ marks under the manufacturer’s warranty. This does not affect your statutory rights. ENVIRONMENTAL T...
Page 3 - DESCRIPTION OF YOUR APPLIANCE; SETTING THE TIME; bEFORE OPERATING YOUR APPLIANCE
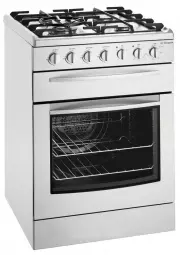
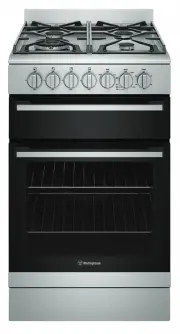
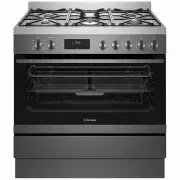
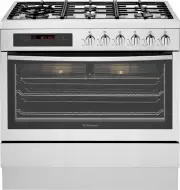
4 5 INSTALLATION DESCRIPTION DESCRIPTION OF YOUR APPLIANCE MODEL PSP632 MODEL DSP635 ILLUSTRATION ONLY DO NOT PRINT REVISIONS This drawing contains confidential information and is the property of Aktiebolaget Electrolux, Sydney, Australia without whose permission it may not be copied, shown or hande...
Page 4 - GRILL TRAY; USING THE HOTPLATE
6 7 USING THE HOTPLATE INSTALLATION GRILL TRAY To insert the grill tray, fully open the drawer and position the tray so that the slots on the outer edges fit over the tabs on the slides. Place the grill tray insert into the grill tray. bURNER CROwNS AND CAPS • The burner crown must be fitted correct...
Page 5 - NOTE: In the absence of electrical power, carry out the; USING THE GRILL; WARNING; SAFETY wARNINGS AbOUT THE GRILL; GUIDE TO bETTER GRILLING
8 9 USING THE GRILL USING THE GRILL GAS HOTPLATESOPERATION • To ignite, push knob in and turn anti-clockwise to the ignition symbol . • Sparks are sent to all burners.• Release knob once burner has ignited and adjust the flame. 1 Low heat burner (5.1 MJ/h) Used for simmering and for use with small c...
Page 6 - Once automatic baking is complete, return to manual; USING THE TIMER; NOTE: Your 3 button programmable timer only operates with
10 11 USING THE TIMER USING THE TIMER 2-HOUR “AUTO OFF” TIMER The 2- hour timer features an automatic oven “cut off”. This means that a cooking period of up to 120 minutes can be used. When the timer has counted back to “Auto Off” a bell will sound and the oven element will be switched off. Although...
Page 7 - NOTE: If you are using water in cooking, this will turn to; USING THE OvEN
12 13 USING THE OVEN USING THE OVEN FAN bAKING The temperature in the oven is controlled by a thermostat. The fan distributes the heat throughout the oven compartment. This allows:• Baking on all shelves at the same time with little variation in browning or cooking. • Cooking at slightly lower tempe...
Page 8 - ROASTING MEAT; DEALING wITH COOKING PRObLEMS; ‘SIMPLE TEST CAKE’
14 15 USING THE OVEN USING THE OVEN ROASTING MEAT • You can use the grill tray and grill tray insert for roasting meat in the oven. • Place the meat in the oven and set the temperature between 180°C and 200°C. (It is recommended to wrap your meats in an oven roasting bag or foil to prevent fats and ...
Page 9 - ELECTRONIC bURNER CONTROL; NOTE: Items with high sugar content not only include jam and; NOTE: You can also use household oven enamel cleaners; NOTE: Make sure you follow the polish or brushing lines in; CAUTION; CLEANING YOUR APPLIANCE
16 17 CLEANING USING THE OVEN Your gas oven is fitted with an electronic controller which manages the operation of the burner and monitors the flame. This controller includes features which ensure the safe operation of your appliance and will prevent the build up of unburnt gas, should a fault occur...
Page 10 - REMOvING AND REPLACING THE OvEN LIGHT; CLEANING YOUR OvEN ACCESSORIES; REMOvING THE SHELvES FROM THE OvEN; GRILL COMPARTMENT; SOLvING PRObLEMS; FAULTS
18 19 SOLVING PROBLEMS CLEANING REMOvING AND REPLACING THE OvEN LIGHT • Turn oven light glass anticlockwise to remove it for globe replacement. A special high temperature resistant globe should be used that can be purchased from the Electrolux Customer Care Centre. WARNING MAKE SURE THE APPLIANCE IS...
Page 11 - CAbINET REqUIREMENTS; C. INSTALLATION INTO LOwER TEMPERATURE TOLERANT CAbINETRY; INSTALLING THE APPLIANCE; RECOMMENDED CAbINET DESIGN; and stability bolt MUST be installed on all cookers
20 21 INSTALLATION INSTALLATION CAbINET REqUIREMENTS This appliance has been designed to ‘slot-in’ to a 600mm wide gap built-in standard kitchen cabinets. As such the appliance can be installed matching the height and depth of benches and behind the kick rail of the cabinets. This allows the cooker ...
Page 12 - NOTE: When connections are made to a multi-phase; CONNECTING TO SERvICES AND COMMISSIONING; ELECTRICAL SUPPLY CONNECTION; CHECKING GAS PRESSURES
22 23 INSTALLATION INSTALLATION The cooker MUST be installed in compliance with:• wiring connections in AS/NZS 3000 Wiring Rules• local regulations, municipal building codes and other statutory regulations • For New Zealand Only: The cooking range must be connected to the supply by a supply cord fit...
Page 13 - TESTING THE OPERATION OF THE GAS COOKER; CHECKING GAS SUPPLY
24 25 TESTING THE OPERATION INSTALLATION Once these checks have been completed, if the regulator still fails to perform in a satisfactory manner it should be replaced. 9. One by one, turn the knobs to minimum and screw in the bypass screw (accessible when the knob is removed) until a small stable fl...
Page 14 - Warranty; NOTES
26 27 NOTES WARRANTY This document sets out the terms and conditions of the product warranties for Electrolux Appliances. It is an important document. Please keep it with your proof of purchase documents in a safe place for future reference should you require service for your Appliance. 1. In this w...