Page 2 - Safety Information; SAVE THESE INSTRUCTIONS; Table of Contents
2 Table of Contents ....................................................... 2Safety Information ..................................................... 2Pre-Operation ............................................................ 4 Pre-Installation ..........................................................
Page 4 - UNPACKING AND EXAMINING YOUR OVEN; GROUNDING INSTRUCTIONS; RADIO OR TV INTERFERENCE
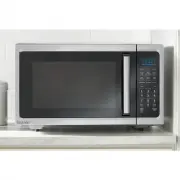
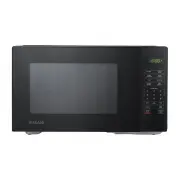
4 Pre-Operation UNPACKING AND EXAMINING YOUR OVEN Carefully remove oven from carton. SAVE THE CARTON AS IT MAY MAKE INSTALLATION EASIER. Remove all packing materials from inside the oven cavity; however, do not remove the waveguide cover, which is located on the right side in the oven cavity. Verify...
Page 6 - ABOUT FOOD; Food
6 Pre-Operation (continued) ABOUT FOOD Food Do Don’t Eggs, sausages, fruits and vegetables Puncture egg yolks before cooking to prevent “explosion”. Pierce skins of potatoes, apples, squash, hot dogs and sausages so that steam escapes. Cook eggs in shells. Reheat whole eggs. Popcorn Use specially ba...
Page 7 - ABOUT SAFETY; Temp; ABOUT UTENSILS AND COVERINGS
7 HOMEDEPOT.com Please contact 1-855-847-7264 for further assistance. Pre-Operation (continued) ABOUT SAFETY Check foods to see that they are cooked to the following recommended temperatures. Temp Food 160°F prepared food. 165°F For leftover, ready-to-reheat refrigerated, and deli and carry-out fres...
Page 9 - SPECIFICATIONS; Power Supply; PACKAGE CONTENTS; Part
9 HOMEDEPOT.com Please contact 1-855-847-7264 for further assistance. Pre-Installation SPECIFICATIONS Power Supply 120 V 20 AC 60 Hz Single phase Microwave Power Consumption 1500 W Output Power 1000 W Frequency 2450 MHz Outside Dimensions 10-7/8 in. (H) × 29-7/8 in. (W) × 18-13/16 in. (D) Cavity Dim...
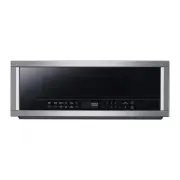
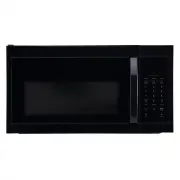
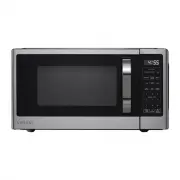
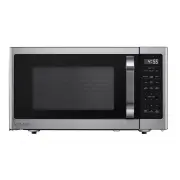
Page 10 - Operation; CONTROL PANEL OPERATION; Control
10 Operation CONTROL PANEL OPERATION Your microwave oven control panel lets you select the desired cooking function quickly and easily. All you have to do is touch the necessary command pad. The following is a list of all the command and number pads located on the control panel. 2 3 4 5 6 7 8 9 10 1...
Page 11 - FUNCTION; SETTING THE CLOCK; SETTING MICROWAVE COOKING PROGRAM; Touch number pad
11 HOMEDEPOT.com Please contact 1-855-847-7264 for further assistance. Operation (continued) CAUTION: To avoid risk of personal injury or property damage, do not operate the microwave oven empty. To avoid risk of personal injury or property damage, do not use stoneware, aluminum foil, metal utensils...
Page 12 - LIGHT CONTROL; Working Mode; VENT FAN CONTROL; Touch Vent 4 Speed pad
12 Operation (continued) For example, suppose you want to cook at 80% power level for 10 minutes. In standby mode, touch Micro pad once. Use the number pads to enter cooking time. Touch Power Level pad once, and then touch the number pad 8 to select 80% power level. NOTE: During cooking, you can tou...
Page 13 - Press number; SENSOR REHEAT
13 HOMEDEPOT.com Please contact 1-855-847-7264 for further assistance. Operation (continued) NOTE: After cooking starts, when a certain temperature is reached, if the exhaust fan is not turned on, the exhaust fan will automaticallyturn on the HIGH gear (BOOST or HIGH gear can be switched), and the e...
Page 14 - SENSOR REHEAT MENUS; POTATO
14 Operation (continued) SENSOR REHEAT MENUS Press number Food type Weight/Serving 1 Beverage 1 cup (8 oz)2 cups (16 oz)3 cups (24 oz) 2 Frozen Entree 8 oz – 24 oz 3 Pizza 1 – 3 slices (6 oz/slice) 4 Dinner Plate 8 oz – 24 oz 5 Soup/Sauce 8 oz – 24 oz 6 Chili 8 oz – 24 oz 7 Pasta 8 oz – 24 oz 8 Mac ...
Page 16 - Care and Cleaning
16 Operation (continued) CHILD LOCK The child lock prevents unsupervised operation by children and this program only works in standby mode. To set: In standby mode, touch and hold Lock Turntable/Off for 3 seconds, then a beep will sound and the display will show LOCK ON. In the locked state, all pad...
Page 19 - OVEN LIGHT
19 HOMEDEPOT.com Please contact 1-855-847-7264 for further assistance. Care and Cleaning (continued) OVEN LIGHT To release vent cover, remove the screw on the vent cover. To release oven light, remove the screw on the LED. Dedicated oven light is needed. louver back into place, and replace the louve...