Page 2 - TABLE OF CONTENTS
SAFETY INFORMATION .................................................................................................................................. EN-2 SETTING UP YOUR OVEN................................................................................................................................
Page 3 - SAFETY INFORMATION
EN-2 When using electrical appliances basic safety precautions should be followed, including the following:WARNING - To reduce the risk of burns, electric shock, fire, injury to persons or exposure to excessive microwave energy:1. Read all instructions before using the appliance.2. Read and follow t...
Page 4 - SAVE THESE INSTURCTIONS; bag
3) If material inside of the oven ignite, keep oven door closed, turn oven off, and disconnect the power cord, or shut off power at the fuse or circuit breaker panel. 4) Do not use the cavity for storage purposes. Do not leave paper products, cooking utensils, or food in the cavity when not in use. ...
Page 5 - EXPOSURE TO EXCESSIVE
PRECAUTIONS TO AVOID POSSIBLE MICROWAVE ENERGY (a) Do not attempt to operate this oven with the door open since open door operation can result in harmful exposure to microwave energy. It is important not to defeat or tamper with the safety interlocks. (b) Do not place any object between the oven fro...
Page 6 - GROUNDING INSTRUCTIONS
This appliance must be grounded. In the event of an electrical short circuit, groundingreduces the risk of electric shock by providing an escape wire for the electric current. This appliance is equipped with a cord having a grounding wire with a grounding plug. The plug must be plugged into an outle...
Page 7 - receiver are on different branch circuits.; RADIO INTERFERENCE
1. Operation of the microwave oven may cause interference to your radio, T V or similar equipment. 2. When there is interference, it may be reduced or eliminated by taking th e following measures:1) Clean door and sealing surface of the oven2) Reorient the receiving antenna of radio or television.3)...
Page 8 - MATERIALS YOU CAN USE IN MICROWAVE OVEN; MATERIALS TO BE AVOIDED IN MICROWAVE OVEN
MATERIALS YOU CAN USE IN MICROWAVE OVEN Utensils Remarks Browning dish Follow manufacturer* instructions. The bottom of browning dish must be at least 3/16 inch (5mm) above the turntable. Incorrect usage may cause the turntable to break. Dinnerware Microwave-safe only. Follow manufacturer's instruct...
Page 9 - NORMAL RESPONSIBILITIES OF THE CONSUMER**
WARRANTYMICROWAVE OVEN LIMITED WARRANTY Your product is protected by this Limited Warranty: Warranty service must be obtained from VISSANI Consumer Services or an authorized VISSANI servicer.Warranty• One year Limited Warranty from original purchase date.VISSANI, through its authorized servicers wil...
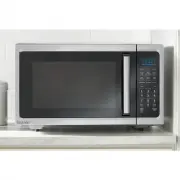
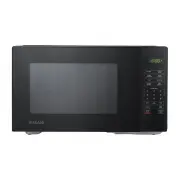
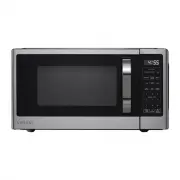
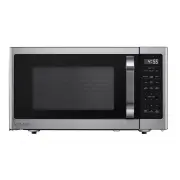
Page 10 - PART NAMES
Observation window Door assembly Safety Grill Rack (Only be used in Convection function and be placed on the glass tray interlock system Turntable shaftTurntable ring assembly Glass tray Remove the oven and all materials from the carton and oven cavity.Your oven comes with the following accessories:...
Page 11 - cavity to protect the magnetron.; INSTALLATION
Remove all packing material and accessories. Examine the oven for any damage such as dents or broken door. Do not install if oven is damaged. surface. Do not remove the light brown Mica cover that is attached to the oven Cabinet: Remove any protective film found on the microwave oven cabinet cavity ...
Page 13 - CONTROL PANEL
CONTROL PANEL AND FEATURES START/+30Sec. STOP/Cancel CONTROL PANEL EN-12
Page 14 - MANUAL COOKING
Level Power Display 10 100% PL10 9 90% PL9 8 80% PL8 7 70% PL7 6 60% PL6 5 50% PL5 4 40% PL4 3 30% PL3 2 20% PL2 1 10% PL1 1.POWER LEVELSTen power levels are available. Prior to cooking, press Power Level and "PL10" will display. Then press number padsto select a different power level. Pleas...
Page 16 - WARM HOLD FUNCTION
Note: d. Press number pads to enter the cooking time. The maximum cooking time is 99 e. Press START/+30Sec. to start cooking. The remaining cook time will display. "Conv." will flash. 1.. If no preheat needed, skip step c above2.. If preheating, do not place food into oven until cooking temp...
Page 17 - remaining defrost time will display.
Note: 1.. Time can also be added in 30 seconds increments by pressing START/+30Sec. during Mic- wave Cooking, Time Defrost and Multi-stage Cooking. 2.. Time cannot be added by pressing START/+30Sec. during Weight Defrost and Kitchen Tim functions. a. Instant cooking at 100% power level and 1 to 6 mi...
Page 18 - Auto Defrost Function
b. Press Auto Defrost more times or press More / Less pad to choose the defrost food a. Press Auto Defrost, "dEF1", "Cook" and "DEF." ,"Auto" will appear in the display. type, "dEF1" through "dEF4". See table below. LED display Food Weight dEF1 Meat 0....
Page 20 - press “2” to choose “H2”menu.
a. Press Sensor Reheat , "Sr-1", "SENS." and "Auto","Cook" will display.b. Press Sensor Reheat more times or press number pads 1 through 3 to choose the type of food. c. Press START/+30Sec. to start cooking. "Sr-1", "SENS." and "Auto" will flas...
Page 21 - procedure will be indicated by 1, 2 or 3 in the display.; FAVORITE FUNCTION; wave
Air Fry Chart : Food Frozen French Fries Frozen Onion Rings Frozen Chicken nuggets Chicken wings Chicken legs Chicken Tenders Coconut Tenders Fish Sticks Spring Rolls Mozzarella Sticks Display H1 H2 H3 H4 H5 H6 H7 H8 H9 H10 Weight/Portion About 8oz About 8oz About 11oz About 11oz About 14oz About 8o...
Page 22 - INQUIRING FUNCTION; seconds in the display.; starting the child lock function ) to enter the Energy Saver mode.
EXAMPLE: 80% Power Level for 5 minutes followed by 60% Power Level for 10minutes; saved as memory 3.• Press Favorite 3 times; screen displays 3.• Press Microwave, then press "5", "0" and "0" to set first stage cook time.• Press Power Level once, then press "8" to choo...
Page 24 - MAINTENANCE
MAINTENANCE TroubleshootingCheck your problem by using the chart below and try the solutions for each problem. If the microwave oven still does not work properly, contact the nearest authorized service center. TROUBLE POSSIBLE CAUSE POSSIBLE REMEDY Oven will not start a. Electrical cord for oven is ...