VEVOR WDPQSWDKZQY404HTNV1 - Manuals

User Manual VEVOR WDPQSWDKZQY404HTNV1


Summary
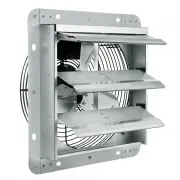
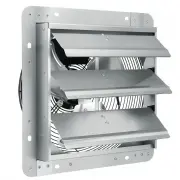
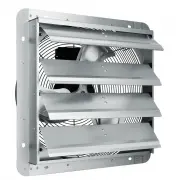
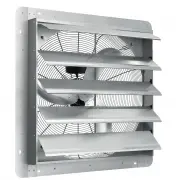
- 1 - JBSF-320G <Picture Only For Reference> Have product questions? Need technical support? Please feel free tocontact us: [email protected] NEED HELP? CONTACT US! This is the original instruction, please read all manual instructions carefully before operating. VEVOR reserves a clear interpre...
- 2 - Contents Ⅰ . Safety Precautions Ⅱ . Product Description Ⅲ . Installation Guide Ⅳ . Function Description Ⅴ . Faults and Maintenance Ⅰ .Safety Precautions WARNING Indicates a hazardous situation that, if not avoided, could result in death or serious injury. DANGER Indicates a hazardous situation...
- 4 - Solar roof exhaust fan functions in several ways to keep your place cool and comfortable. Its design includes the following features: • It keeps your home cooler in the summer by extracting 20 times more air than a Whirly Bird.• It is solar-powered, so there is no running cost.• It reduces the...
VEVOR Fans Manuals
-
 VEVOR BYCSPQSDJAC10PBM8V1
User Manual
VEVOR BYCSPQSDJAC10PBM8V1
User Manual
-
 VEVOR BYCSPQSDJAC12DLJSV1
User Manual
VEVOR BYCSPQSDJAC12DLJSV1
User Manual
-
 VEVOR BYCSPQSDJAC16NRV5V1
User Manual
VEVOR BYCSPQSDJAC16NRV5V1
User Manual
-
 VEVOR BYCSPQSDJAC2421TSV1
User Manual
VEVOR BYCSPQSDJAC2421TSV1
User Manual
-
 VEVOR BYCSPQSDJEC10VE89V1
User Manual
VEVOR BYCSPQSDJEC10VE89V1
User Manual
-
 VEVOR BYCSPQSDJEC12J2DNV1
User Manual
VEVOR BYCSPQSDJEC12J2DNV1
User Manual
-
 VEVOR BYCSPQSDJEC14Y5NAV1
User Manual
VEVOR BYCSPQSDJEC14Y5NAV1
User Manual
-
 VEVOR BYCSPQSDJEC16PFKWV1
User Manual
VEVOR BYCSPQSDJEC16PFKWV1
User Manual
-
 VEVOR GYBGSFS18INCH2HS2V1
User Manual
VEVOR GYBGSFS18INCH2HS2V1
User Manual
-
 VEVOR GYBGSFSYCSF18BWP2V1
User Manual
VEVOR GYBGSFSYCSF18BWP2V1
User Manual
-
 VEVOR GYBGSFSYCSF203K0JV1
User Manual
VEVOR GYBGSFSYCSF203K0JV1
User Manual
-
 VEVOR GYBGSFSYCSS24BCVOV1
User Manual
VEVOR GYBGSFSYCSS24BCVOV1
User Manual
-
 VEVOR GYBGSFSYCSS30K4KVV1
User Manual
VEVOR GYBGSFSYCSS30K4KVV1
User Manual