Page 4 - OUTDOOR GAS
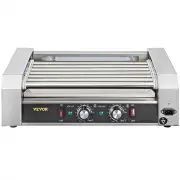
1 Model: EGA94 Have product questions? Need technical support? Please feel free tocontact us: [email protected] NEED HELP? CONTACT US! This is the original instruction, please read all manual instructions carefully before operating. VEVOR reserves a clear interpretation of our user manual. The appea...
Page 5 - Compliance is a North n security certification.; IMPORTANT SAFEGUARDS; Please read ALL the instructions before using your machine.; DANGER
2 Warning-To reduce the risk of injury, user must read instructionsmanual carefully.Keep this manual for future reference. Compliance is a North n security certification. IMPORTANT SAFEGUARDS Thank you for using this product. In order to make sure that you can operate themachine correctly, read this...
Page 6 - CALIFORNIA PROPOSITION 65 WARNING:; The State of California is aware; WARNNG
3 6. In the event of a fire,walk away from the appliance and call your firemen atonce.Do not try to put out any oil or a grease fire with water. Not following these instructions may cause fire or explosion which maycause property damaged personal injury, or death. WARNNG ! 7. Consumers must take res...
Page 8 - and
5 26. LP gas cylinders must be stored outdoors out of the reach of children and must not be stored in a building, garage or any other enclosed area. Your cylindermust never be stored where temperatures can reach over 125°F.27. Do NOT insert any tool or foreign object into the valve outlet or safety ...
Page 13 - or intrusion. If you find any of these, replace the
10 90. Turn controls and gas source or tank OFF when not in use. The cylinder shallbe disconnected when the appliance is not in use.
91. When not in use, the gas must be turned off and the cylinder shall bedisconnected.92. Consumers are not allowed to disassemble the combustion system principally....
Page 14 - material during cooking. An asphalt surface; This device is to be used outdoors only; be used in a; let children and minors get close to or touch the machine.; Do NOT; immerse the appliance in water or any other liquid.
11 vessel immediately and turn off the appliance burners and gas supply. Don't try tomove the appliance or cooking vessel.
102. Make sure the appliance must be on level, stable noncombustible surface inan area clear of combustible
material during cooking. An asphalt surface (blacktop) can not be...
Page 16 - use the machine in high wind.; use this product as a furnace.
13 134. Keep fire extinguisher within safe and accessible distance and make surethose operating the machine are trained to use it. 135. Keep away from flammable material and fluids such as petroleum, alcohol,diesel fuel, kerosene and charcoal lighter fluid or vehicles while in use. Do not usethese m...
Page 17 - INSTALLATION SAFETY PRECAUTIONS
14 the valve and light again. Should the problem persist take the unit back to yourdealer for checking. WARNING! This product will become very hot, do not move it during operation. WARNING! Do not use the barbecue in a confined and/or habitable space e.g. houses, tents, caravans, motor homes, boats....
Page 18 - Parts List
15 Parts List Model: EGA94 1. Griddle Surface *1 PCS 10. Griddle Gas Control Valve *4 PCS 19. Leg Locking Assembly *1 PCS 2. Griddle Body *1 PCS 11. Main Control Knob Bezel *4 PCS 20. Upper Right Cart Frame *1 PCS 3. Fireproof Board *1 PCS 12. Grease Box *1 PCS 21. Lower Right Cart Frame *1 PCS 4. B...
Page 19 - CAUTION; BEFORE STARTING THE INSTALLATION; INSTALLATION GUIDE; To complete assembly you will need:
16 WARNNG ! 1. Never use this appliance under extended awnings as it may cause a fire orpersonal injury. Install it on the opposite side from the fuel distribution/dispensingsystem of the recreational vehicle.
2. Never let it be located or used under overhead unprotected combustiblebuildings or ro...
Page 20 - Typical assembly is approximately one hour .; Gas cylinders need to purchase separately by yourself.; Never check leaks with an open flame. Turn on the gas and apply
17 9. Typical assembly is approximately one hour . WCAUTION: Two (2) people are required for assembly. ATTENTION! Gas cylinders need to purchase separately by yourself. ATTENTION! Whilst every care is taken in the manufacture of this product, care must be takenduring assembly in case sharp edges are...
Page 22 - will be required to stand
19 STEP 3 STEP 3 3. Attach Bottom Shelf. STEP 4 4. Attach Side Handles and Insert Control Knobs. Caution: Two (2) people will be required to stand griddle upright.
Page 23 - Attach Right Side Shelf And Left Side Shelf. Place The Griddle.; The replacement hose assembly shall be specified by
20 STEP 4 STEP 5 5. Attach Right Side Shelf And Left Side Shelf. Place The Griddle. Attention: Maximum side shelf weight is 33 lbs (15 kg). Caution: The replacement hose assembly shall be specified by the manufacturer. TIPS: Before first use and after each use, always season your griddle per "Se...
Page 24 - TRANSPORTING & STORAGE INSTRUCTIONS; found in this section.
21 TRANSPORTING & STORAGE INSTRUCTIONS Before transporting or storing this griddle:1. Always season griddle per ''Seasoning Griddle'' section.2. Always clean griddle per ''Cleaning Instructions'' section.3. Always wait until griddle is cool.4. Always turn griddle off per '' Turning Off '' sectio...
Page 29 - LP gas tank must be properly disconnected and removed prior to
26 CONNECTING LP GAS TANK 1. Make sure control knobs are in the '' OFF''position (Figure 2).2. Before connecting, be sure there is no debriscaught in the head of the LP gas tank, head ofthe regulator valve or in the head of the burneror burner ports.3. Connect regulator/hose assembly to tank byturni...
Page 30 - INSTALLING LP GAS TANK
27 those illustrated in figure .including visible cracks and pitting ,must be returnedunused to the seller. INSTALLING LP GAS TANK To operate, you will need one precision-filled standard barbecue grill LP gas tankwith external valve threads This product is used with 20lb gas cylinders. CAUTION: LP g...
Page 31 - INSERTING AND SECURING LP GAS TANK
28 INSERTING AND SECURING LP GAS TANK 1. Unfold the upper LP gas tank support. 2. Place precision-filled LP gas tank upright onto the upper and lower LP gas tanksupport so the tank valve is facing the gas line connection.
Page 32 - OPERATING INSTRUCTIONS; must read all steps carefully.; Checking for Leaks; Burner Connections; Failure to inspect this
29 OPERATING INSTRUCTIONS Before using the appliance for the first time, peel off any promotional materials andpackaging materials, and check that machine are clean and free of dust. Ifnecessary, wipe them over with a damp cloth. Spread over with an absorbentkitchen towel and wipe off any excess oil...
Page 33 - Operating Main Burners
30 2. Tank/Gas Line Connection 2.1 Make 2-3 oz of leak detection solution bymixing one part liquid dish washing soap withthree parts water. 2.2 Make sure control knobs are in the '' OFF ''position (Figure 2).2.3 Connect LP gas tank per '' Installing LP GasTank'' section.2.4 Turn LP gas tank valve to...
Page 35 - griddle Position lit match near side of burner (Figures 4 and 5).; f burner flame goes out during operation, immediately turn the; or; When cooking, fire extinguishing materials should be readily
32 griddle Position lit match near side of burner (Figures 4 and 5). Important: Always use the Lighting Hook (included) when lighting burners with a match.2.9 After lighting, observe the burner flame Make sure all burner ports are lit andflame height matches illustration (Figure 6). Note: Each burne...
Page 36 - Excessive flare-ups can over-cook your food and be dangerous.; CLEANING AND CARE
33 Flare-ups are a part of cooking meats on a griddle and add to the unique flavor ofgrilling. Excessive flare-ups can over-cook your food and be dangerous. Important: Excessive flare-ups result from the build-up of grease in the grease cup. If a grease fire occurs, turn the control knob(s) to '' OF...
Page 37 - flammable vapors and liquids.; Cleaning Cart Surfaces
34 flammable vapors and liquids.
1.2 Do NOT obstruct the flow of the combustion of LP gas and the ventilation of air1.3 Keep the ventilation opening(s) of the LP gas tank area free and clear fromdebris.1.4 Visually check the burner flames to make sure your griddle is working properly(Figure 11).
...
Page 38 - THE STORAGE OF GRIDDLE; Never put griddle in storage or travel mode at once after use
35 3.6 Lift burners up and away from gas valve orifice.3.7 Disconnect wire from spark electrode.3.8 Clean venturi of each burner with small bottle brush or compressed air.3.9 Remove all residue and dirt from burner surface.3.10 Clean any clogged ports with a stiff wire (such as an opened paper clip)...
Page 39 - SEASONING GRIDDLE; Please read and follow this advice when cooking on your product.; Seasoning; Important: season your griddle every time you use it.; Tools needed for seasoning:
36 Tank"section.8. Place the protective cap cover on the LP tank and store the tank outdoors in awell-ventilated area out of direct sunlight.9. If storing the griddle indoors, cover the griddle and store in a cool dry place10. If storing the griddle outdoors, cover the griddle with a griddle cov...
Page 41 - Refurbish the Griddle Surface; SAFETY OF FOOD
38 2.11 Following "Before Storing" section. 3. Refurbish the Griddle Surface 3.1 If griddle is off, light per "Lighting" section for 10 minutes. Then turn griddle offper "Turning Off ” section. 3.2 If griddle is on, turn griddle off per " Turning Off " section.3.3 While t...
Page 42 - can use a thermometer to test proper internal food temperatures.; TROUBLESHOOTING
39 3. Cook: Make sure meat and poultry are cooked thoroughly to kill bacteria.You can use a thermometer to test proper internal food temperatures. TROUBLESHOOTING