VEVOR DDJRJ550W4003WZSZV1 - Manuals
User Manual VEVOR DDJRJ550W4003WZSZV1


Summary
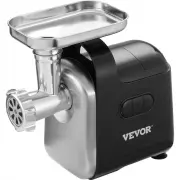
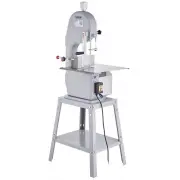
- 1 - MG5008KA-GS MG5008K-UL <Picture Only For Reference > Have product questions? Need technical support? Please feel free tocontact us: [email protected] NEED HELP? CONTACT US! This is the original instruction, please read all manual instructions carefully before operating. VEVOR reserves a ...
- 2 - HOUSEHOLD USE ONLYSAVE THESE INSTRUCTIONS Note: Before beginning assembly of product, make sure all parts are present. Compare parts with package content list and hardware contents. Do not attempt to assemble the unitif any parts are missing or damaged.Contact customer service for replacement ...
- 3 - 14. Never run the appliance empty after assembling the blade and blade disk. Otherwisethe blade and blade disk will be abraded seriously, and accelerate the unit aging.15. Appliances can be used by persons with reduced physical, sensory or mentalcapabilities or lack of experience and knowledge...
VEVOR Meatgrinders Manuals
-
 VEVOR 1100WJRJ90800X001V1
User Manual
VEVOR 1100WJRJ90800X001V1
User Manual
-
 VEVOR DDJR1100W9903O5FOV1
User Manual
VEVOR DDJR1100W9903O5FOV1
User Manual
-
 VEVOR DDJRJ550W5003TPZVV1
User Manual
VEVOR DDJRJ550W5003TPZVV1
User Manual
-
 VEVOR DDJRJ750W80038FEQV1
User Manual
VEVOR DDJRJ750W80038FEQV1
User Manual
-
 VEVOR DDJRJBXSQ42031SATV1
User Manual
VEVOR DDJRJBXSQ42031SATV1
User Manual
-
 VEVOR DMCJRJJL0000DETAVV1
User Manual
VEVOR DMCJRJJL0000DETAVV1
User Manual
-
 VEVOR DMCJRJJLBL1GASLM7V1
User Manual
VEVOR DMCJRJJLBL1GASLM7V1
User Manual
-
 VEVOR DMCJRJJLBL2G215HRV1
User Manual
VEVOR DMCJRJJLBL2G215HRV1
User Manual
-
 VEVOR JGJRJ850W42609QR8V1
User Manual
VEVOR JGJRJ850W42609QR8V1
User Manual
-
 VEVOR JQJ128B0000000001V1
User Manual
VEVOR JQJ128B0000000001V1
User Manual
-
 VEVOR JRJBXGJRJ5DXP0001V0
User Manual
VEVOR JRJBXGJRJ5DXP0001V0
User Manual
-
 VEVOR JRJXPSJRJ00000001V0
User Manual
VEVOR JRJXPSJRJ00000001V0
User Manual
-
 VEVOR LSJGJ1500W420HDRYV1
User Manual
VEVOR LSJGJ1500W420HDRYV1
User Manual
-
 VEVOR LSJGJ2200W422NFBCV1
User Manual
VEVOR LSJGJ2200W422NFBCV1
User Manual
-
 VEVOR RJDTMC1100W3YOMFQV1
User Manual
VEVOR RJDTMC1100W3YOMFQV1
User Manual
-
 VEVOR SYZJSJRJB80CMAC3RV0
User Manual
VEVOR SYZJSJRJB80CMAC3RV0
User Manual
-
 VEVOR TSJGJ1100W420AHCPV1
User Manual
VEVOR TSJGJ1100W420AHCPV1
User Manual
-
 VEVOR TSJGJ1500W4202NX5V1
User Manual
VEVOR TSJGJ1500W4202NX5V1
User Manual
-
 VEVOR TSJGJ2200W418LAWMV1
User Manual
VEVOR TSJGJ2200W418LAWMV1
User Manual