VEVOR BYCSPQSDJEC10VE89V1 - Manuals

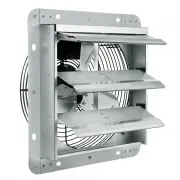
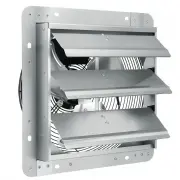
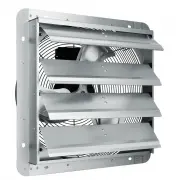
User Manual VEVOR BYCSPQSDJEC10VE89V1


Summary
- 1 - Have product questions? Need technical support? Please feel free to contact us: [email protected] NEED HELP? CONTACT US! This is the original instruction, please read all manual instructions carefully before operating. VEVOR reserves a clear interpretation of our user manual. The appearance of...
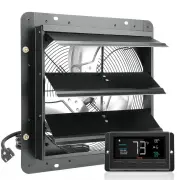
- 2 - PLEASE READ THE INSTRUCTIONS CAREFULLY BEFORE USING THE EQUIPMENT Contents Ⅰ .SAFETY PRECAUTIONS Ⅱ .PRODUCT DESCRIPTION Ⅲ .INSTALLATION Ⅳ .POWERING AND SETUP Ⅴ .CLEANING Ⅵ .PROGRAMMING SAFETY PRECAUTIONS WARNING Read all safety warnings, instructions, illustrations and specifications provided ...
- 3 - If the machine emits smoke, odor, motor noise and other abnormal conditions,Please do not use it. It may cause fire or electric shockDo not disassemble, repair or rectify the machine during use. Doing so may result in fire or electric shock and personal injury BE CAREFUL DO NOT use fan in wind...
VEVOR Fans Manuals
-
 VEVOR BYCSPQSDJAC10PBM8V1
User Manual
VEVOR BYCSPQSDJAC10PBM8V1
User Manual
-
 VEVOR BYCSPQSDJAC12DLJSV1
User Manual
VEVOR BYCSPQSDJAC12DLJSV1
User Manual
-
 VEVOR BYCSPQSDJAC16NRV5V1
User Manual
VEVOR BYCSPQSDJAC16NRV5V1
User Manual
-
 VEVOR BYCSPQSDJAC2421TSV1
User Manual
VEVOR BYCSPQSDJAC2421TSV1
User Manual
-
 VEVOR BYCSPQSDJEC12J2DNV1
User Manual
VEVOR BYCSPQSDJEC12J2DNV1
User Manual
-
 VEVOR BYCSPQSDJEC14Y5NAV1
User Manual
VEVOR BYCSPQSDJEC14Y5NAV1
User Manual
-
 VEVOR BYCSPQSDJEC16PFKWV1
User Manual
VEVOR BYCSPQSDJEC16PFKWV1
User Manual
-
 VEVOR GYBGSFS18INCH2HS2V1
User Manual
VEVOR GYBGSFS18INCH2HS2V1
User Manual
-
 VEVOR GYBGSFSYCSF18BWP2V1
User Manual
VEVOR GYBGSFSYCSF18BWP2V1
User Manual
-
 VEVOR GYBGSFSYCSF203K0JV1
User Manual
VEVOR GYBGSFSYCSF203K0JV1
User Manual
-
 VEVOR GYBGSFSYCSS24BCVOV1
User Manual
VEVOR GYBGSFSYCSS24BCVOV1
User Manual
-
 VEVOR GYBGSFSYCSS30K4KVV1
User Manual
VEVOR GYBGSFSYCSS30K4KVV1
User Manual
-
 VEVOR WDPQSWDKZQY404HTNV1
User Manual
VEVOR WDPQSWDKZQY404HTNV1
User Manual