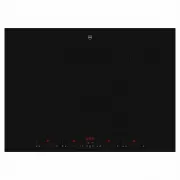
Page 3 - Contents
3 Contents 1 Safety precautions 4 1.1 Symbols used . . . . . . . . . . . . . . . . . . . . . . . . . . . . . . . . . . . . . . . . . . . . . . 4 1.2 General safety precautions . . . . . . . . . . . . . . . . . . . . . . . . . . . . . . . . . . . . 5 1.3 Appliance-specific safety precautions . . . . ...
Page 4 - Safety precautions; Symbols used
4 1 Safety precautions 1.1 Symbols used Denotes important safety precautions. Failure to observe said precautions can result in injury or damage to the appliance or fittings! Information and precautions to observe. Information and precautions to observe. Tips for ease of use. Read the operating inst...
Page 5 - General safety precautions
1 Safety precautions 5 1.2 General safety precautions • Read the operating instructions before using the appliance for the first time! • This appliance is not intended for use by persons (including children) with reduced physical, sensory or mental capabilities, or lack of experience and/or knowledg...
Page 6 - Appliance-specific safety precautions; • WARNING: If the surface is cracked, switch
1 Safety precautions 6 1.3 Appliance-specific safety precautions • WARNING: If the surface is cracked, switch the appliance off and disconnect it from the mains to avoid possible electric shock. • WARNING: The appliance and its accessible parts get hot during use. Be careful not to touch the heating...
Page 8 - Disclaimer; Instructions for use
1 Safety precautions 8 1.4 Disclaimer • Any repairs, modifications or manipulations to the appliance, especially any live parts, may only be carried out by the manufacturer, its Customer Services or similarly qualified persons. Repairs if carried out incorrectly may cause serious injury, damage to t...
Page 10 - Disposal; Packaging; Appliance disposal
1 Safety precautions 10 1.6 Disposal Packaging Disconnection ➤ Pull the plug out of the mains socket or have the appliance disconnected from the mains supply by an electrician. Then cut off the mains cable. ➤ Disable the appliance after disconnecting it. Appliance disposal • The symbol on the identi...
Page 11 - Using for the first time; Where is the identification plate?
11 2 Using for the first time • The appliance must be installed and connected to the mains supply in accordance with the separate installation instructions. Have a qualified fitter/electrician carry out the necessary work. • A cooking zone can give off an unpleasant smell during the first few hours ...
Page 12 - Your appliance; Appliance overview
12 3 Your appliance 3.1 Appliance overview GK36TI, GK36TIC, GK36TIF • 1 cooking zone ø 250 mm • 1 cooking zone ø 210 mm • 1 cooking zone ø 145 mm GK46TI, GK46TIC, GK46TIF • 1 cooking zone ø 210 mm • 2 cooking zones ø 180 mm • 1 cooking zone ø 145 mm
Page 13 - Operating and display elements; Touch buttons
3 Your appliance 13 3.2 Operating and display elements GK36TI… Touch buttons Displays Appliance ON/OFF Increase power level/operating time Reduce power level/operating time PowerPlus ON/OFF Pause cooking ON/OFF 1 Cooking zone indicator lights for the operating time 2 Operating time/timer 3 Cooking z...
Page 16 - Cookware; Suitable cookware
3 Your appliance 16 3.5 Cookware Suitable cookware Only cookware with a magnetic base is suitable for use with the induction hob. This can be tested in the following ways: • A magnet sticks anywhere on the base of the cookware. • On the hob, the power level set illuminates and not . Energy-efficient...
Page 17 - Noise during cooking
3 Your appliance 17 Noise during cooking Cookware can make noise during cooking. This does not indicate any malfunction, nor does it affect the functioning of the appliance in any way. Noise depends on the cookware used. If the noise causes consid-erable disturbance, it can help to change the cookwa...
Page 18 - Operating the appliance; Switching the appliance on and off
18 4 Operating the appliance The individual cooking zones are all operated in the same way. When the appliance is switched off, all the displays are dark (stand-by mode), except for the residual heat indicator should any cooking zone still be hot. 4.1 Switching the appliance on and off ➤ Switch the ...
Page 19 - Residual heat indicator; Keep warm setting
4 Operating the appliance 19 4.3 Overview of power levels 4.4 Switching a cooking zone off ➤ Press the touch button for the required cooking zone repeatedly until illuminates in the corresponding display. – If no other entry is made and the other cooking zones are switched off, the appliance switche...
Page 20 - PowerPlus; Switching PowerPlus on
4 Operating the appliance 20 4.6 PowerPlus All the cooking zones are equipped with the PowerPlus booster. When PowerPlus is switched on, the cooking zone selected works at extra high power for 10 minutes. PowerPlus can be used, for instance, to heat a large quantity of water. Switching PowerPlus on ...
Page 21 - Power management
4 Operating the appliance 21 Power management GK36TI, GK36TIC, GK36TIF PowerPlus cannot be used with cooking zones 1 and 2 at the same time. If PowerPlus is activated with both cooking zones, then the power output is reduced for the cooking zone that was first selected.Cooking zone 3 can be operated...
Page 23 - Automatic boost; Switching the automatic boost on
4 Operating the appliance 23 4.7 Automatic boost All the cooking zones are equipped with a selectable automatic boost. With this function, a cooking zone works at power level 9 for a certain length of time (see table). Then it automatically goes back to the power level set. Switching the automatic b...
Page 24 - Operating time; Setting the operating time
4 Operating the appliance 24 4.8 Operating time With the operating time function, the cooking zone switches off automatically after a set time (1–99 minutes). This function cannot be used at the same time with several cooking zones. Setting the operating time ➤ Select the required cooking zone. ➤ Us...
Page 26 - Timer; Setting the timer
4 Operating the appliance 26 4.9 Timer The timer functions like an egg timer (1–99 minutes). It can only be used if no operating time has been set. Setting the timer ➤ Switch the appliance on. ➤ Using the or touch button for the operating time/timer, set the required duration of the timer. – The fir...
Page 30 - Care and maintenance; Cleaning
30 5 Care and maintenance 5.1 Cleaning Always clean the hob after use. This prevents food residues from burning on. Dried-on or burned-on food residue is harder to clean off. Use of improper cleaning techniques can result in damage to the markings or surface. ➤ Use only a soft cloth or sponge with w...
Page 31 - Trouble-shooting and error messages; What to do if ...; ... the appliance is not working and the displays are not illuminated
31 6 Trouble-shooting and error messages 6.1 What to do if … … the appliance is not working and the displays are not illuminated … illuminates in the display … illuminates in the displays Possible cause Solution • The fuse or circuit breaker for electrical installations in the home is defective. ➤ C...
Page 32 - ... a continuous acoustic signal is emitted,
6 Trouble-shooting and error messages 32 … a continuous acoustic signal is emitted, flashes and the appliance switches off … and flash alternately in the display Possible cause Solution • A touch button was touched for longer than 10 seconds. ➤ Remove object or food that has boiled over. ➤ The appli...
Page 34 - Index
34 7 Index A Acoustic signal . . . . . . . . . . . . . . . 29Appliance Switching off . . . . . . . . . . . . . 18, 36Switching on . . . . . . . . . . . . . 18, 36 Appliance overview . . . . . . . . . . . . 12Automatic boost . . . . . . . . . . . . . . 23 C Care . . . . . . . . . . . . . . . . . . . ...
Page 35 - Repair service
35 8 Repair service Whether you contact us about a malfunction or an order, please always state the serial number (FN) and the model type of your appliance. Enter these details below and also on the service sticker which comes with the appliance. Stick it in a conspicuous place or in your telephone ...
Page 36 - Quick instructions; To switch appliance on
Quick instructions Please first read the safety precautions in the operating instructions! To switch appliance on ➤ Hold the touch button depressed for about 1 second. To select cooking zone ➤ Press the or touch button for the required cooking zone. ➤ Using the or touch button, set the required powe...