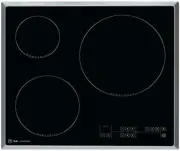
Page 3 - Contents
3 Contents 1 Safety precautions 4 1.1 Symbols used......................................................... 4 1.2 General safety precautions .................................. 4 1.3 Appliance-specific safety precautions ............... 4 1.4 Instructions for use ....................................
Page 4 - Safety precautions; Symbols used; General safety precautions
4 1 Safety precautions 1.1 Symbols used Denotes important safety precau-tions.Failure to observe said precautionscan result in injury or in damage tothe appliance or fittings! Information and precautions thatshould be observed. Information on disposal Information about the Operating In-structions ▸ ...
Page 5 - Instructions for use; Before using for the first time
1 Safety precautions 5 ▪ WARNING: The applianceand its accessible parts gethot during use. Be careful notto touch the heating ele-ments. ▪ Under no circumstances usea steam cleaner to clean theappliance. ▪ Do not place metal objectssuch as knives, forks,spoons, lids or aluminium foilon the hob as th...
Page 6 - Note on use; Caution: Risk to life
1 Safety precautions 6 ▪ The heated surface will remain hot forsome time after it is switched off andwill cool down only slowly to room tem-perature. Please allow sufficient time forthe appliance to cool down before, forinstance, cleaning it. Note on use ▪ Tests have shown that under normal cir-cums...
Page 7 - Appliance overview
2 Using for the first time The appliance must be installed and connected to the electricity supply in accord-ance with the separate installation instructions. Have a qualified fitter/electriciancarry out the necessary work. All traces of adhesive must be removed before the appliance is used for the ...
Page 8 - Operating and display elements; Buttons; How induction hobs function
3 Your appliance 3.2 Operating and display elements Never rest objects on the operating elements! This can cause damage to the appli-ance and unintended operating errors. 1 2 10 9 4 7 6 5 8 3 13 12 11 Buttons Multi-function button Appliance ON/OFF Slider (for setting the power level) Wipe protection...
Page 9 - Suitable cookware
3 Your appliance 3.4 Pan detection Each cooking zone is equipped with pan detection. This detects suitable induction com-patible cookware with a magnetic base. ▪ If cookware is placed on a cooking zone before it is turned on, illuminates in thecorresponding display. ▪ If the cookware is removed duri...
Page 11 - Noise during cooking; OptiGlass; Illumination; Operation; Switching the appliance on and off
4 Operation Noise during cooking Cookware can make noise during cooking. This does not indicate any malfunction, nordoes it affect the functioning of the appliance in any way. Noise depends on the cookware used. If the noise causes considerable disturb-ance, it can help to change the cookware. 3.7 O...
Page 12 - Overview of power levels; Melting function; Switching the melting function on; Keep warm function; Switching the keep warm function on
4 Operation If the hob is switched on, – and alternate in the display if cookware is standing on a cooking zone that has residual heat. – illuminates if no cookware is standing on a cooking zone with residual heat. 4.5 Overview of power levels Power level Cooking method Use Melting Butter, chocolate...
Page 13 - Simmer function; Switching the simmer function on; PowerPlus; Switching PowerPlus on
4 Operation 4.8 Simmer function With the simmer function , sausages, dumplings and stuffed pasta, for instance, can be cooked in hot water, just below boiling point. The precision of the simmer function depends on the cookware used. Water canstart to boil. If this is the case, we recommend the pan l...
Page 14 - Bridging function; Switching the bridging function on; Automatic boost; Switching the automatic boost on
4 Operation If the power level is increased above these levels, PowerPlus switches off. 4.10 Bridging function The bridging function allows two individual cooking zones lying one behind the other tobe switched on together and to be adjusted together. Switching the bridging function on ▸ Touch both s...
Page 15 - Operating time; Setting the operating time
4 Operation 4.12 Operating time Do not leave the hob unattended during use. Risk of boiling over, burning on andigniting! With the operating time function, a Cooking zone switches off automatically after a settime 1 min. – 1 hrs. 59 mins.. Setting the operating time ▸ Set the desired power level on ...
Page 17 - Restore function
4 Operation ▸ Touch the and buttons at the same time. – An acoustic signal is emitted. ▸ Touch the button again. – An acoustic signal is emitted. – The childproof lock is now switched on. – illuminates in all the power level displays. Operating the appliance with the childproof lock activated ▸ Swit...
Page 18 - OptiLink; Connecting the hob to the range hood; User settings
5 OptiLink Touch the button to switch the appliance off at any time. 5 OptiLink 5.1 Connecting the hob to the range hood The hob can only be connected to a range hood with the OptiLink function. To activate the connecting mode on the hob:▸ Switch the hob off.▸ Access the user setting (see page 19).▸...
Page 19 - Changing user settings; Saving entry
6 User settings User setting Setting value Factory setting Operating time PowerPlus Ends after 5 minutes Ends after 10 minutes Ends after 15 minutes Automatic boost Automatic boost off Automatic boost on Default operating time / timer duration Default duration 0 minutes Adjustable in steps from 10–9...
Page 20 - Cancelling user settings; Care and maintenance; Cleaning
7 Care and maintenance Cancelling user settings ▸ Press the button. – Any changes made to the default values are not saved. – The «User settings» mode is ended. 7 Care and maintenance Ideally, clean the appliance when it has completely cooled down.Burns hazard! Always clean the hob after use. This p...
Page 21 - Cleaning agent; Glass ceramic with OptiGlass; Error messages
8 Trouble-shooting ▸ Wipe off with a wet cloth and then polish with a dry cloth or the soft side of a suitable cleaning sponge. 7.1 Cleaning agent Glass ceramic with OptiGlass Unsuitable cleaning agents may attack and damage the coating. ▸ Only use the cleaning agents and methods for glass ceramic w...
Page 23 - Other possible problems; Technical data; Product fiche
9 Technical data 8.2 Other possible problems Problem Possible cause Solution The appliance is notworking and all the dis-plays are dark. ▪ The fuse or circuit breaker forelectrical installations in thehome is defective. ▸ Change the fuse.▸ Reset the circuit breaker. ▪ The fuse or circuit breakerkeep...
Page 24 - Disposal; Packaging
10 Disposal Model number GK 31116 Type designation GK CTI4T74MMS… Number of cooking zones 4 Heating technology Induction cooking zone Dimensions of cookingzone cm 18 × 20 18 × 20 18 × 20 18 × 20 Energy consumption percooking zone Wh/kg 186.2 185.5 180.5 191.9 Energy consumption of theentire hob EC W...
Page 25 - Index
11 Index A Appliance Switching on and off ................................... 11 Appliance disposal .......................................... 24Appliance overview ............................................ 7Appliance-specific safety precautions ......................................................
Page 27 - Your repair order
12 Service & Support 12 Service & Support The «Trouble-shooting» section gives you valuable tips on how to deal with minormalfunctions yourself, saving you the time and trouble of calling out a service tech-nician and any cost that goes along with it. Information on the V-ZUG warranty can be...
Page 28 - Quick instructions; To switch appliance on; To select cooking zone; To switch cooking zone off; To switch appliance off
Quick instructions Please first read the safety precautions in the operating instructions! To switch appliance on ▸ Touch the button. To select cooking zone ▸ Touch the slider for the required cooking zone or swipe it to set the power level. Or:▸ Touch « » on the slider to heat a large quantity of w...