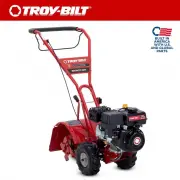
Page 2 - To The Owner; Table of Contents; Thank You
To The Owner 1 2 Safe Operation Practices ........................................ 3 Assembly & Set-Up .................................................. 5 Controls & Operation .............................................. 7 Service .............................................................
Page 3 - Important Safe Operation Practices; Training; Operation; CALIFORNIA PROPOSITION 65
Important Safe Operation Practices 2 3 Training 1. Read, understand, and follow all instructions on the machine and in the manual(s) before attempting to assemble and operate. Keep this manual in a safe place for future and regular reference and for ordering replacement parts. 2. Be familiar with al...
Page 4 - Notice Regarding Emissions; SAVE THESE INSTRUCTIONS!
4 S ection 2 — i mportant S afe o peration p racticeS the spark plug wire and ground it against the engine to prevent unintended starting. 5. Do not change the engine governor settings or over-speed the engine. The governor controls the maximum safe operating speed of engine. 6. Maintain or replace ...
Page 5 - Contents of Carton
Assembly & Set-Up 3 5 Assembly Warning! To prevent personal injury or property damage, do not start the engine until all assembly steps are complete and you have read and understand the Safe Operations Practices. Recommended Tools for Assembly • Two 1⁄2” open-end wrenches • Block of wood (to sup...
Page 6 - Red; Black
S ection 3— A SSembly & S et -U p 6 Reverse Clutch Control 1. Carefully unwrap the reverse clutch control cable (red) from its shipping position and route it up the right side handle. Position the cable so that it rests above the small groove on the handle assembly in front of the reverse drive ...
Page 10 - Loading & Unloading the Tiller
10 S ection 4— c ontrolS & o peration • Each succeeding lower terrace is started by walking below the terrace you’re preparing. For added stability of the tiller, always keep the uphill wheel in the soft, newly tilled soil. Do not till the last 12” or more of the downhill outside edge of each te...
Page 11 - Service; Transmission Gear Oil; Maintenance Schedule
Service 5 11 WARNING! Before inspecting, cleaning or servicing the machine, shut off the engine, wait for all moving parts to come to a complete stop, disconnect the spark plug wire and move the wire away from the spark plug. Failure to follow these instructions can result in serious personal injury...
Page 12 - Tines
S ection 5— S ervice 12 7. If the gear oil level is low, add gear oil immediately. If the gear oil level is okay, securely reinstall the transmission cover and reinstall the belt cover. NOTE: When reinstalling the belt cover, be sure to engage the bail and hold it so that the drive belt is tight bef...
Page 13 - Troubleshooting; Problem
Troubleshooting 6 13 Problem Cause Remedy Wheels and Tines will not turn. 1. Improper use of controls. 2. Worn or broken clutch belt. 3. Internal transmission wear or damage. 4. Bolt and key loose in transmission pulley. 1. Review Controls & Operation Section. 2. Contact Authorized Service Deale...
Page 14 - Replacement Parts; Component
Replacement Parts 7 14 Component Part Number and Description 954-04091 Reverse Drive belt, 3L x 29.125 954-04090 Forward Drive Belt, 4L x 25.375 742-04223 Bolo Tine (LH), 12” 742-04224 Bolo Tine (RH), 12” 934-04232 Wheel, 13 x 5 x 6 946-04414A Reverse Drive Cable 946-04413A Forward Drive Cable 710-0...
Page 15 - Notes
Page 16 - MANUFACTURER’S LIMITED WARRANTY FOR
MANUFACTURER’S LIMITED WARRANTY FOR GDOC-100023 REV. C The limited warranty set forth below is given by Troy-Bilt LLC with respect to new merchandise purchased and used in the United States and/or its territories and possessions, and by MTD Products Limited with respect to new merchandise purchased ...