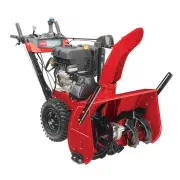
Page 2 - WARNING; Contents
decal127-9363 Figure 3 WARNING CALIFORNIA Proposition 65 Warning The engine exhaust from this product contains chemicals known to the State of California to cause cancer, birth defects, or other reproductive harm. Use of this product may cause exposure to chemicals known to the State of California t...
Page 3 - Safety; General Safety
Safety This machine has been designed in accordance withANSI/OPEI B71.3 specifications. General Safety This product is capable of amputating hands andfeet and of throwing objects. Always follow all safetyinstructions to avoid serious personal injury. • Read and understand the contents of this Operat...
Page 4 - Safety and Instructional Decals
Safety and Instructional Decals Safety decals and instructions are easily visible to the operator and are located near any areaof potential danger. Replace any decal that is damaged or missing. decal94-2577 94-2577 1. To engage the rotor blades, hold the control bar againstthe handle. 2. To disengag...
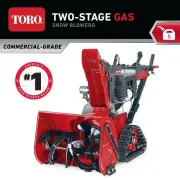
Page 5 - Setup; Unfolding the Handle; Procedure; Procedure
Setup 1 Unfolding the Handle No Parts Required Procedure g287663 2 Installing the Recoil-Start Guide and Rope No Parts Required Procedure g286483 5
Page 6 - Installing the Discharge Chute; Filling the Engine with Oil
3 Installing the Discharge Chute No Parts Required Procedure g262492 4 Filling the Engine with Oil No Parts Required Procedure g286445 6
Page 7 - Adjusting the Control Cable; Product Overview
5 Adjusting the Control Cable No Parts Required Procedure Refer to Checking and Adjusting the Control Cable (page 15) . Product Overview g280271 Figure 8 1. Chute deflector 5. Quick Shoot™ control 2. Chute-deflector trigger 6. Oil-drain plug 3. Fuel-tank cap 7. Oil fill/dipstick 4. Control bar g2802...
Page 8 - Specifications; Attachments/Accessories; Operation; Before Operation; Before Operation Safety; Fuel Safety
Specifications Model Weight Length Width Height 43 kg 122 cm 54 cm 107 cm 38757 (95 lb) (48 inches) (21 inches) (42 inches) Attachments/Accessories A selection of Toro approved attachments andaccessories is available for use with the machineto enhance and expand its capabilities. Contactyour Authori...
Page 9 - Filling the Fuel Tank
Filling the Fuel Tank • For best results, use only clean, fresh (less than30 days old), unleaded gasoline with an octanerating of 87 or higher ((R+M)/2 rating method). • Oxygenated fuel with up to 10% ethanol or 15%MTBE by volume is acceptable. • Do not use ethanol blends of gasoline (such as E15 or...
Page 10 - Checking the Engine-Oil Level
Checking the Engine-Oil Level Service Interval: Before each use or daily—Check the engine-oil level and add oil if necessary. g293393 Figure 11 10
Page 11 - During Operation; During Operation Safety; Starting the Engine; Using Electric Start
During Operation During Operation Safety General Safety • Shut off the engine before unclogging themachine and always use a stick or thesnow-cleanout tool (if provided). • Stay behind the handles and away from thedischarge opening while operating the machine. Keep your face, hands, feet, and any oth...
Page 12 - CAUTION; Using Recoil Start
CAUTION If you leave the machine plugged into a power source, someone can inadvertently start themachine and injure people or damage property (electric-start models only). Unplug the power cord whenever you are not starting the machine. g293708 Figure 12 Using Recoil Start Note: Remove your glove wh...
Page 14 - Operating Tips; After Operation; After Operation Safety
g006398 Figure 17 1. Chute-deflector trigger 2. Chute deflector Clearing a CloggedDischarge Chute To clear the chute: • Shut the engine off! • Wait 10 seconds to ensure that the rotor bladeshave stopped rotating. • Always use a clean-out tool; never use your hands. Operating Tips WARNING The rotor b...
Page 15 - Maintenance; Maintenance Safety; Checking the Control Cable
Maintenance Recommended Maintenance Schedule(s) Maintenance Service Interval Maintenance Procedure After the first hour • Check the control cable and adjust it if necessary. After the first 2 hours • Change the engine oil. Before each use or daily • Check the engine-oil level and add oil if necessar...
Page 16 - Inspecting the Rotor Blades
Adjusting the Control Cable 1. Slide up the spring cover and unhook the springfrom the adjuster link ( Figure 19 ). g006402 Figure 19 1. Adjuster link 3. Spring cover 2. Z-fitting 4. Unhook the spring here. Note: You can pull up the adjuster link and cable to make unhooking the spring easier. 2. Mov...
Page 17 - Changing the Engine Oil
Changing the Engine Oil Service Interval: After the first 2 hours Yearly If possible, run the engine for a few minutes beforechanging the oil to warm it. Warm oil flows better andcarries more contaminants. Engine Oil Specifications Engine oil capacity 0.95 L (32 fl oz)* Oil viscosity Refer to Figure...
Page 18 - Replacing the Spark Plug; Replacing the Drive Belt
g006374 Figure 25 9. Wait 3 minutes for the oil to settle in the engine. 10. Wipe the dipstick clean with a clean cloth. 11. With the machine in the operating position,insert the dipstick into the oil-fill tube, but do not screw it in , then remove the dipstick. 12. Read the oil level on the dipstic...
Page 21 - Storage; Storage Safety
Storage Storage Safety • Shut off the engine, remove the key, and waitfor all movement to stop before you leave theoperator’s position. Allow the machine to coolbefore adjusting, servicing, cleaning, or storing it. • Fuel fumes are highly flammable, explosive, anddangerous if inhaled. If you store t...
Page 23 - California Proposition 65 Warning Information
California Proposition 65 Warning Information What is this warning? You may see a product for sale that has a warning label like the following: WARNING: Cancer and Reproductive Harm—www.p65Warnings.ca.gov. What is Prop 65? Prop 65 applies to any company operating in California, selling products in C...