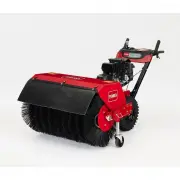
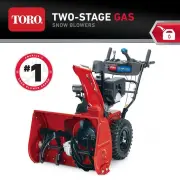
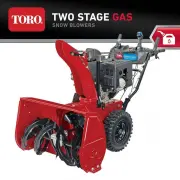
Page 3 - Safety and Instructional Decals
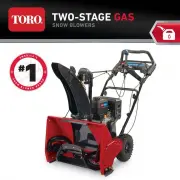
Safety and Instructional Decals Note: Safety and instruction decals are located near areas of potential danger. Replace damaged decals. 131–1785 Order part no. 131–5921 1. Auger drive—squeeze the lever to engage; release the leverto disengage. 4. Thrown object hazard—keep bystanders a safe distance ...
Page 4 - Setup; Loose Parts; Unfolding the Handle; Procedure
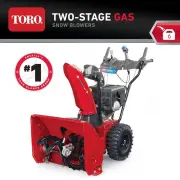
Setup Loose Parts Use the chart below to verify that all parts have been shipped. Procedure Description Qty. Use 1 No parts required – Unfold the handle. Bolt (1/4–20 X 1–1/2 inch) 1 Lock nut (1/4–20 inch) 1 Carriage bolt (1/4–20 x 1 inch) 3 Lock nut (1/4–20 inch) 3 2 Screw (1/4–20 X 5/8 inch) 1 Ins...
Page 5 - Installing the Discharge Chute
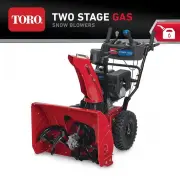
2 Installing the Discharge Chute Parts needed for this procedure: 1 Bolt (1/4–20 X 1–1/2 inch) 1 Lock nut (1/4–20 inch) 3 Carriage bolt (1/4–20 x 1 inch) 3 Lock nut (1/4–20 inch) 1 Screw (1/4–20 X 5/8 inch) Procedure 1. Insert the chute post through the bracket into the baseof the machine and secure...
Page 6 - Filling the Engine with Oil
3 Filling the Engine with Oil No Parts Required Procedure Your machine comes with oil in the engine. Model Max fill 36002 16.9 oz (0.5 L) 36003 23.7 oz (0.7 L) Oil type: automotive detergent oil with an API serviceclassification of SJ, SL, or higher. Use Figure 6 below to select the best oil viscosi...
Page 7 - Product Overview; Operation; Before Operation; Safety; DANGER; Filling the Fuel Tank
Product Overview Figure 8 1. Auger lever 6. Scraper 2. Fuel tank cap 7. Discharge chute 3. Dipstick 8. Chute deflector 4. Skid 9. Quick Stick® dischargechute control 5. Auger 10. Upper handle Figure 9 1. Fuel tank cap 5. Recoil starter 2. Primer 6. Electric starter plug-in 3. Ignition key 7. Electri...
Page 8 - Checking the Engine-Oil Level; During Operation; Starting the Engine
than 10% ethanol by volume, such as E15 (contains 15%ethanol), E20 (contains 20% ethanol), or E85 (contains85% ethanol). Using unapproved gasoline may causeperformance problems and/or engine damage which maynot be covered under warranty. • Do not use gasoline containing methanol. • Do not store fuel...
Page 10 - Engaging the Auger; Self-propelling the Machine; Stopping the Engine
WARNING The electrical cord can become damaged, causinga shock or fire. Thoroughly inspect the electrical cord before usingthe machine. If the cord is damaged, do not operatethe machine. Replace or repair the damaged cordimmediately. Contact an Authorized Service Dealerfor assistance. CAUTION If you...
Page 11 - Operating Tips; WARNING; After Operation
Clearing a Clogged DischargeChute Important: Hand contact with the rotating auger inside the discharge chute is the most common cause of injuryassociated with snowthrowers. Never use your hand toclean out the discharge chute. 1. While remaining in the operating position, release theself-propel handl...
Page 12 - Maintenance; Maintenance Safety; Checking the Engine Oil Level
Maintenance Note: Determine the left and right sides of the machine from the normal operating position. Recommended Maintenance Schedule(s) Maintenance Service Interval Maintenance Procedure After the first hour • Check for loose fasteners and tighten them if necessary. After the first 2 hours • Cha...
Page 13 - Changing the Engine Oil
Checking and Adjusting theSkids Service Interval: Yearly Check the skids to ensure that the auger does not contact thepaved surface. Adjust the skids as needed to compensate forwear ( Figure 17 ). 1. Loosen the skid bolts. 2. Slide a 5 mm (3/16 inch) board underneath the scraper. Note: Using a thinn...
Page 15 - Replacing the Spark Plug; Adjusting the Auger Cable
Replacing the Spark Plug Service Interval: Every 100 hours—Replace the spark plug. WARNING Replacing the spark plug while the engine is hotcan result in burns. Wait until the engine is cool to replace the sparkplug. Use a Toro spark plug or equivalent (Champion® RN9YC orNGK BPR6ES). 1. Remove the bo...
Page 16 - Checking the Tire Pressure
Adjusting the TransmissionCable Service Interval: After the first 2 hours Yearly If the wheels easily stall out, or if the wheels drive withoutengaging the self-propel handle, adjust the transmission cable. 1. Loosen the nut on the upper cable clamp, but do notremove it ( Figure 25 ). Figure 25 1. N...
Page 17 - Storage; Storing the Snowthrower
Storage Storing the Snowthrower WARNING • Gasoline fumes are highly flammable, explosive,and dangerous if inhaled. If you store themachine in an area with an open flame, thegasoline fumes may ignite and cause anexplosion. • Do not store the machine in a house (livingarea), basement, or any other are...
Page 18 - Emission Control Warranty Statement
*374-0299* Emission Control Warranty Statement For the United States, California, and Canada Your Warranty Rights and Obligations The California Air Resources Board (CARB), the U.S. Environmental Protection Agency (EPA), and The Toro Company, are pleased to explain theemission control system warrant...
Page 20 - The Toro Warranty
SnowMaster Single-Stage Snowthrowers The Toro Warranty A Three-Year Limited Warranty (45 Day Limited Warranty for Commercial Use) Conditions and Products Covered The Toro Company and its affiliate, Toro Warranty Company, pursuant toan agreement between them, jointly promise to repair the Toro Produc...