Page 4 - Παρουσίαση
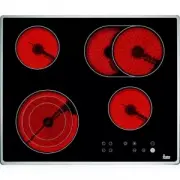
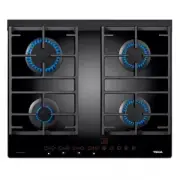
GB DE FR Introduction / Allgemeines / Présentation / Παρουσίαση 1 2 3 4 5 1 2 3 5 4 6 CGX 60 4G IS 1 2,580 Kcal/h - 3 Kw fast burner.2 1,500 Kcal/h - 1.75 Kw semi-fast burner.3 1,500 Kcal/h - 1.75 Kw semi-fast burner.4 860 Kcal/h - 1 Kw auxiliary burner.5 Burner control knobs.* All burners incorpora...
Page 5 - Guide to Using the Instructions Booklet; You should keep the Guarantee
5 Guide to Using the Instructions Booklet Dear Customer, We are delighted that you have put yourtrust in us. We are confident that the new hob thatyou have purchased will fully satisfy yourneeds. This modern, functional and practicalmodel has been manufactured using top-quality materials that have u...
Page 6 - Important; Positioning the hobs; When hobs are handled before; Installation
GB 6 Important INSTALLATION AND SETUP SHOULDBE CARRIED OUT BY AN AUTHORISEDTECHNICIAN ACCORDING TO CURRENT INSTALLATION STANDARDS. Positioning the hobs Depending on the model to be installed, anopening with the dimensions shown infigure 1 should be cut into the unit's work-top. The system for fixing...
Page 7 - Positioning the oven; Fixing the hob
GB 7 cannot be damaged by accidentalblows or heavy weight. If the glass breaks or cracks, the hob should immediately be disconnec-ted from the electric current in order toavoid the risk of electric shock. The glues used in manufacturing the kitchen unit and on the decorativelaminates and on the lami...
Page 8 - Information for the Technical
GB 8 ning the gas pipe connection nut, a maxi-mum grip torque of 300 cm * Kgf should beused. Once the gas connection has been carriedout, check that it is properly tightened. Ifthis is done using air, please rememberthat the test pressure should not be grea-ter than 200 g/cm². If you do not have air...
Page 9 - Table 1; Front view of the gas tap
GB 9 2 Remove the controls of the taps bypulling firmly upward and remove thegasket. 3 Use a slim, grooved screwdriver to turnthe screw that is next to the shaft of thegas tap (detail "A" in figure 3). 4 When properly adjusted, check that theflame does not go out when you turn theknob quickl...
Page 10 - Technical Information; Dimensions and powers; Models
Dimensions in mm Length Width Height Thickness of the glass Dimensions for positioning in the kitchen unit mm Length Width Depth Power per burner and cooking element 3.5 Kw triple ring gas burner 3 Kw fast gas burner 1.75 Kw semi-fast gas burner 1 Kw auxiliary gas burner Electric Nominal power (W) P...
Page 11 - Table 2
GB 11 Technical data COMMON FEATURES FOR ALL MODELS WITH AUTOMATIC IGNITION The supply voltage and frequency will beas shown on the rating plate. COMMON FEATURES FOR THESE GASMODELS Warnings: a) Before installation, make sure that thelocal supply conditions (the gas type andpressure) are compatible ...
Page 12 - Use and Maintenance
GB 12 Special requirements before first use Before connecting the hob to the electricmains, check that the voltage and fre-quency of the mains matches what isshown on the hob's rating plate, which islocated on the lower part of the hob, andon the guarantee or, where appropriate,the technical data sh...
Page 14 - Locking the sensor buttons; Safety disconnection
GB 14 EMERGENCY SHUT-OFF The appliance may be turned off at anytime by touching the general on/off sensorbutton (1). After doing so, turn the con- trol knobs back to the initial position. TURNING OFF THE BURNER 1 Use the corresponding control knob tolower the power to the off position (B infig. 6). ...
Page 16 - Bien
Using the hob * If the glass is broken or cracked, turn all of the control knobs of the hob to the offposition as well as the gas intake tapand disconnect the electrical current.Contact TEKA'S Technical Service. * Do not keep items on the glass surface.* Do not leave aluminium foil, tinfoil or plast...
Page 17 - Reminder
GB 17 Do not use small cookware on large burners, becau-se the flame will spread away. Use proper cookware for each burner in order to bet-ter utilise the heat. Do not place cookware misaligned over the centre ofthe burner. Place the cookware properly centred over the burner. Do not use instruments ...
Page 18 - Cleaning and care
GB 18 To properly care for the glass, you shouldclean it with suitable products and instru-ments when the glass is cold. If you cleanit every time it is used, it will be easier toclean and you will keep dirt from differentcooking sessions from getting stuck. The degree of soiling should be takeninto...
Page 19 - Maintenance; The symbol
GB 19 Maintenance No part of this appliance requires periodiclubrication. The burners are operating correctly whenthey have a blue-green, stable flame. If thetips of the flame are yellow, the burnersshould be cleaned thoroughly. If the pro-blem persists, contact the TechnicalService. To ensure that ...
Page 20 - If something doesn't work; The gas burners make the cookware dirty
GB 20 If something doesn't work Problem Possible cause Possible solution There is no spark when the automatic lightingcontrol is pressed The voltage does not reach the plug Check and repair the power mains The gas burners make the cookware dirty The burner openings are dirty Clean the burner opening...