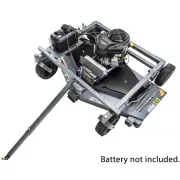
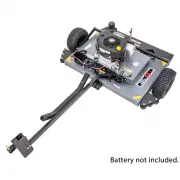
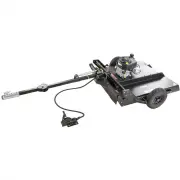
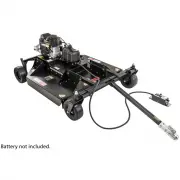
Page 2 - LIMITED WARRANTY; All transportation charges, damage, or loss incurred during
LIMITED WARRANTY The manufacturer’s warranty to the original consumer purchaser is: This product is free from defects in materials and workmanship for a period of one (1) year from the date of purchase by the original consumer purchaser. We will repair or replace, at our discretion, parts found to b...
Page 3 - SAFETY PRECAUTIONS; • Read the manual. Learn to operate this machine safely.; Never allow children to operate this machine.; Never assume that children will
This Safety Alert Symbol indicates important messages in this manual. When you see this symbol, carefully read the message that follows and be alert to the possibility of personal injury. Read this manual completely. This machine can amputate hands, feet, and throw objects. Failure to observe the fo...
Page 4 - • Turn; blades and stop the engine.; • Watch for traffic when operating near or crossing roadways.; Always look down and behind before and while
• Turn off the blades when not mowing. Before leaving the machine, turn off the blades and stop the engine. • Watch for traffic when operating near or crossing roadways. • Do not operate the mower if the mower has been dropped or damaged in any manner or if it vibrates excessively. Excessive vibrati...
Page 5 - SAFETY DECALS; Logo Decal
OD36-Deflector Decal OD45-Warning Decal OD29-Danger Decal Engine Serial # OD11-No Step Decal OD15-Void Warranty Decal OD33-Speed Decal OD55-Triangle Danger Decal (All four deck corners) Trail Mower Serial # SAFETY DECALS Replace decal immediately if damaged. Order by part number from Swisher. OD9912...
Page 6 - OPERATING YOUR TRAIL MOWER; designed for speeds exceeding 5 MPH.
OPERATING YOUR TRAIL MOWER INTENDED USE The 44” Trail Mower is designed to produce a quality finish cut on lawns, golf courses, etc. It is not intended to clear brush or cut saplings. Your Trail Mower should be towed behind an ATV, golf cart, lawn tractor, or other approved vehicle. It is not design...
Page 7 - ENGAGING BLADES; consumer should not alter the braking system.; STARTING THE ENGINE; “START” position release when engine begins to run.; BREAKING IN YOUR MOWER
• Set vehicle parking brake or chock wheels to prevent accidental rolling.• Start engine properly.• Slowly engage blade control.• In a safe environment, i.e. no children, allow blades to rotate and engine to idle for 5 minutes. This breaks in the belts and the engine. • Stop mower properly. ENGAGING...
Page 8 - MOWER HEIGHT ADJUSTMENT
• Make adjustments while Trail Mower is not running.• There is approximately 1 ½” to 4 ½” of height adjustment.• Rotate height adjust crank handle in a clockwise direction to lower the mower deck. A counter-clockwise direction is used to lift the mower deck. • Graduated scales are for reference only...
Page 10 - MOWER MAINTENANCE; Do not store engine indoors or other poorly ventilated area. Keep
MOWER MAINTENANCE GENERAL RECOMMENDATIONS The warranty on this Trail Mower does not cover items that have been subjected to operator abuse or negligence. To receive full value from the warranty, operator must maintain unit as instructed in this manual.Some adjustments will need to be made periodical...
Page 11 - BLADE CARE AND SERVICE; Disconnect spark plug wire before servicing unit.; REPAIR PARTS; Module; RECOIL START MODELS; FC44 RECOIL START; DESCRIPTION
BLADE CARE AND SERVICE For best results mower blades must be kept sharp. The blades can be sharpened with a few strokes of a file or grinding wheel. Do not attempt to sharpen blades while they are on the mower. Disconnect spark plug wire before servicing unit. Important: Replace blades that have bee...
Page 12 - PARTS NOT SHOWN
DESCRIPTION PART # Harness - W iring, 12V 19206 Solenoid - 3 Pole 1002004 Cable - Battery, 10" Red; Positive BCSR Cable - Battery, 10" Black; Negative BCS Box - Battery 10231* Pad - Battery BATPAD Cable - Battery 19.5", Red BCL Boot - Battery BCBT Battery - Hold Down BHOLD BATTERY (12N12...
Page 13 - PARTS BREAKDOWN
Fig. 2 PARTS BREAKDOWN ITEM # DESCRIPTION PART # 1 Cover - Belt 10599* 2 Bolt - 1/4-20 X 1/2 NB114 3 Base - Motor 4517* 4 Hitch - W eldment 4525* 5 Bolt - Serrated Flange 5/16-18 X 3/4 NB596 6 Nut - Serrated Flange 5/16-18 NB170 7 Bracket - Roller Right 4016* 8 Bolt - 3/8-16 X 5 1/2 NB575 9 Bracket ...
Page 14 - Blade Driver Assembly
Fig. 3 ENGINE SET UP Fig. 4 BLADE SET UP ITEM # DESCRIPTION PART # QTY 1 Engine - 11.5HP N/A 1 1 Engine - 11.5HP 12V N/A 1 2 Module - Engine MOD1** 1 3 Valve - Oil Drain 16000 1 4 Bolt - Serr Flange, 5/16-18 X1 1/4 NB253 4 5 Tether - Assembly 6736 1 6 Bracket - Switch 4483Z 1 Switch - Toggle 685SP 1...
Page 17 - De scription
Fig. 9 BRAKE ARM CONFIGURATIONS 17 Ite m # De scription Pa rt # Qty 1 Arm - Brake 10589* 1 2 Eyebolt - 1/4-20 X 3/4 V139EB 1 3 Nut - Nylock 1/4-20 NB180 1 4 Nut - Serr Flange 1/4-20 NB524 2 5 Bolt - HTC 1/4-20 X 1 1/2 NB162 2 6 Nut - Kep 10-24 NB172 1 7 Pad - Brake 9039 1 8 Screw - 10-24 X 1 1/2 NB7...
Page 24 - SWISHER ACQUISITION INC.
OWNER’S MANUAL HOW TO ORDERREPAIR PARTS : 44” FAST FINISH TRAIL MOWER Each Trail Mower has its own serial number. Each engine has its own serial number. The serial number for the Trail Mower will be found on the right hand side of the drive belt housing. The serial number for the engine will be foun...