Page 2 - Heading
Sub Heading Body copy with not indent applied. • Bullet copy Bullet copy Bullet copy Bullet copy Bullet copy Bullet copy Bullet copy Bullet copy 2 Heading
Page 3 - Contents
Contents Important instructions – retain for future use. Sunbeam’s Safety Precautions 1 Features of your Pressure Cooker 3 The Control Panel 6 Before the first use 8 The Safety Lid 9 Cooking menus overview 10 Cooking menus settings table 13 Cooking Pot markings 14 Using the Pressure Cooker menu 15 U...
Page 4 - Sunbeam’s Safety Precautions
Sunbeam’s Safety Precautions SAFETY PRECAUTIONS FOR YOUR PRESSURE COOKER. • Do not plug in or switch on the unit without having the cooking pan inside the unit. • Do not operate the unit on an inclined surface• Use your unit well away from walls and curtains, and don’t use in confined spaces. • Chec...
Page 8 - Features of your Sunbeam PE6100 Pressure Multi Cooker continued
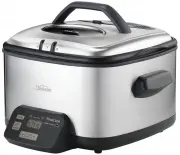
5 Features of your Sunbeam PE6100 Pressure Multi Cooker continued Lid Lock Valve Steam Release Valve Cover Sealing Gasket Cooking Rack Cooking rack is suitable for steaming Pressure & Steam Release Valve Lid Lock Rod
Page 9 - The Control Panel
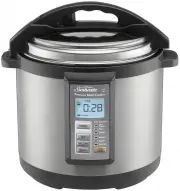
6 The Control Panel The control panel on the Pressure Cooker is designed to ensure easy use and to show the progress of your cooking. Choose from the 7 cooking menus – Pressure Cook, Slow Cook, Rice, Steam and Frypan (Brown, Sauté, Simmer). Choose your cooking menu, set the time and start cooking. 1...
Page 10 - The Control Panel continued
7 5. Start/ Stop button Press the START button to begin the selected cooking menu once all settings have been chosen. Press and hold the STOP button for 3 seconds if you wish to change your setting. 6. LCD Screen The unit needs to gain pressure and/ or temperature before cooking can commence. Cookin...
Page 11 - Before the first use
8 1. Remove all packaging, plastic, paper and cardboard from the unit. 2. The LCD screen (timer panel) has an electrostatic sticker on the screen. This is part of the packaging. Please remove prior to use. 3. Ensure the power is switched off at the power outlet, and remove the power cord from the un...
Page 12 - The Safety Lid
9 The Safety Lid The Sunbeam Pressure Cooker has been designed with safety in mind and has various switch off safety measures.1. Pressure will not build if the lid is not shut correctly and has not sealed. 2. Pressure will not build if the lid is not locked in the LOCK position. 3. Pressure will not...
Page 13 - Cooking Menus Overview
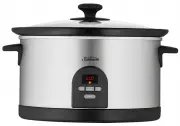
10 Pressure Cooking Pressure Cooking is an ideal way to create quick, flavoursome and delicious meals. Pressure Cooking is a method of cooking food in liquid (water, stock, wine etc) in a sealed cooking pan. The sealed unit retains steam and builds pressure raising the temperature of the liquid insi...
Page 14 - Cooking menus overview continued
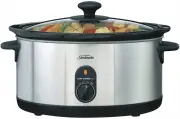
11 Cooking menus overview continued Slow Cooking Slow Cooking achieves flavour filled meals, and tender moist meats cooked to perfection. As the name suggests, meals are not cooked under pressure but are cooked over a long period of time. Slow Cooking provides healthy, simple and economical cooking....
Page 15 - Cooking Menu Settings continued
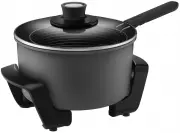
12 Cooking Menu Settings continued Brown, Sauté, Simmer The Frypan mode has three heat settings Brown, Sauté and Simmer. Change the heat setting depending on the food that you are cooking, and your style of cooking. It is ideal to use prior to Pressure Cooking, and Slow Cooking to brown meats, sauté...
Page 16 - Cooking Menu Settings Table
13 Pressure Slow Cook Rice Steam Frypan Cooking Menu Pressure Cook Slow Cook Rice Steam Brown Sauté Simmer Cooking Method Pressure Temperature (not Pressure) Pressure Temperature (not Pressure) Temperature (not Pressure) Pressure & Steam Valve Setting SEAL RELEASE SEAL SEAL NA Maximum Programmab...
Page 17 - Cooking Pot markings
14 Cooking Pot markings Inside the removable cooking pan are two sets of markings. One side is marked MAX PC which indicates the maximum fill line when cooking any food other than rice. The other side is marked FULL RC CUP. For white rice, the maximum is the 12 cup line (rice and water combined shou...
Page 18 - Using the Pressure Cooker menu
15 Using the Pressure Cooker menu Place the Pressure Cooker on a flat, level surface.Plug in the unit. The unit will beep, and the indicator lights and the LCD screen will illuminate. The Pressure Cooker will default to the Pressure Cooker menu, on the HIGH (70kpa) setting. ‘Pressure’ and ‘HIGH’ wil...
Page 19 - Using the Slow Cooker menu
16 Using the Slow Cooker menu The Slow Cook menu does not cook under pressure, but does need the lid locked to commence cooking. It cooks similar to standard slow cookers and uses low temperatures and longer cooking times to achieve tender, flavoursome meals.Place the Pressure Cooker on a flat, leve...
Page 20 - Using the Rice menu
17 Using the Rice menu Place the Pressure Cooker on a flat, level surface.Plug in the unit. The unit will beep, and the indicator lights and the LCD screen will illuminate. The Pressure Cooker will default to the Pressure Cooker menu, on the HIGH setting. ‘Pressure’ and ‘HIGH’ will flash on the disp...
Page 21 - Using the Rice menu continued
18 Using the Rice menu continued of cooking wait until the pressure releases naturally, rather than using the Quick Release Method (using the finger tab on the pressure release valve). TIP: The Rice Cooking settings are in the Cooking Menu Settings Table on page 13. Note: During cooking, steam will ...
Page 22 - Rice Cooking Chart – White Rice; Rice Cooking Chart – Brown Rice
19 Rice Cooking Chart – White Rice The maximum quantity of White Rice is 12 cups. Uncooked Rice Quantity - Using Rice Cup Fill to Water Indicator Approximate Cooking Time (excluding time to gain pressure) 3 3 6 minutes 4 4 7 minutes 5 5 8 minutes 6 6 9 minutes 7 7 10 minutes 8 8 11 minutes 9 9 12 mi...
Page 23 - Types of Rice
20 Types of Rice There are three main types of rice: Short Grain: The grains are short and plump. When cooked the grains are soft and sticky with a glossy appearance. Varieties of short grain rice: Japanese Koshihikari - a soft sticky rice, sold as “sushi rice” and used to make sushiPearl – a soft s...
Page 24 - Using the Steam menu
21 Using the Steam menu Place the Pressure Cooker on a flat, level surface.Plug in the unit. The unit will beep, and the indicator lights and the LCD screen will illuminate. The Pressure Cooker will default to the Pressure Cooker menu, on the HIGH setting. ‘Pressure’ and ‘HIGH’ will flash on the dis...
Page 26 - How to use the Time Delay
How to use the Time Delay Time Delay is available on the Pressure Cooker, Slow Cooker, Rice and Steam menus only. The Pressure Cooker allows you to delay the start of your cooking so that cooking finishes when you need it. Note: Do not use the Time Delay when the recipe has perishable ingredients su...
Page 27 - Care and Cleaning
Care and Cleaning Cleaning should only be carried out when the Pressure Cooker is switched off and the plug removed from the socket. Allow the unit to completely cool before cleaning.Do not use the removable cooking pan on the stovetop, inside a microwave oven or inside an oven. Use the pan only ins...
Page 28 - Care and Cleaning continued
Figure 2. Clearing the steam release valve cover. Pull upward Remove Press downward Install 25 Pressure and Steam Release Valve Ensure the pressure and steam release valve is clear from debris before you commence using the unit. Remove the valve and gently clean. Ensure it is completely dry before r...
Page 29 - Hints and Tips
26 Hints and Tips With your Pressure Cooker you can create an large variety of delicious meals, snacks and desserts. Various foods take different times to cook perfectly, so sometimes it may take a little trial and error to get the cooking times right for you. Converting Traditional Recipes • After ...
Page 30 - Hints and Tips continued
27 Slow Cooking • If you are slow cooking, you can use the Brown menu first which allows you to sear meat and vegetables at the beginning, but also allows you to thicken sauces and make gravies at the end. Browning meat prior to slow cooking not only gives your food great colour, it also seals in th...
Page 33 - Trouble Shooting Guides
30 Trouble Shooting Guides Problem Possible Reason Solution Menu lights on the control panel are flashing The program has not been set Set the MENU, TIME and press START ‘Cooking’ light is flashing on the LCD screen The unit is warming up and/or gaining pressure. For the frypan menus, the unit is wa...
Page 34 - Trouble Shooting Guides continued
31 Trouble Shooting Guides continued Problem Possible Reason Solution Unit not gaining pressure The pressure and steam safety valve is not in the ‘Seal’ position Check the valve and flick to the ‘Seal’ position The sealing gasket may not be correctly positioned Carefully remove the lid, and check th...
Page 37 - Recipes - Side Dishes
34 LegumesMakes: 1.5 Litres Menu: Pressure Cooker 3 cups water1 cup dried beans 1. Place all ingredients in pan. Secure lid. 2. Press MENU and select PRESSURE HIGH. Press TIME and set desired time. Make sure the steam vent is closed. Press START. 3. Once cooking is completed, and the pressure has re...
Page 38 - Recipes - Side Dishes continued
35 Recipes - Side Dishes continued HummusMakes: 5 cupsMenu: Pressure Cooker 6 cups water2 cups or 375g dried chickpeas1 cup olive oil3 cloves garlic, peeled¼ cup tahini½ cup waterJuice of 2 lemons1 tablespoon good quality soy sauceSalt and freshly ground black pepper, to taste 1. Place chickpeas and...
Page 40 - Recipes - Main Meals continued
37 5. Press MENU and select PRESSURE HIGH. Press TIME and set for 45 minutes. Make sure the steam vent is set to the seal position. Press START. 6. Once cooking is completed, and the pressure has released, set aside to cool. 7. Press MENU and select SIMMER. Add the kidney beans and bring the chili c...
Page 53 - Recipes - Desserts continued
50 Recipes - Desserts continued Butterscotch Steamed PuddingServes: 8 Menu: Steamer 175g butter, room temperature1 cup brown sugar1 teaspoon vanilla extract3 eggs1 ¾ cups self-raising flour1 teaspoon baking powder SAUCE: 1 cup thickened cream¾ cup brown sugar60g butter2 teaspoons vanilla extract 1. ...
Page 57 - Notes
Page 59 - 2 Month Warranty
Should you experience any difficulties with your product during the warranty period, please contact our customer service line for advice on 1300 881 861 in Australia, or 0800 786 232 in New Zealand. Alternatively, you can send a written claim to Sunbeam to: Australia Units 5 & 6, 13 Lord Street ...
Page 60 - Need help with your appliance?
8/14 is a registered trademark. Need help with your appliance? Contact our customer service team or visit our website for information and tips on getting the most from your appliance. In Australia Visit www.sunbeam.com.au Or call 1300 881 861 In New Zealand Visit www.sunbeam.co.nz Or call 0800 786 2...