Page 2 - the vicinity of this or any other appliance.; the installation must; ELECTRICAL GROUNDING; This appliance is equipped with a three prong
Range Record in the space provided below the Model No. and Serial No. of this appliance. These numbers are found on the serial plate located below the lift-up cooktop.Model No._ _ _ _ _ _ _ _ _ _ _ _ _ _ _ _ _ _ _ _ _ _ _ Type Number _ _ _ _ _ _ _ _ _ _ _ _ _ _ _ _ _ _ _ _ _Serial No. _ _ _ _ _ _ _ ...
Page 3 - IMPORTANT – Read and save these instructions.; READ THE IMPORTANT SAFEGUARDS AND ALL
38 INSTALLATION INSTRUCTIONS BUILT-IN GAS AND ELECTRIC RECESSED WALL OVENS IMPORTANT – Read and save these instructions. Save for local electrical inspector’s use. Destroy the carton and plastic bags after the range is unpacked. Children should not use packaging material for play. Cartons covered wi...
Page 4 - IMPORTANT SAFEGUARDS, Continued
IMPORTANT SAFEGUARDS, Continued • Do not allow children to climb or play around the range. The weight of a child on an open oven door may cause the range to tip, resulting in serious burns or other injury. • USER SERVICING: Do not repair or replace any part of the appliance unless it is specifically...
Page 5 - WIRING DIAGRAM FOR GAS SURFACE UNITS; REFER ONLY TO FEATURES WHICH ARE EQUIPPED ON YOUR RANGE; for the amount of food being cooked, or the size of the utensil.; TOP BURNER VALVES
WIRING DIAGRAM FOR GAS RANGES AND SURFACE UNITS WITH BATTERY EQUIPMENT 180-6C162 REFER ONLY TO FEATURES WHICH ARE EQUIPPED ON YOUR RANGE IGNTION SWITCHES TOP BURNER IGNITION LEADS OVEN IGN. LEAD G BK IGNITION MODULE R 9 VOLT DC SUPPLY RR RF T'STAT LR LF (IF EQUIPPED) THIS SECTION EQUIPPED ON RANGES ...
Page 6 - ELECTRIC SURFACE UNITS; NFPA70 latest edition.; Built-In Top Unit with Battery Ignition (Main Burners Not Shown)
IMPORTANT SAFEGUARDS, Continued • Do not place hands between the spring tension hinge and the oven door frame when you are removing the oven door. You could pinch your fingers. • Do not use the broiler pan without its insert. The broiler pan and its insert allow dripping fat or grease to drain and b...
Page 7 - GAS RECESSED WALL OVEN; On sealed burner models never attempt to operate the surface
Flexible Connectors - If the gas range/oven is connected to a gas supply with a metal flexible connector, move the range/oven with CAUTION for service or cleaning. Flexible connectors are not intended for repeated bending. Do not allow cleaners to make contact with flexible connectors. The connector...
Page 8 - Leveling a Free-Standing Range; INSTALLATION INSTRUCTIONS; INSTALLATION; See CABINET PREPARATIONS Section.
8 INSTALLATION INSTRUCTIONS Be sure appliance is properly installed and grounded by a qualified technician. It is the responsibility of the technician to make certain that your range is properly installed. Situations caused by improper installation are not covered under the warranty. Any expenses in...
Page 9 - WIRING DIAGRAM FOR GAS RANGES; standards are not applicable with local codes.; Electrical Connections; Canada, if an external electrical source is utilized.
32 REFER ONLY TO FEATURES WHICH ARE EQUIPPED ON YOUR RANGE WARNING ELECTRICAL GROUNDING INSTRUCTIONS THIS APPLIANCE IS EQUIPPED WITH A THREE-PRONG GROUNDING PLUG FOR YOUR PROTECTION AGAINST SHOCK HAZARD AND SHOULD BE PLUGGED DIRECTLY INTO A PROPERLY GROUNDED THREE-PRONG RECEPTACLE. DO NOT CUT OR REM...
Page 10 - BACKGUARD INSTALLATION INSTRUCTIONS; Gas Ranges; Place the backguard on top of side panels at the rear of range.
BACKGUARD INSTALLATION INSTRUCTIONS Gas Ranges A. Remove main top. B. Place the backguard on top of side panels at the rear of range. C. Attach and tighten the screws through the lower inside flange of the end caps and the clips on the side panels. D. Attach and tighten the screws through the holes ...
Page 11 - TROUBLE SHOOTING GUIDE; Surface burner flames; WALL CLEARANCES; installed above the cooking surface.
30 TROUBLE SHOOTING GUIDE 1. Surface burner fails to light. 2. Uneven flame. 3. Surface burner flames • Lifts of port. • Yellow in color. • Noisy when turned off. 4 Pilot goes out. 5. Oven does not light. 6. Oven Temperature seems inaccurate. • Food takes too long. • Food cooks too fast. • Food pale...
Page 12 - ALIGNMENTS AND ADJUSTMENTS; Installation; CLEANING THE RANGE, Continued; To remove the door
12 ALIGNMENTS AND ADJUSTMENTS Installation It is the responsibility of the installer to make certain that the range is properly adjusted at the time of installation. Situations caused by improper adjustments or improper installation are not covered under the warranty. Any expenses incurred due to su...
Page 13 - Aluminum Foil in Oven and Broiler; To Convert and/or Adjust; Convertible Pressure Regulator
28 CLEANING THE RANGE, Continued Range tops finished in brushed chrome should be wiped clean of spatters or soiling after each use. Clean with a paper towel or a damp cloth. For heavy spatters, use a mild detergent and water. Wipe dry with a soft cloth. A light coat of oil or thin cooking oil should...
Page 14 - CLEANING THE RANGE; Knobs
14 It is essential to maintain the gas pressure constantly at 10 inches water column pressure for ranges set for LP Gas; and 4 inches water column pressure for ranges set for Natural Gas to get proper burner performance. Note: Burner rates specified on the rating plate of your range apply for elevat...
Page 15 - DIGITAL CLOCK WITH TIMER; CLOCK; OPTIONAL EQUIPMENT, continued; Background and Control Panel Features; Access to the batteries is done as follows:; ALIGNMENTS AND ADJUSTMENT, Continued; Standard Top Burner Valves; ALIGNMENTS AND ADJUSTMENT, Continued
26 Electrical Grounding Instructions: This Appliance must be properly grounded and must be connected as shown in figure 1, 2 or 3 on page 11. Do not alter wiring or electrical equipment. The backguard equipment is optional, depending on model selection. The range you have purchased may or may not be...
Page 16 - Top Burner Height; Before Using Your Oven–Read These Instructions Carefully.; DO NOT USE ANY TYPE OF OVEN CLEANER, POWERED CLEANSERS, SOAP,
16 ALIGNMENTS AND ADJUSTMENT, Continued 5. Top Burner Valves Top burner valves have orifices that are dedicated to the type of fuel to be used. Theseorifices are not adjustable. They must be changed completely to convert from one gas tothe other. DO NOT DISCARD THE UNUSED ORIFICES. They should be sa...
Page 17 - If a spillover does occur on the oven bottom; Ovens With Constant Pilot; Light the oven pilot as follows:
24 To protect the oven bottom surface, place a piece of aluminum foil slightly larger than thebaking dish on the rack below to catch any boilovers. It should not completely cover therack as this would cause uneven heat in the oven. Aluminum foil should not be placed onthe oven bottom. If a spillover...
Page 18 - Oven Ignition With Constant Pilot; CAUTION; Make certain the oven is cool when manually lighting
18 ALIGNMENTS AND ADJUSTMENT, Continued Ovens With Constant Pilot The oven pilot is located along the left hand side of the oven burner. It is fastened underthe flame safety probe. The flame of the oven pilot ignites main burner gas when theoven is turned on. If the pilot flame is not present, the f...
Page 19 - OPERATION OF RANGE; other enclosed literature.
22 OPERATION OF RANGE Using Your Range The range may have only part of the features described within this manual. If your range has some features which are not covered in this manual, these features will be covered in other enclosed literature. Top Burner Operation Note: When boiling food, the highe...
Page 20 - Automatic Oven Safety Valve; System Operation; ON
20 ALIGNMENTS AND ADJUSTMENT, Continued IF THE OVEN BURNER DOES NOT IGNITE WITHIN 20 TO 60 SECONDS AFTER THE PILOT IS LIGHTED, TURN THE OVEN TEMPERATURE CONTROL TO OFF AND WAIT FOR POWER TO BE RESTORED. DO NOT ATTEMPT TO RELIGHT THE PILOT AGAIN. If the oven does not function properly when the power ...
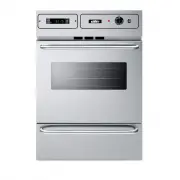


 Summit Appliance CMV24
User Manual
Summit Appliance CMV24
User Manual
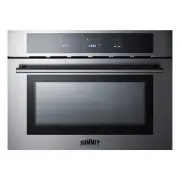 Summit Appliance CMV24SS
User Manual
Summit Appliance CMV24SS
User Manual
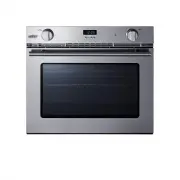 Summit Appliance SGWOGD27
User Manual
Summit Appliance SGWOGD27
User Manual
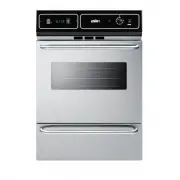 Summit Appliance TEM721BKW
User Manual
Summit Appliance TEM721BKW
User Manual
 Summit Appliance TTM7212BKW
User Manual
Summit Appliance TTM7212BKW
User Manual
 Summit Appliance TTM7212DK
User Manual
Summit Appliance TTM7212DK
User Manual
 Summit Appliance TTM7212KW
User Manual
Summit Appliance TTM7212KW
User Manual
 Summit Appliance WEM715KW
User Manual
Summit Appliance WEM715KW
User Manual
 Summit Appliance WTM7212KW
User Manual
Summit Appliance WTM7212KW
User Manual
 Summit Appliance WTM721EKW
User Manual
Summit Appliance WTM721EKW
User Manual