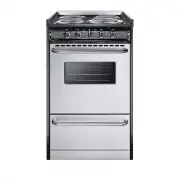
Page 2 - Range; Record these numbers for future use.; Contents; California Proposition 65B; WARNING
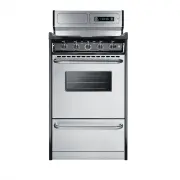
2 Range Record in the space provided below the Model No. and Serial No. of this appliance. Thesenumbers are found on the serial plate located below the lift-up cooktop. Model No. ________________________ Type Number ________________________ Serial No. ________________________ Purchase Date__________...
Page 4 - IMPORTANT SAFEGUARDS, Continued; CAUTION
4 IMPORTANT SAFEGUARDS, Continued • Do not allow children to climb or play around the range. The weight of a child on an open oven door may cause the range to tip, resulting in serious burns or other injury. • USER SERVICING: Do not repair or replace any part of the appliance unless it is specifical...
Page 7 - Clean Ventilating Hoods Frequently; Opening the oven door often to check on foods wastes electricity.
7 IMPORTANT SAFEGUARDS, Continued VENTILATING HOODS Clean Ventilating Hoods Frequently Grease should not be allowed to accumulate on hood or filter. When flaming foods underhood, turn hood fans on. ENERGY-SAVING IDEAS Surface Cooking Turn surface elements off before cooking is completed. The units w...
Page 8 - INSTALLATION INSTRUCTIONS; Leveling a Free-Standing Range
INSTALLATION INSTRUCTIONS Be sure appliance is properly installed and grounded by a qualified technician. It is the responsibility of the technician to make certain that your range is properlyinstalled. Situations caused by improper installation are not covered under the warranty.Any expenses incurr...
Page 9 - BACKGUARD INSTALLATION INSTRUCTIONS; Electric Ranges
9 BACKGUARD INSTALLATION INSTRUCTIONS Electric Ranges 1. Move the main top forward. (Lift up and pull forward slightly.) 2. Place the backguard on top of end panels at the rear of range. Make certain the tabs ofthe burner box cover rest on the outside of the burner box flanges. (See No. 1.) 3. If ba...
Page 10 - CORD CONNECTED APPLIANCES; Copper has always proven itself to be the most dependable
10 CORD CONNECTED APPLIANCES We recommend that you have the electrical hookup of your range done by a qualifiedelectrician. Have the electrician show you where your range disconnect is located. If youfail to wire your range in accordance with governing codes, you may create a hazardouscondition. Ref...
Page 11 - THREE-WIRE CORD CONNECTION
11 1. Remove the top nuts on the junctionblock studs. 2. Tighten the back nuts. 3. Install the three-wire cord and strainrelief provided on the cord set throughthe hole in the power cord bracket. 4. Connect the red and black leads to theouter terminals and the white lead to thecenter terminal. Use t...
Page 12 - THREE-WIRE CONDUIT CONNECTION
NOTE: The power cord bracket will haveto be reversed for conduit installations.Detach the bracket and flip its orientation.Reattach the bracket to the range so theconduit will pass through the smaller hole. 1. Remove the top nuts on the junctionblock studs. 2. Tighten the back nuts. 3. Install the t...
Page 13 - CABINET PREPARATIONS
13 CABINET PREPARATIONS Free-Standing Ranges “A”– –– 30 inches minimum clearance between the top of the cooking surface and the bottom of an unprotected wood or metal cabinet; or “A”– –– 24 inches minimum when bottom of wood or metal cabinet is protected by not less than 1/4 inch “Flame Retardant” m...
Page 14 - SURFACE COOKING; Cooking Utensils
14 SURFACE COOKING Cooking Utensils Your range is equipped with tubular type top elements. Here are some helpful hints forsuccessful cooking. For best result and energy conservation, choose cooking utensils which have the following characteristics: • Pans should have flat bottoms that make good cont...
Page 15 - To Operate Surface Units; Improper use of; SURFACE COOKING, continued; Cooking Utensils, Continued; Material; Aluminum
15 *Caution: Permanent damage will take place if cookware fuses to the element. To Operate Surface Units The surface controls are easily operated. Simply push in and turn in either direction. Whenthe element is energized, the indicator light (cook top signal light) glows when one ormore of the eleme...
Page 16 - Opening Oven Door; Let hot air or steam escape before removing or replacing food.; Arranging Oven Racks; Always arrange the oven racks while the oven is cool.; Baking; SELECT THE OVEN RACK POSITION BEFORE YOU BEGIN BROILING.
16 OPERATIONAL CHECK Check all connections to see that they are tight and have not become loosened duringtransit. Each top element is controlled by a switch and when turned on the element shouldheat up within a minute except for solid disk elements. These take approximately 3minutes. (Solid elements...
Page 17 - OPTIONAL EQUIPMENT; Continuous Cleaning Feature; Before Using Your Oven–Read These Instructions Carefully.; Using The Continuous Cleaning Oven; USE ANY ABRASIVE MATERIALS, STEEL WOOL, SHARP
17 OPTIONAL EQUIPMENT Continuous Cleaning Feature If your oven has the continuous cleaning feature, it will have a dull gray finish with whitespeckles that has been blended with a special catalytic material. (If the oven has a glossyfinish, it is standard porcelain enamel without the continuous clea...
Page 18 - OPTIONAL EQUIPMENT, Continued; Backguard and Control Panel Features; CLOCK WITH TIMER; TIMER
OPTIONAL EQUIPMENT, Continued Backguard and Control Panel Features Electrical Grounding Instructions: This Appliance must be properlygrounded and must be connected as shown in figure 1, 2 or 3 on page 11.Do not alter wiring or electrical equipment. The backguard equipment is optional, depending on m...
Page 19 - CLEANING THE RANGE; Using Commercial Oven Cleaners; Use only a mild solution of soap and water on; backguards, aluminum control panels; Never use harsh abrasives or cleaning powders that may scratch or; Knobs
19 CLEANING THE RANGE Always keep cleaning materials and chemicals in a safe place and away from children.Know what you are using. Make sure all parts of the range are COOL before cleaning. Besure to replace the parts correctly. Using Commercial Oven Cleaners Commercial oven cleaners may be used on ...
Page 20 - CLEANING THE RANGE, Continued; Aluminum Foil in Oven and Broiler; Use a mild solution of soap and water; USER SERVICING; to its position in the anti-tip bracket when you push the range back.; Repair Parts; MOISTURE
20 CLEANING THE RANGE, Continued Aluminum Foil in Oven and Broiler Aluminum foil when used improperly is a cause of many range fires. Make certainheating elements aren’t covered or come in contact with aluminum foil. Never cover a rack completely. A piece of foil slightly larger than the utensil can...
Page 21 - ALIGNMENTS AND ADJUSTMENTS; Oven Door Spring Adjustments; Storage
21 ALIGNMENTS AND ADJUSTMENTS Oven Door Spring Adjustments The oven door springs are properly adjusted before leaving the factory. The springs shouldbe adjusted to allow the door to remain open when pulled 90 degrees forward and yet pullthe door tight against the oven front frame when closed. If adj...
Page 22 - open it to the full open position. Raise the locking mechanism by
22 Lift-Off Oven Door (on some models) The oven door is removable (on some models) but it is heavy. You may need helpremoving and replacing the door. To remove the door, open it to the full open position. Raise the locking mechanism by applying force to the locking mechanism lever. Close the door un...
Page 24 - NOTES