Page 2 - CAUTION
2 IMPORTANT SAFETY INFORMATION READ ALL INSTRUCTIONS BEFORE USING TO REDUCE THE RISK OF FIRE, ELECTRIC SHOCK, OR INJURY TO PERSONS, OBSERVE THE FOLLOWING: A. Use this unit only in the manner intended by the manufacturer. If you have questions, contact the manufacturer. B. Before servicing or cleanin...
Page 3 - REMOTE ENABLE EQUIPMENT (on some models); How to Remove Protective Shipping Film and Packaging Tape; READ AND SAVE THESE INSTRUCTIONS
3 IMPORTANT SAFETY INFORMATION READ ALL INSTRUCTIONS BEFORE USING REMOTE ENABLE EQUIPMENT (on some models) This device complies with part 15 of the FCC Rules. Operation is subject to the following two conditions: (1) This device may not cause harmful interference, and (2) this device must accept any...
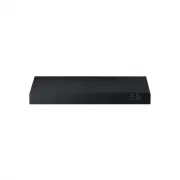
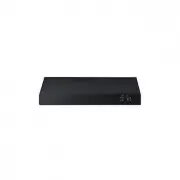
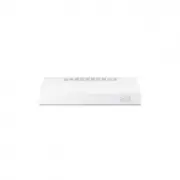
Page 4 - Controls; On Some Models; TH; ont
4 Controls On Some Models 1. Rangehood Control Panel: The control panel is located on the front of the canopy. 2. Light Switch: The light switch toggles between the lightbulb On and Off. 3. Fan Power Switch: The power switch toggles between fan settings Hi, Lo, and Off. U SI N G TH E H O O D: C ont ...
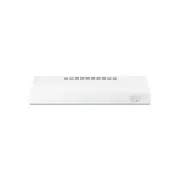
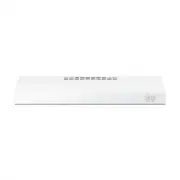
Page 5 - Filter; Charcoal Filter; E A; Filt
5 Filter Be sure the circuit breaker is off, and all surfaces are cool before cleaning or servicing any part of the vent hood. Charcoal Filter For this model, the air needs to be recirculated through a disposable charcoal filter that helps remove smoke and odors. NOTE: DO NOT rinse or put the charco...
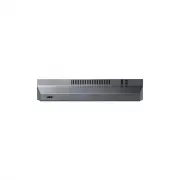
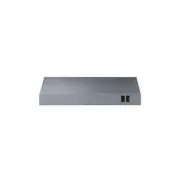
Page 6 - Surfaces; Stainless Steel Surfaces (on some models); Lights; ND; Sur
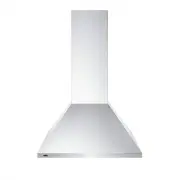
6 Surfaces Stainless Steel Surfaces (on some models) Do not use a steel wool pad; it will scratch the surface. Use warm sudsy water or a stainless steel cleaner or polish to clean the stainless steel surface. Always wipe the surface in the direction of the brush line. Follow the cleaner instructions...
Page 7 - FOR YOUR SAFETY; WARNING; Installation; BEFORE YOU BEGIN; IMPORTANT; IN
7 To reduce risk of fire and to properly exhaust air, be sure to duct air outside. Do not vent exhaust air into spaces within walls or ceilings or into attics, crawl spaces or garages. CAUTION FOR YOUR SAFETY Before beginning the installation, switch power off at service panel and lock the service d...
Page 8 - Installation Preparation; DUCTWORK REQUIREMENTS; Exhaust connection; Duct length; INSULATION AND/OR CAULK AROUND THE DUCTS
8 Installation Preparation 1" = 2.5 cm; 1' = 0.3 m IN STA LLA TI ON PR EPA RA TI O N DUCTWORK REQUIREMENTS TO REDUCE THE RISK OF FIRE, USE ONLY METAL DUCTWORK. NOTE: Read the ductwork sections only if you do not have existing ductwork. If you have existing ductwork, skip to the “Damage” section,...
Page 10 - TOOLS AND MATERIALS REQUIRED; INSTALLATION DIMENSIONS; REMOVE THE PACKAGING
10 Installation Preparation 1" = 2.5 cm; 1' = 0.3 m IN STA LLA TI ON PR EPA RA TI O N TOOLS AND MATERIALS REQUIRED (NOT INCLUDED) Safety glasses Pencil and tape measure Spirit level Wire cutter/stripper UL listed wire nuts Electric drill, #2 Phillips, flat head, and 9 ⁄ 32 " drill bit Torx 1...
Page 11 - ADVANCE PLANNING; Vented Install Planning; POWER SUPPLY; Electrical supply
11 Installation Preparation 1" = 2.5 cm; 1' = 0.3 m IN STA LLATI ON PR EPARA TIO N ADVANCE PLANNING Vented Install Planning • This hood is designed to be vented vertically using a 7" round duct or a 3 1 ⁄ 4 " x 10" rectangular duct or horizontally using a 3 1 ⁄ 4 " x 10" rect...
Page 12 - PREPARING MOUNTING; SELECT VENT OPTION THAT
12 2 PREPARING MOUNTING A To install to the bottom of cabinet Use the diagram or hood as a template and mark the locations on the cabinet for the keyhole screws. Drive the 4 (F) screws partway into the bottom of the cabinet (or wood shims). Hood mounting screws (4) Cabinet front X 10 1 ⁄ 4 ” 2 1 ⁄ 2...
Page 13 - PREPARE FOR ELECTRICAL
13 Installation Preparation 1" = 2.5 cm ; 1' = 0.3 m IN ST AL LAT IO N PR EPARA TIO N 3 PREPARE FOR ELECTRICAL AND VENTING Select the vent option that your installation will require and proceed to that section: A Outside top exhaust (Vertical duct–3 1 ⁄ 4 ” x 10” Rectangular) • Use the diagram a...
Page 15 - Installation Instructions; 1 SECURE HOOD; FOR VENTED INSTALLATIONS
15 Installation Instructions 9 FEED-IN WIRES Lift the hood into position and feed the house wiring through the wiring knockout. 11 SECURE HOOD Tighten the mounting screws. Be sure the screw heads are in the narrow neck of the keyhole slot. Mounting screw (4) Keyhole (4) IN ST AL LAT IO N PR EPARA TI...
Page 16 - 2 CONNECT DUCTWORK TO
16 Installation Instructions 12 CONNECT DUCTWORK TO HOOD (Ducted installations only) Connect ducting to hood. Use duct tape to make joints secure and airtight. 13 ELECTRICAL CONNECTIONS 1. Connect the Power Supply Cable to the range hood. Attach the white lead of the power supply to the white lead o...
Page 17 - Before you call for service; SH
17 Troubleshooting tips ... Before you call for service You can solve many common problems easily, saving you the cost of a possible service call. Try the suggestions below to see if you can solve the problem before calling for service. Problem Possible Cause What To Do Fan/Light does not operate wh...
Page 18 - DISCLAIMER OF IMPLIED WARRANTIES LIMITATION OF REMEDIES
18 LI M IT ED WA R R A N TY WARNING: This product can expose you to chemicals including Nickel (Metallic) which is known to the State of California to cause cancer. For more information go to www.P65Warnings.ca.gov Note: Nickel is a component in all stainless steel and some other metallic compositio...