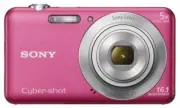
Page 2 - Owner’s Record; English
2 Owner’s Record The model and serial numbers are located on the bottom. Record the serial number in the space provided below. Refer to these numbers whenever you call upon your Sony dealer regarding this product. Model No. DSC-W210/W215/W220/W230 Serial No. ___________________________ To reduce fir...
Page 3 - CAUTION
3 GB [ Battery pack If the battery pack is mishandled, the battery pack can burst, cause a fire or even chemical burns. Observe the following cautions. • Do not disassemble.• Do not crush and do not expose the battery pack to any shock or force such as hammering, dropping or stepping on it. • Do not...
Page 5 - Attention; For Customers in Europe
5 GB [ Note: This equipment has been tested and found to comply with the limits for a Class B digital device, pursuant to Part 15 of the FCC Rules.These limits are designed to provide reasonable protection against harmful interference in a residential installation. This equipment generates, uses, an...
Page 7 - Table of contents
7 GB Table of contents Notes on using the camera ...................................................................... 8 Getting started ................................................................................. 9 Checking the accessories supplied ...............................................
Page 8 - Notes on using the camera; Notes on recording/playback
8 Notes on using the camera [ Internal memory and “Memory Stick Duo” media back up Do not turn off the camera, remove the battery pack, or remove the “Memory Stick Duo” media while the access lamp is lit. Otherwise, the internal memory data or “Memory Stick Duo” media may be damaged. Be sure to make...
Page 9 - Getting started; Checking the accessories supplied
9 GB Getting started Checking the accessories supplied • Battery charger BC-CSGD/BC-CSGE (1) • Power cord (mains lead) (1) (not supplied in the USA and Canada) • Rechargeable battery pack NP-BG1 (1)/ Battery case (1) • USB, A/V cable for multi-use terminal (1) • Wrist strap (1) • Soft carrying case ...
Page 10 - Preparing the battery pack; Insert the battery pack into the battery charger.; Charging time
10 1 Preparing the battery pack 1 Insert the battery pack into the battery charger. 2 Connect the battery charger to the wall outlet (wall socket). The CHARGE lamp lights up, and charging starts.When the CHARGE lamp turns off, charging is finished (Normal charge).If you continue charging the battery...
Page 11 - Inserting the battery pack/a “Memory Stick Duo” media; Open the battery/“Memory Stick Duo” media cover.; When there is no “Memory Stick Duo” media inserted; Status
11 GB 2 Inserting the battery pack/a “Memory Stick Duo” media (sold separately) 1 Open the battery/“Memory Stick Duo” media cover. 2 Insert the “Memory Stick Duo” media (sold separately). 3 Insert the battery pack. 4 Close the battery/“Memory Stick Duo” media cover. [ When there is no “Memory Stick ...
Page 12 - To remove the battery pack/“Memory Stick Duo” media; the battery eject lever; the access lamp
12 [ To remove the battery pack/“Memory Stick Duo” media Open the battery/“Memory Stick Duo” media cover. • Never remove the battery pack/“Memory Stick Duo” media when the access lamp is lit. This may cause damage to data in the “Memory Stick Duo” media/internal memory. Slide the battery eject lever...
Page 13 - Turning the camera on/setting the clock; Set the clock with the control button.; Select the date display format with; To change the date and time
13 GB 3 Turning the camera on/setting the clock 1 Press ON/OFF (Power) button. 2 Set the clock with the control button. 1 Select the date display format with v / V , then press z . 2 Select each item with b / B and set the numeric value with v / V , then press z . 3 Select [OK], then press z . • The...
Page 14 - Shooting images easily; Select the desired function on the mode dial.; When shooting movies:; Shoot with the shutter button.; Press the shutter button fully down.; Press the shutter button fully down.
14 Shooting images easily 1 Select the desired function on the mode dial. When shooting still images (Auto Adjustment mode): Select . When shooting movies: Select . 2 Hold the camera, with your elbows pressed against your body to steady it. 3 Shoot with the shutter button. When shooting movies: Pres...
Page 15 - Using the mode dial; SCN; * Scene Selection in SCN mode
15 GB Mode dial/Zoom/Flash/Macro/Self-timer/Display [ Using the mode dial Auto Adjustment Allows you to shoot with the settings adjusted automatically. Easy Shooting Allows easy shooting with easy-to-see indicators. Smile Shutter When the camera detects a smile, the shutter is released automatically...
Page 16 - DISP
16 [ W/T Using the zoom Press T to zoom, press W to return the zoom. [ Flash (Selecting a flash mode for still images) Press B ( ) on the control button repeatedly until the desired mode is selected. : Flash Auto Flashes when there is insufficient light or backlight (default setting) : Flash forced ...
Page 17 - Detecting smiles and shooting automatically (Smile Shutter); Wait detecting a smile.
17 GB Detecting smiles and shooting automatically (Smile Shutter) When the camera detects a smile, the shutter is released automatically. 1 Select (Smile Shutter) mode on the mode dial. 2 Aim the camera at the subject and press the shutter button halfway down to focus. 3 Press the shutter button all...
Page 18 - Detecting the shooting conditions (Scene Recognition)
18 Detecting the shooting conditions (Scene Recognition) The camera automatically detects the shooting conditions, and then takes the shot. 1 Select (Auto Adjustment) mode on the mode dial. 2 Press MENU button (pages 24, 25). 3 Select (Scene Recognition) with v / V on the control button. 4 Select th...
Page 19 - Viewing/deleting images; To delete images; To view an enlarged image (playback zoom); Press
19 GB Viewing/deleting images 1 Press (Playback). If you press when the camera is powered off, the camera is turned on automatically and set to playback mode. To switch to the shooting mode, press again. 2 Select an image with b / B on the control button. Movie: Press z to play back a movie. (Press ...
Page 20 - To view an index screen; To delete images in index mode; To play back a series of images with effects and music (Slideshow)
20 [ To view an index screen Press (Index) while a single image is displayed. Then, select an image with v / V / b / B . To return to the single image screen, press z . • Each time you press (Index), the number of images on the index screen increases. [ To delete images in index mode 1 Press MENU wh...
Page 21 - To view images on TV
21 GB [ To view images on TV Connect the camera to the TV with the cable for multi-use terminal (supplied). To view on HD (High Definition) TV, an HD Output Adaptor Cable (sold separately) is needed. • If you set the image size to [16:9], you can record images in the size that fills the entire scree...
Page 22 - Learning the various functions – HOME/Menu; Using the HOME screen; Press HOME to display the HOME screen.; When you select the; Select the desired setting with; Select a setting with
22 Learning the various functions – HOME/Menu Using the HOME screen The HOME screen is the gateway screen for all the functions of the camera, and can be called up regardless of the mode setting (shooting/viewing). 1 Press HOME to display the HOME screen. 2 Select a category with b / B on the contro...
Page 23 - For details on the operation; HOME items; Categories
23 For details on the operation 1 page 22 GB HOME items Pressing HOME displays the following items. Only the available items are displayed on the screen. Details on the items are displayed on the screen by the guide. Categories Items Shooting Shooting View Images Single Image Image Index Slideshow S...
Page 24 - Using menu items; Press MENU to display the menu.; Press MENU to turn off the menu.
24 Using menu items 1 Press MENU to display the menu. • The menu will be displayed only during shooting and playback mode.• Different items will become visible depending on the selected mode. 2 Select a desired menu item with v / V on the control button. • If the desired item is hidden, keep pressin...
Page 25 - Menu items; Shooting menu
25 For details on the operation 1 page 24 GB Menu items The available menu items vary depending on the mode setting (shooting/viewing), and the mode dial position in the shooting mode. Only the available items are displayed on the screen. Shooting menu Scene Selection Selects the settings pre-adjust...
Page 26 - Viewing menu
26 For details on the operation 1 page 24 Viewing menu (Delete) Deletes images. (Slideshow) Plays back a series of images with effects and music. (Retouch) Retouches still images. (Multi-Purpose Resize) Changes the image size according to usage. (Protect) Prevents accidental erasure. Adds a Print or...
Page 27 - Enjoying your computer; Viewing “Cyber-shot Handbook”; For Macintosh users
27 GB Enjoying your computer You can view images shot with the camera on a computer. By using the software in the CD-ROM (supplied), you can enjoy still images and movies from the camera more than ever. For details, refer to “Cyber-shot Handbook” in the CD-ROM (supplied). Supported Operating Systems...
Page 28 - Indicators on the screen; Each time you press; When shooting still images; When shooting movies
28 Indicators on the screen Each time you press v (DISP) on the control button, the display changes (page 16). [ When shooting still images • The indicators are limited in Easy Shooting mode. [ When shooting movies [ When playing back A Battery remaining Low battery warning Image Size Mode dial/Menu...
Page 30 - Battery life and memory capacity; Battery life and number of images you can record/view
30 Battery life and memory capacity Battery life and number of images you can record/view The numbers shown in the following tables assume a fully charged battery pack (supplied) is used at an ambient temperature of 25°C (77°F). The numbers shown for images you can record/view are approximations and...
Page 31 - Number of still images and recordable time of movies; The approximate recordable number of still images; The approximate recordable time of movies
31 GB Number of still images and recordable time of movies The number of still images and the length of time for movies may vary depending on the shooting conditions. • Even if the capacity of your recording media is the same as the one in the table below, the number of still images and the length o...
Page 32 - Troubleshooting; Cannot insert the battery pack.; The power turns off suddenly.; ss; Battery pack and power
32 Troubleshooting If you experience trouble with the camera, try the following solutions. Be aware that by sending the camera for repair, you give consent that the contents of the internal memory, music files may be checked. Cannot insert the battery pack. • Insert the battery pack correctly by pus...
Page 33 - Shooting still images/movies
33 GB The remaining charge indicator is incorrect. • This phenomenon occurs when you use the camera in an extremely hot or cold location. • A discrepancy arose between the remaining charge indicator and the actual remaining battery charge. Fully discharge the battery pack once, then charge it to cor...
Page 34 - The same image is shot several times.; Viewing images
34 White, black, red, purple or other streaks appear on the image, or the image seems reddish. • This phenomenon is called smearing. This is not a malfunction. The same image is shot several times. • [REC Mode] is set to [Burst] or Exposure Bracket. Or, [Scene Recognition] is set to [Advanced] (page...
Page 35 - Precautions
35 GB Precautions [ Do not use/store the camera in the following places • In an extremely hot, cold or humid place In places such as in a car parked in the sun, the camera body may become deformed and this may cause a malfunction. • Under direct sunlight or near a heater The camera body may become d...
Page 36 - Specifications; Camera
36 Specifications Camera [System] Image device: 7.79 mm (1/2.3 type) color CCD, Primary color filter Total pixel number of camera: Approx. 12.4 Megapixels Effective pixel number of camera: Approx. 12.1 Megapixels Lens: Carl Zeiss Vario-Tessar 4× zoom lens f = 5.35 – 21.4 mm (30 – 120 mm (35 mm film ...
Page 37 - Trademarks
37 GB BC-CSGD/BC-CSGE battery charger Power requirements: AC 100 V to 240 V, 50/60 Hz, 2 W Output voltage: DC 4.2 V, 0.25 AOperating temperature: 0°C to 40°C (32°F to 104°F) Storage temperature: –20°C to +60°C (–4°F to +140°F) Dimensions: Approx. 83 × 55 × 24 mm (3 3/8 × 2 1/4 × 31/32 inches) (W/H/D...
Page 38 - Español
2 Nombre del producto: Cámara DigitalModelo: DSC-W210/W215/W220/W230 Para reducir el riesgo de incendio o descarga eléctrica, no exponga la unidad a la lluvia ni a la humedad. INSTRUCCIONES DE SEGURIDAD IMPORTANTES -GUARDE ESTAS INSTRUCCIONES PELIGROPARA REDUCIR EL RIESGO DE INCENDIO O DESCARGA ELÉC...
Page 40 - Índice
4 Índice Notas sobre la utilización de la cámara ................................................... 5 Preparativos .................................................................................... 7 Comprobación de los accesorios suministrados ..................................... 7 1 Preparació...
Page 41 - Notas sobre la utilización de la cámara
5 ES Notas sobre la utilización de la cámara [ Copia de seguridad de la memoria interna y del “Memory Stick Duo” No apague la cámara, extraiga la batería, ni retire el “Memory Stick Duo” mientras está encendida la lámpara de acceso. De lo contrario, podrán dañarse los datos de la memoria interna o e...
Page 43 - Preparativos; Comprobación de los accesorios suministrados
7 ES Preparativos Comprobación de los accesorios suministrados • Cargador de batería BC-CSGD/BC-CSGE (1) • Cable de alimentación (1) (no suministrado en EE. UU. y Canadá) • Batería recargable NP-BG1 (1)/caja de la batería (1) • Cable USB, A/V para terminal de usos múltiples (1) • Correa para muñeca ...
Page 44 - Preparación de la batería; Inserte la batería en el cargador de batería.; Tiempo de carga
8 1 Preparación de la batería 1 Inserte la batería en el cargador de batería. 2 Conecte el cargador de batería a la toma de corriente de la pared. Se ilumina la lámpara CHARGE, y comienza a efectuarse la carga.Cuando se apague la lámpara CHARGE, habrá finalizado la carga (Carga normal).Si continúa c...
Page 45 - Inserción de la batería/un “Memory Stick Duo” (se vende; Abra la tapa de la batería/“Memory Stick Duo”.; Cuando no hay un “Memory Stick Duo” insertado
9 ES 2 Inserción de la batería/un “Memory Stick Duo” (se vende por separado) 1 Abra la tapa de la batería/“Memory Stick Duo”. 2 Inserte el “Memory Stick Duo” (se vende por separado). 3 Inserte la batería. 4 Cierre la tapa de la batería/“Memory Stick Duo”. [ Cuando no hay un “Memory Stick Duo” insert...
Page 46 - Para comprobar la carga de batería restante; Para extraer la batería/“Memory Stick Duo”
10 [ Para comprobar la carga de batería restante Pulse el botón ON/OFF (Alimentación) para encender y comprobar la carga de batería restante en la pantalla LCD. • Si utiliza la batería NP-FG1 (se vende por separado), también aparecerán los minutos después del indicador de batería restante ( 60 min (...
Page 47 - Encendido de la cámara/ajuste del reloj; Ajuste el reloj con el botón de control.; Seleccione el formato de visualización de fecha con; Para cambiar la fecha y hora; Ajustes del reloj] en; Notas sobre cuando se conecta la alimentación
11 ES 3 Encendido de la cámara/ajuste del reloj 1 Pulse el botón ON/OFF (Alimentación). 2 Ajuste el reloj con el botón de control. 1 Seleccione el formato de visualización de fecha con v / V , después pulse z . 2 Seleccione cada elemento con b / B y ajuste el valor numérico con v / V , después pulse...
Page 48 - Toma de imágenes fácilmente; Seleccione la función deseada en el dial de modo.; Cuando se toman películas:; Tome la imagen con el botón del disparador.; Pulse el botón del disparador a fondo.; Pulse el botón del disparador a fondo.
12 Toma de imágenes fácilmente 1 Seleccione la función deseada en el dial de modo. Cuando se toman imágenes fijas (modo de ajuste automático): Seleccione . Cuando se toman películas: Seleccione . 2 Sujete la cámara, con los codos presionados contra su cuerpo para que no se mueva. 3 Tome la imagen co...
Page 49 - Utilización del dial de modo
13 ES Dial de modo/Zoom/Flash/Macro/Autodisparador/Pantalla [ Utilización del dial de modo Ajuste automático Le permite tomar con los ajustes realizados automáticamente. Toma fácil Permite una toma fácil con indicadores fáciles de ver. Captador de sonrisas Cuando la cámara detecta una sonrisa, el ob...
Page 50 - Utilización del zoom; Pulse T para accionar el zoom, pulse W para retornar el zoom.; Flash (Selección de un modo de flash para imágenes fijas); Pulse; Utilización del autodisparador; Pulse
14 [ W/T Utilización del zoom Pulse T para accionar el zoom, pulse W para retornar el zoom. [ Flash (Selección de un modo de flash para imágenes fijas) Pulse B ( ) del botón de control repetidamente hasta que se seleccione el modo deseado. : Flash automático Parpadea cuando hay insuficiente luz o lu...
Page 52 - Detección de sonrisas y toma automática (Captador de sonrisas); Seleccione el modo; Espere mientras se detecta una sonrisa.
16 Detección de sonrisas y toma automática (Captador de sonrisas) Cuando la cámara detecta una sonrisa, el obturador se libera automáticamente. 1 Seleccione el modo (Captador de sonrisas) en el dial de modo. 2 Apunte con la cámara al motivo y pulse el botón del disparador hasta la mitad para enfocar...
Page 54 - Visionado/borrado de imágenes; Para borrar imágenes
18 Visionado/borrado de imágenes 1 Pulse (Reproducción). Si pulsa cuando la cámara esté apagada, la cámara se encenderá automáticamente y se pondrá en el modo de reproducción. Para cambiar al modo de toma de imagen, pulse otra vez. 2 Seleccione una imagen con b / B del botón de control. Película: Pu...
Page 56 - Para ver imágenes en un televisor
20 [ Para ver imágenes en un televisor Conecte la cámara al televisor con el cable para terminal de usos múltiples (suministrado). Para ver en un televisor HD (Alta Definición), se necesita un cable de adaptador de salida HD (se vende por separado). • Si ajusta el tamaño de imagen a [16:9], podrá gr...
Page 57 - Utilización de la pantalla HOME; Pulse HOME para visualizar la pantalla HOME.; Cuando selecciona la categoría; Seleccione el ajuste deseado con; Seleccione un ajuste con
21 ES Familiarización con las diversas funciones – HOME/Menú Utilización de la pantalla HOME La pantalla HOME es la pantalla de acceso a todas las funciones de la cámara, y puede ser invocada independientemente del ajuste de modo (toma de imagen/visualización). 1 Pulse HOME para visualizar la pantal...
Page 58 - Para más detalles sobre la operación; Elementos de HOME; Categorías; Toma de imagen
22 Para más detalles sobre la operación 1 página 21 Elementos de HOME Al pulsar HOME se muestran los elementos siguientes. En la pantalla solamente se visualizan los elementos disponibles. Los detalles de los elementos se visualizan en la pantalla mediante la guía. Categorías Elementos Toma de image...
Page 59 - Utilización de los elementos del menú; Pulse MENU para visualizar el menú.; Pulse MENU para quitar el menú.
23 ES Utilización de los elementos del menú 1 Pulse MENU para visualizar el menú. • El menú se visualizará solamente durante los modos de toma de imagen y reproducción.• Habrá visibles diferentes elementos dependiendo del modo seleccionado. 2 Seleccione un elemento de menú deseado con v / V del botó...
Page 60 - Elementos del menú; Menú para tomar imágenes
24 Para más detalles sobre la operación 1 página 23 Elementos del menú Los elementos de menú disponibles variarán dependiendo del ajuste de modo (toma de imagen/visualización), y de la posición del dial de modo en el modo de toma de imagen. En la pantalla solamente se visualizan los elementos dispon...
Page 61 - Menú de visualización
25 Para más detalles sobre la operación 1 página 23 ES Menú de visualización (Borrar) Borra imágenes. (Diapositivas) Reproduce una serie de imágenes con efectos y música. (Retocar) Retoca imágenes fijas. (Múltiples tamaños) Cambia el tamaño de imagen de acuerdo con la utilización. (Proteger) Previen...
Page 62 - Disfrute de su ordenador; Visionado “Guía práctica de Cyber-shot”; Para usuarios de Windows
26 Disfrute de su ordenador Puede ver imágenes tomadas con la cámara en un ordenador. Utilizando el software del CD-ROM (suministrado), puede disfrutar de imágenes fijas y películas de la cámara más que nunca antes. Para más detalles, consulte la “Guía práctica de Cyber-shot” en el CD-ROM (suministr...
Page 63 - Para usuarios de Macintosh
27 ES [ Para usuarios de Macintosh 1 Encienda su ordenador e inserte el CD-ROM (suministrado) en la unidad de CD-ROM. 2 Seleccione la carpeta [Handbook] y copie el “Handbook.pdf” almacenado en la carpeta [ES] a su ordenador. 3 Después de haberse completado el copiado, haga doble clic en “Handbook.pd...
Page 64 - Indicadores de la pantalla; Cada vez que pulse; Cuando se toman imágenes fijas; Cuando se toman películas
28 Indicadores de la pantalla Cada vez que pulse v (DISP) del botón de control, cambiará la visualización (página 15). [ Cuando se toman imágenes fijas • En el modo Toma fácil, los indicadores están limitados. [ Cuando se toman películas [ Cuando se reproduce A Batería restante Aviso de poca batería...
Page 65 - PLAY
29 ES B C D Marca de orden de impresión (DPOF) Relación del zoom VOL. Volumen Conexión PictBridge z Bloqueo AE/AF ISO400 Número ISO Obturación lenta con reducción de ruido (NR) 125 Velocidad de obturación F3,5 Valor de abertura +2,0EV Valor de exposición Indicador del cuadro del visor de rango AF 1,...
Page 68 - Número de imágenes fijas y tiempo grabable de películas; El número aproximado de imágenes fijas que se puede grabar
32 Número de imágenes fijas y tiempo grabable de películas El número de imágenes fijas y el tiempo de duración para películas pueden variar dependiendo de las condiciones de la toma. • Aunque la capacidad de su soporte de grabación sea igual que una de la tabla de abajo, el número de imágenes fijas ...
Page 69 - El tiempo aproximado de películas que se puede grabar
33 ES [ El tiempo aproximado de películas que se puede grabar Los números de la tabla de abajo muestran el tiempo máximo aproximado que se puede grabar obtenido de la suma total de todos los archivos de película. (Unidades: h (hora) : min (minuto) : s (segundo)) • Las películas con el tamaño ajustad...
Page 70 - Solución de problemas; Resulta imposible insertar la batería.; La alimentación se desconecta súbitamente.; “Guía; Batería y alimentación
34 Solución de problemas Si encuentra problemas con la cámara, pruebe las siguientes soluciones. Tenga presente que enviando la cámara para repararla, usted da consentimiento para que el contenido de la memoria interna, y los archivos de música puedan ser comprobados. Resulta imposible insertar la b...
Page 71 - Toma de imágenes fijas/películas
35 ES El indicador de carga restante es incorrecto. • Este fenómeno ocurre cuando utiliza la cámara en un lugar muy cálido o frío. • Surgió una discrepancia entre el indicador de carga restante y la carga de batería restante real. Descargue completamente la batería una vez, y después cárguela para c...
Page 72 - Visualización de imágenes
36 Se ha tomado la misma imagen varias veces. • [Modo Grabación] está ajustado a [Ráfaga] o Variación exposición. O, [Reconocimiento de escena] está ajustado a [Avanzado] (página 24). Resulta imposible reproducir imágenes. • Pulse (Reproducción) (página 18). • El nombre de carpeta/archivo ha sido ca...
Page 73 - Precauciones; Acerca del transporte
37 ES Precauciones [ No utilice o almacene la cámara en los siguientes lugares • En un lugar muy caluroso, frío o húmedo En lugares tales como en un automóvil aparcado al sol, es posible que el cuerpo de la cámara se deforme y esto podrá ocasionar un mal funcionamiento. • Bajo la luz solar directa o...
Page 75 - Especificaciones; Cámara
39 ES Especificaciones Cámara [Sistema] Dispositivo de imagen: CCD de color de 7,79 mm (tipo 1/2,3), Filtro de color primario Número total de píxeles de la cámara: Aprox. 12,4 Megapíxeles Número efectivo de píxeles de la cámara: Aprox. 12,1 Megapíxeles Objetivo: Objetivo zoom Carl Zeiss Vario-Tessar...
Page 80 - Printed in China
Printed in China Printed on 70% or more recycled paper using VOC (Volatile Organic Compound)-free vegetable oil based ink.Impreso en papel reciclado en un 70% o más utilizando tinta hecha con aceite vegetal exento de compuesto orgánico volátil (COV). Additional information on this product and answer...


 Sony A6400 + SEL-P1650 Black (ILCE-6400L/B)
User Manual
Sony A6400 + SEL-P1650 Black (ILCE-6400L/B)
User Manual
 Sony A6600 Body Black (ILCE-6600/B)
User Manual
Sony A6600 Body Black (ILCE-6600/B)
User Manual
 Sony A7R Mark IV Body (ILCE-7RM4)
User Manual
Sony A7R Mark IV Body (ILCE-7RM4)
User Manual
 Sony Alpha 6500 (ILCE-6500)
User Manual
Sony Alpha 6500 (ILCE-6500)
User Manual
 Sony Alpha 6500 + 18-135mm (ILCE-6500M/B)
User Manual
Sony Alpha 6500 + 18-135mm (ILCE-6500M/B)
User Manual
 Sony Alpha 7 III
User Manual
Sony Alpha 7 III
User Manual
 Sony Alpha 7 IV
User Manual
Sony Alpha 7 IV
User Manual
 Sony Alpha 7C
User Manual
Sony Alpha 7C
User Manual
 Sony Alpha 7C Body Silver
User Manual
Sony Alpha 7C Body Silver
User Manual
 Sony Alpha a6400 + E 16-55 mm f/2.8 G (ILCE6400G.CEC)
User Manual
Sony Alpha a6400 + E 16-55 mm f/2.8 G (ILCE6400G.CEC)
User Manual
 Sony Alpha a6500 body (ILCE6500B.CEC)
User Manual
Sony Alpha a6500 body (ILCE6500B.CEC)
User Manual
 Sony Cyber-shot DSC-H55 Black
User Manual
Sony Cyber-shot DSC-H55 Black
User Manual
 Sony Cyber-shot DSC-HX10 Black
User Manual
Sony Cyber-shot DSC-HX10 Black
User Manual
 Sony Cyber-shot DSC-RX10
User Manual
Sony Cyber-shot DSC-RX10
User Manual
 Sony Cyber-shot DSC-W710 Pink
User Manual
Sony Cyber-shot DSC-W710 Pink
User Manual
 Sony DCZV1/B
User Manual
Sony DCZV1/B
User Manual
 Sony DSC-F77
Manual
Sony DSC-F77
Manual