Page 2 - English; Select your country or region.; Checking the supplied items
GB 2 The number in parentheses indicates the number of pieces.• Camera (1)• Rechargeable battery pack NP-BX1 (1)• Micro USB cable (1)• AC Adaptor AC-UD10/UD11 (1)• Power cord (mains lead) (not supplied in the USA and Canada) (1)• Wrist strap (1)• Strap adapter (2) (Strap adapters are used to attach ...
Page 3 - Owner’s Record; Battery pack; WARNING
GB 3 GB Owner’s Record The model and serial numbers are located on the bottom. Record the serial number in the space provided below. Refer to these numbers whenever you call your Sony dealer regarding this product. Model No. DSC-RX100 Serial No. _____________________________ Model No. AC-UD10/AC-UD1...
Page 4 - AC Adaptor
GB 4 • Be sure to charge the battery pack using a genuine Sony battery charger or a device that can charge the battery pack. • Keep the battery pack out of the reach of small children.• Keep the battery pack dry.• Replace only with the same or equivalent type recommended by Sony.• Dispose of used ba...
Page 5 - Regulatory Information; Declaration of Conformity
GB 5 GB UL is an internationally recognized safety organization.The UL Mark on the product means it has been UL Listed. If you have any questions about this product, you may call: Sony Customer Information Center1-800-222-SONY (7669). The number below is for the FCC related matters only. [ Regulator...
Page 6 - For Customers in Europe
GB 6 [ Notice for the customers in the countries applying EU Directives The manufacturer of this product is Sony Corporation, 1-7-1 Konan Minato-ku Tokyo, 108-0075 Japan. The Authorized Representative for EMC and product safety is Sony Deutschland GmbH, Hedelfinger Strasse 61, 70327 Stuttgart, Germa...
Page 7 - Notice for customers in the United Kingdom
GB 7 GB [ Disposal of waste batteries (applicable in the European Union and other European countries with separate collection systems) This symbol on the battery or on the packaging indicates that the battery provided with this product shall not be treated as household waste.On certain batteries thi...
Page 8 - Identifying parts
GB 8 A Shutter button B Mode dial (Intelligent Auto)/ (Superior Auto)/ (Program Auto)/ (Aperture Priority)/ (Shutter Priority)/ (Manual Exposure)/ (Memory recall)/ (Movie)/ (Sweep Shooting)/ (Scene Selection) C For shooting: W/T (zoom) leverFor viewing: Index/Playback zoom lever D Self-timer lamp/Sm...
Page 9 - wj; Inserting the battery pack; Insert the battery pack.
GB 9 GB T (Playback) button U / (In-Camera Guide/Delete) button V Battery insertion slot W Battery eject lever X Tripod socket hole • Use a tripod with a screw less than 5.5 mm (7/32 inches) long. Otherwise, you cannot firmly secure the camera, and damage to the camera may occur. Y Access lamp Z Mem...
Page 10 - Charging the battery pack
GB 10 Charging the battery pack 1 Connect the camera to the AC Adaptor (supplied), using the micro USB cable (supplied). 2 Connect the AC Adaptor to the wall outlet (wall socket). The Power/Charge lamp lights orange, and charging starts.• Turn off the camera while charging the battery.• You can char...
Page 12 - Charging by connecting to a computer; Notes
GB 12 x Charging by connecting to a computer The battery pack can be charged by connecting the camera to a computer using a micro USB cable. • Note the following points when charging via a computer: – If the camera is connected to a laptop computer that is not connected to a power source, the laptop...
Page 14 - Supplying power; Inserting a memory card (sold separately); until it clicks into place.
GB 14 x Supplying power The camera can be supplied with power from the wall outlet (wall socket) by connecting to the AC Adaptor (supplied), using the micro USB cable (supplied). This way, there is no need to worry about draining the battery when shooting over extended periods or when the camera is ...
Page 16 - Setting the clock; on the control wheel.
GB 16 Setting the clock 1 Press the ON/OFF (Power) button. Date & Time setting is displayed when you turn on the camera for the first time.• It may take time for the power to turn on and allow operation. 2 Check that [Enter] is selected on the screen, then press z on the control wheel. 3 Select ...
Page 17 - Shooting still images/movies; Press the shutter button halfway down to focus.; When the image is in focus, a beep sounds and the; Press the shutter button fully down to shoot an image.
GB 17 GB Shooting still images Shooting movies • Do not pull up the flash manually. This may cause a malfunction.• When using the zoom function while shooting a movie, the sound of the camera operating will be recorded. The sound of the MOVIE button operating may also be recorded when movie recordin...
Page 18 - Viewing images; Press the
GB 18 x Selecting next/previous image Select an image by pressing B (next)/ b (previous) on the control wheel or by turning the control wheel. Press z in the center of the control wheel to view movies. x Deleting an image 1 Press / (Delete) button. 2 Select [Delete] with v on the control wheel, then...
Page 19 - This camera is equipped with a built-in instruction guide.; Shooting Tip; The camera displays shooting tips for the shooting mode selected.; Viewing the Guide; Press the MENU button.; and change shooting tips using
GB 19 GB This camera is equipped with a built-in instruction guide. In-Camera Guide The camera displays explanations for MENU items and the setting values. Shooting Tip The camera displays shooting tips for the shooting mode selected. Viewing the Guide 1 Press the MENU button. 2 Select the desired M...
Page 20 - DISP; Introduction of other functions
GB 20 Other functions can be operated using the control wheel, MENU button, etc. x Control wheel DISP (Display Contents): Allows you to change the screen display. (Flash Mode): Allows you to select a flash mode for still images. / (Exposure Comp./Photo Creativity): Allows you to adjust image brightn...
Page 21 - Still shooting menu
GB 21 GB x Fn (Function) button Allows you to register seven functions and recall those functions when shooting. 1 Press the Fn (Function) button. 2 Select the desired function using the Fn (Function) button or b / B on the control wheel. 3 Select the setting value by turning the control wheel or Co...
Page 26 - Features of “PlayMemories Home”; send images by e-mail, and change the shooting date and time.; Connect the camera to a computer.
GB 26 The built-in software “PlayMemories Home” allows you to import still images and movies to your computer and use them.You can shoot or play back images on this camera even if you do not install “PlayMemories Home”, however, “PlayMemories Home” is required to import AVCHD movies to your computer...
Page 27 - “Image Data Converter” allows you to develop RAW images.; Features of “Image Data Converter”; Install “Image Data Converter”
GB 27 GB “Image Data Converter” allows you to develop RAW images. x Features of “Image Data Converter” Below are examples of the functions available when you use “Image Data Converter”. • You can edit RAW images using multiple correction functions, such as tone curve or sharpness. • You can adjust i...
Page 29 - Notes on using the camera
GB 29 GB • The recordable time of movies varies because the camera is equipped with VBR (Variable Bit Rate), which automatically adjusts image quality depending on the shooting scene. When you record a fast-moving subject, the image is clearer but the recordable time is shorter because more memory i...
Page 32 - Camera; Specifications
GB 32 Camera [System] Image device: 13.2 mm × 8.8 mm (1.0 type) Exmor CMOS sensor Total pixel number of camera: Approx. 20.9 Megapixels Effective pixel number of camera: Approx. 20.2 Megapixels Lens: Carl Zeiss Vario-Sonnar T * 3.6× zoom lensf = 10.4 mm – 37.1 mm (28 mm – 100 mm (35 mm film equivale...
Page 34 - Trademarks
GB 34 Trademarks • The following marks are trademarks of Sony Corporation. , “Cyber-shot,” “Memory Stick PRO Duo,” “Memory Stick PRO-HG Duo,” “Memory Stick Duo,” “Memory Stick Micro” • “AVCHD Progressive” and “AVCHD Progressive” logotype are trademarks of Panasonic Corporation and Sony Corporation. ...
Page 36 - Español; Seleccione su país o región.; Comprobación de los artículos suministrados
ES 2 El número entre paréntesis indica el número de piezas.• Cámara (1)• Batería recargable NP-BX1 (1)• Cable micro USB (1)• Adaptador de alimentación de ca AC-UD10/UD11 (1)• Cable de alimentación (no suministrado en EE.UU. y Canadá) (1)• Correa para muñeca (1)• Adaptador de correa (2) (Para colocar...
Page 37 - Batería; AVISO
ES 3 ES Nombre del producto: Cámara DigitalModelo: DSC-RX100 Para reducir el riesgo de incendio o descarga eléctrica, no exponga la unidad a la lluvia ni a la humedad. INSTRUCCIONES DE SEGURIDAD IMPORTANTES-GUARDE ESTAS INSTRUCCIONESPELIGROPARA REDUCIR EL RIESGO DE INCENDIO O DESCARGA ELÉCTRICA, SIG...
Page 38 - Adaptador de ca; Atención para los clientes en Europa
ES 4 • Sustitúyala únicamente por otra del mismo tipo o equivalente recomendada por Sony.• Deshágase de la baterías usada lo antes posible según el procedimiento que se describe en las instrucciones. [ Adaptador de ca Conecte el adaptador de ca a la toma de corriente de la pared más cercana. Si ocur...
Page 40 - Identificación de las partes
ES 6 A Botón del disparador B Dial de modo (Auto. inteligente)/ (Automático superior)/ (Programa auto.)/ (Priorid. abertura)/ (Prior. tiempo expos.)/ (Exposición manual)/ (Recuperar memoria)/ (Película)/ (Toma de barrido)/ (Selección escena) C Para tomar imagen: Palanca W/T (zoom)Para visualizar: Pa...
Page 41 - Inserción de la batería
ES 7 ES T Botón (Reproducción) U Botón / (Guía en la cámara/ Eliminar) V Ranura de inserción de la batería W Palanca de expulsión de la batería X Agujero roscado para el trípode • Utilice un trípode con un tornillo de menos de 5,5 mm de largo. De lo contrario, no podrá sujetar firmemente la cámara, ...
Page 42 - Carga de la batería; finalizado, extraiga la batería y vuelva a insertarla.
ES 8 Carga de la batería 1 Conecte la cámara al adaptador de alimentación de ca (suministrado), utilizando el cable micro USB (suministrado). 2 Conecte el adaptador de alimentación de ca a la toma de corriente de la pared. Se ilumina en naranja la lámpara de alimentación/carga, y comienza la carga.•...
Page 43 - Notas
ES 9 ES • Si la lámpara de alimentación/carga de la cámara parpadea cuando el adaptador de alimentación de ca está conectado a la toma de corriente de la pared, indica que la carga se ha detenido temporalmente porque la temperatura está fuera del rango recomendado. Cuando la temperatura vuelve dentr...
Page 44 - Carga conectando a un ordenador
ES 10 x Carga conectando a un ordenador La batería se puede cargar conectando la cámara a un ordenador utilizando el cable micro USB. • Tenga en cuenta los puntos siguientes cuando cargue a través de un ordenador: – Si conecta la cámara a un ordenador portátil que no está conectado a la fuente de co...
Page 45 - Suministro de alimentación
ES 11 ES • El número de arriba de imágenes se aplica cuando la batería está completamente cargada. El número de imágenes podrá disminuir dependiendo de las condiciones de uso. • El número de imágenes que se puede grabar es cuando las tomas se hacen en las condiciones siguientes:– Utilización de “Mem...
Page 46 - de memoria hasta que encaje en su sitio con un chasquido.
ES 12 Inserción de una tarjeta de memoria (se vende por separado) 1 Abra la tapa. 2 Inserte la tarjeta de memoria (se vende por separado). • Con la esquina cortada orientada como en la ilustración, inserte la tarjeta de memoria hasta que encaje en su sitio con un chasquido. 3 Cierre la tapa. Asegúre...
Page 48 - Ajuste del reloj; permitir realizar operaciones.; en la rueda de control.; Seleccione elementos:
ES 14 Ajuste del reloj 1 Pulse el botón ON/OFF (Alimentación). Cuando encienda la cámara por primera vez se visualizará el ajuste de Fecha y Hora.• Es posible que lleve algún tiempo en conectarse la alimentación y permitir realizar operaciones. 2 Compruebe que está seleccionado [Intro] en la pantall...
Page 49 - Toma de imágenes fijas/películas; continúa grabando la película.
ES 15 ES Toma de imágenes fijas Toma de películas • No levante el flash manualmente. Ello podría ocasionar un mal funcionamiento.• Cuando utilice la función del zoom mientras toma una película, se grabará el sonido del funcionamiento de la cámara. Es posible que también se grabe el sonido del botón ...
Page 50 - Visualización de imágenes; Pulse el botón
ES 16 • Se puede filmar continuamente durante 29 min (minuto) aproximadamente de una vez con los ajustes predeterminados de la cámara y cuando la temperatura es de aproximadamente 25 °CCuando termine la grabación de película, puede volver a grabar pulsando el botón MOVIE otra vez. Es posible que la ...
Page 51 - Para volver a la toma de imágenes; Pulse el botón del disparador hasta la mitad.; Guía en la cámara; Visionado de la guía; y cambiar los consejos para
ES 17 ES x Para volver a la toma de imágenes Pulse el botón del disparador hasta la mitad. Esta cámara está equipada con una guía de instrucciones incorporada. Guía en la cámara La cámara visualiza explicaciones para los elementos de MENU y los valores de los ajustes. Consejo para la toma de imagen ...
Page 52 - Presentación de otras funciones
ES 18 Las otras funciones se pueden realizar utilizando la rueda de control, el botón MENU, etc. x Rueda de control DISP (Mostrar contenido): Le permite cambiar la visualización en la pantalla. (Modo flash): Le permite seleccionar un modo de flash para imágenes fijas. / (Compensar exp./Creatividad f...
Page 53 - Menú de toma de imágenes fijas
ES 19 ES x Anillo de control Las funciones favoritas se pueden asignar al anillo control; al hacer la toma, los ajustes establecidos se pueden cambiar simplemente girando el anillo de control. x Elementos del menú Menú de toma de imágenes fijas Tamaño de imagen Selecciona el tamaño de las imágenes f...
Page 56 - Menú de reproducción
ES 22 Menú de reproducción Función botón izquierdo Asigna las funciones deseadas al botón izquierdo. Función botón derecho Asigna las funciones deseadas al botón derecho. Asistencia MF Visualiza una imagen ampliada cuando se enfoca manualmente. Tiempo aumento enfoq. Ajusta el tiempo que será mostrad...
Page 58 - Conecte la cámara a un ordenador.
ES 24 * Aparece cuando se inserta una tarjeta Eye-Fi (se vende por separado) en la cámara. El software incorporado “PlayMemories Home” le permite importar imágenes fijas y películas a su ordenador y utilizarlas.Puede tomar o reproducir imágenes en esta cámara aunque no instale “PlayMemories Home”, s...
Page 59 - Características de “PlayMemories Home”; en una visualización de calendario.
ES 25 ES • “PlayMemories Home” no es compatible con Mac OS. Si reproduce imágenes en un ordenador Mac, utilice las aplicaciones que hay instaladas en su ordenador Mac.Para más detalles, visite la URL siguiente:http://www.sony.co.jp/imsoft/Mac/ x Características de “PlayMemories Home” Lo de abajo son...
Page 60 - “Image Data Converter” le permite desarrollar imágenes RAW.; Características de “Image Data Converter”; tales como curva de tono o nitidez.; Instalación de “Image Data Converter”
ES 26 “Image Data Converter” le permite desarrollar imágenes RAW. x Características de “Image Data Converter” Lo de abajo son ejemplos de las funciones disponibles cuando usted utiliza “Image Data Converter”. • Puede editar imágenes RAW utilizando múltiples funciones de corrección, tales como curva ...
Page 62 - Notas sobre la utilización de la cámara
ES 28 • El tiempo grabable de películas varía porque la cámara está equipada con VBR (Velocidad de bits variable), que ajusta automáticamente la calidad de imagen dependiendo de la escena que se está tomando. Cuando grabe un motivo que se mueve rápidamente, la imagen será más clara pero el tiempo gr...
Page 65 - Cámara; Especificaciones
ES 31 ES Cámara [Sistema] Dispositivo de imagen: Sensor 13,2 mm × 8,8 mm (tipo 1,0) Exmor CMOS Número total de píxeles de la cámara: Aprox. 20,9 Megapíxeles Número efectivo de píxeles de la cámara: Aprox. 20,2 Megapíxeles Objetivo: Objetivo zoom 3,6× Carl Zeiss Vario-Sonnar T * f = 10,4 mm – 37,1 mm...
Page 66 - Batería recargable NP-BX1
ES 32 [Conectores de entrada y salida] Conector HDMI: Microtoma HDMIConector micro USB: Comunicación USB Comunicación USB: Hi-Speed USB (USB 2.0) [Pantalla] Pantalla LCD: 7,5 cm (tipo 3,0) unidad TFT Número total de puntos: 1 228 800 puntos [Alimentación, general] Alimentación: Batería recargable NP...
Page 67 - Marcas comerciales
ES 33 ES Marcas comerciales • Las marcas siguientes son marcas comerciales de Sony Corporation. , “Cyber-shot”, “Memory Stick PRO Duo”, “Memory Stick PRO-HG Duo”, “Memory Stick Duo”, “Memory Stick Micro” • “AVCHD Progressive” y el logotipo de “AVCHD Progressive” son marcas comerciales de Panasonic C...
Page 68 - Printed in China


 Sony A6400 + SEL-P1650 Black (ILCE-6400L/B)
User Manual
Sony A6400 + SEL-P1650 Black (ILCE-6400L/B)
User Manual
 Sony A6600 Body Black (ILCE-6600/B)
User Manual
Sony A6600 Body Black (ILCE-6600/B)
User Manual
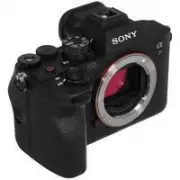
 Sony A7R Mark IV Body (ILCE-7RM4)
User Manual
Sony A7R Mark IV Body (ILCE-7RM4)
User Manual
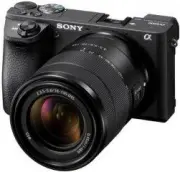
 Sony Alpha 6500 (ILCE-6500)
User Manual
Sony Alpha 6500 (ILCE-6500)
User Manual
 Sony Alpha 6500 + 18-135mm (ILCE-6500M/B)
User Manual
Sony Alpha 6500 + 18-135mm (ILCE-6500M/B)
User Manual
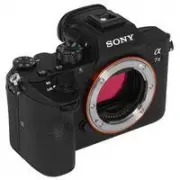 Sony Alpha 7 III
User Manual
Sony Alpha 7 III
User Manual
 Sony Alpha 7 IV
User Manual
Sony Alpha 7 IV
User Manual
 Sony Alpha 7C
User Manual
Sony Alpha 7C
User Manual
 Sony Alpha 7C Body Silver
User Manual
Sony Alpha 7C Body Silver
User Manual
 Sony Alpha a6400 + E 16-55 mm f/2.8 G (ILCE6400G.CEC)
User Manual
Sony Alpha a6400 + E 16-55 mm f/2.8 G (ILCE6400G.CEC)
User Manual
 Sony Alpha a6500 body (ILCE6500B.CEC)
User Manual
Sony Alpha a6500 body (ILCE6500B.CEC)
User Manual
 Sony Cyber-shot DSC-H55 Black
User Manual
Sony Cyber-shot DSC-H55 Black
User Manual
 Sony Cyber-shot DSC-HX10 Black
User Manual
Sony Cyber-shot DSC-HX10 Black
User Manual
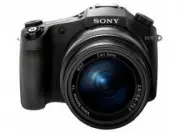 Sony Cyber-shot DSC-RX10
User Manual
Sony Cyber-shot DSC-RX10
User Manual
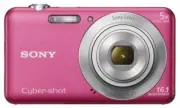 Sony Cyber-shot DSC-W710 Pink
User Manual
Sony Cyber-shot DSC-W710 Pink
User Manual
 Sony DCZV1/B
User Manual
Sony DCZV1/B
User Manual
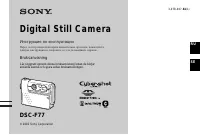 Sony DSC-F77
Manual
Sony DSC-F77
Manual