Page 2 - CAUTION; WARNING; Declaration of Conformity; SONY
2 To prevent fire or shock hazard, do not expose the unit to rain or moisture. If you have any questions about this product, you may call: Sony Customer Information Services Center 1-800-222-SONY (7669) The number below is for the FCC related matters only. CAUTION You are cautioned that any changes ...
Page 3 - For the Customers in Germany
3 Note: This equipment has been tested and found to comply with the limits for a Class B digital device, pursuant to Part 15 of the FCC Rules. These limits are designed to provide reasonable protection against harmful interference in a residential installation. This equipment generates, uses, and ca...
Page 4 - Trademarks; Attention
4 This product has been tested and found compliant with the limits sets out on the EMC Directive for using connection cables shorter than 3 meters. The electromagnetic fields at the specific frequencies may influence the picture and sound of this camera. For the Customers in the U.S.A. and Canada TH...
Page 5 - Before using your camera
5 Before using your camera Trial recording Before you record one-time events, you may want to make a trial recording to make sure that the camera is working correctly. No compensation for contents of the recording Contents of the recording cannot be compensated for if recording or playback is not po...
Page 6 - Table of contents; Getting started
6 Table of contents Before using your camera ......................... 5Identifying the parts .................................. 8 Preparing batteries .................................. 14Charging the batteries ............................. 14Inserting the batteries .............................. 17...
Page 14 - Preparing batteries; Use the following batteries in this camera.; Acceptable batteries; Charging the batteries
14 Preparing batteries Use the following batteries in this camera. Acceptable batteries R6 (size AA) Nickel-Metal Hydride batteries (2) – NH-AA-DI (2) (supplied) – NH-AA-2DI twin-pack (recommended, not supplied) Batteries that cannot be used Manganese batteries, lithium batteries, ni-cad batteries, ...
Page 15 - • To use up the batteries completely, put; Charging time
15 G e tt in g st ar te d Charging the Nickel-Metal Hydride batteries • If the poles of the Nickel-Metal Hydride batteries are dirty, the batteries may not charge properly. Occasionally clean the poles of the batteries and the terminals of the charger by wiping them with a dry cloth. • At the time o...
Page 16 - Battery half full; Flashing
16 Charging the Nickel-Metal hydride batteries (continued) Battery remaining indicator As the battery power decreases with use, the Battery remaining indicator displays the amount of power remaining using the following symbols. • If the LCD screen is off, press the DISPLAY/LCD ON/OFF button to turn ...
Page 17 - Inserting the batteries; Open the Battery cover.; Match the; Close the Battery cover.; To remove the batteries
17 G e tt in g st ar te d Inserting the batteries , Open the Battery cover. Slide it in the direction of the arrow, and it opens out. , Insert the batteries. Match the + / − poles of the batteries to the + / − marks inside the battery case. • Occasionally clean the poles of the batteries and the ter...
Page 19 - Using an external power source; Connect the cable with the; DC plug; Power sources; , if necessary, depending on the design of
19 G e tt in g st ar te d Using an external power source , Open the DC IN jack cover, then connect the AC-LS1 AC power adaptor (not supplied) to the DC IN jack of the camera. Connect the cable with the v mark facing up. • Connect the AC power adaptor to an easily accessible wall outlet (mains) close...
Page 20 - Turning on/off your camera; Press the POWER button.; To turn off the power; POWER button; or the VIDEO OUT jack
20 Turning on/off your camera , Press the POWER button. The POWER ON/OFF lamp lights in green, the power is on. When you turn on your camera for the first time, the CLOCK SET screen appears (see the next page). To turn off the power If you press the POWER button again, the POWER ON/OFF lamp goes out...
Page 21 - Setting the date and time; Set the mode dial to; Mode dial
21 G e tt in g st ar te d Setting the date and time , Set the mode dial to . • To change values for the time and the date that have been previously set, change the mode dial to SET UP, choose [CLOCK SET] in SETUP 1 (page 97), then proceed from Step 3 . • You can also carry out this operation when th...
Page 22 - on the control
22 Setting the date and time (continued) , Choose the year, month, day, hour, and minute items using b / B . A v will be shown above, and a V will be shown below the item currently selected to be set. , Set the desired numerical value using v / V on the control button, then press the center z . Afte...
Page 23 - Inserting and removing a “Memory Stick”; Insert the “Memory Stick.”; To remove the “Memory Stick”; • Whenever the Access lamp is lit, the; Shooting still images
23 S hoot ing st ill i m a g es Inserting and removing a “Memory Stick” , Open the “Memory Stick” cover. Slide the cover in the direction of the arrow to open it. , Insert the “Memory Stick.” Insert the “Memory Stick” all the way in until it clicks, as shown in the illustration. • Whenever you inser...
Page 24 - Deciding the still image size and quality; The image size is set.; Menu button
24 Deciding the still image size and quality , Set the mode dial to , turn on the power, and then push the MENU button. The menu appears. • You can also carry out this operation when the mode dial is set to SCN. • (SPOT METER) is not displayed on the menu of the DSC-P51/P31 (page 61). , Select (Imag...
Page 25 - Image size and quality; Image size; Very fine prints; The number of images* that can be saved in a “Memory Stick”; Capacity
25 S hoot ing st ill i m a g es Image size and quality You can choose image size (number of pixels) and image quality (compression ratio) based on the kind of images you want to shoot. The larger you make the image size and the higher you make the image quality, the better your image, but also the l...
Page 26 - Basic still image shooting (using auto adjustment mode)
26 Basic still image shooting (using auto adjustment mode) , Set the mode dial to , and turn on your camera. • The lens cover opens when the power is turned on. • When the camera is turned on or when using the zoom, and the lens is moving, don’t touch the lens assembly (DSC-P71 only) (page 28). • Wh...
Page 27 - Press the shutter fully down.; About Auto Focus
27 S hoot ing st ill i m a g es , Press the shutter fully down. A beeping sound is heard, the shooting is completed, and the still image is saved in the “Memory Stick.” When the Recording lamp (page 9) goes out, you can shoot the next image. • When you are shooting with the battery, if no tasks are ...
Page 28 - Using the zoom feature; inches) for both W and T; Digital zoom
28 Using the zoom feature , Press the W (wide angle) or the T (telephoto) side of the Zoom button to choose the desired image size, and shoot your image. The minimum distance needed to focus on a subject (From the end of the lens when the zoom button is set all the way to either the W or T side) DSC...
Page 29 - To return to normal shooting; Press
29 S hoot ing st ill i m a g es , Set the mode dial to , and press B ( ) on the control button. (Macro) appears on the LCD screen. • If the menu is currently displayed, press the MENU button first and the menu disappears. • You can perform this operation even when the mode dial is set to SCN (other ...
Page 30 - Selecting a flash mode; Set the mode dial to select; When POWER SAVE is OFF
30 , Center the subject in the frame, and press the shutter all the way down. The Self-timer lamp (page 8 for the DSC-P71, page 10 for the DSC-P51, page 12 for the DSC-P31) will blink in orange, and you will hear a beeping sound. The image will be shot within approximately 10 seconds. To cancel the ...
Page 31 - appears on the LCD
31 S hoot ing st ill i m a g es To reduce “red-eye” when shooting live subjects When the flash begins to strobe before the image is shot, the red-eye phenomenon is reduced. In SET UP, set [RED EYE REDUCTION] to [ON] (page 97). appears on the LCD screen. • The amount of red-eye reduction possible var...
Page 32 - Shooting with the finder; Set the mode dial to SET UP.; The SET UP menu is displayed.; Finder
32 Shooting with the finder The finder is convenient when you want to save battery power, or when it is difficult to confirm the image using the LCD screen. Each time you press the DISPLAY/LCD ON/OFF button, the display changes in the following order. When the LCD screen display is off (only warning...
Page 33 - Select; and press; on the
33 S hoot ing st ill i m a g es , Select ( CAMERA ) using v / V on the control button and press B . Select [ DATE/TIME ] using v / V and press B . , Choose the type of data to be inserted using v / V on the control button, then press the center z . DAY & TIME: Inserts the date and the time of sh...
Page 34 - Twilight portrait mode; Landscape mode; Twilight mode; MENU button
34 Shooting according to scene conditions (SCENE SELECTION) Ordinarily shoot with the camera set to Auto (mode dial: ), but when shooting scenes or people in the dark places, or shooting landscapes, use the modes listed below to increase the quality of your images. Twilight mode Under dark lighting ...
Page 35 - NR slow shutter
35 S hoot ing st ill i m a g es , Select [SCN] using b / B on the control button. • (SPOT METER) is not displayed on the menu of the DSC-P51/P31 (page 61). , Select the desired mode using v / V on the control button. The mode will be set to your choice. When the setting is completed, press the MENU ...
Page 36 - Viewing single images; The last image you shot will be displayed.; Viewing still images
36 Viewing images on the LCD screen of your camera You can see the images you shoot with this camera almost immediately on the LCD screen. This camera offers the following three methods for viewing your images. Single (single-image display) You can view one image at a time, occupying the entire scre...
Page 37 - Select Still Image using; To return to the single-image screen
37 V ie w in g st ill im ages , Select Still Image using b / B on the control button. b : Displays the previous image. B : Displays the next image. Viewing Index (nine- or triple-image display) , Press the Zoom W button once. The display switches to the Index (nine- image) screen . To display the pr...
Page 38 - Viewing images on a TV screen; VIDEO OUT jack
38 Viewing images on a TV screen , Using the video connecting cable, connect the VIDEO OUT jack of the camera to the Image of the TV set. • Connect the video cable to the camera and the TV set only after confirming that both are turned off. , Turn on the power of the TV set, and set the TV/Video tog...
Page 39 - NTSC system; Brazil; SECAM system; Deleting images; Press the MENU button, press; Deleting still images
39 D e le tin g s till ima g e s Watching the playback picture on TV If you want to view the playback picture on a TV, you need a TV having a video input jack and a video connecting cable.The color system of the TV must be the same as that of your digital still camera. Check the following list: NTSC...
Page 40 - To cancel the deletion; Using; To delete all the images
40 Deleting images (continued) , Select [OK] using v on the control button, then press the center z . “MEMORY STICK ACCESS” appears on the screen. When this message disappears, the image has been deleted. To cancel the deletion Using V on the control button, choose [CANCEL], then press the center z ...
Page 41 - The; on the control button.
41 D e le tin g s till ima g e s , Select the image you want to delete using v / V / b / B on the control button then press the center z . The (Delete) mark appears on the selected image. At this point, the image has not yet been deleted. Put the (Delete) marks on all of the images you want to delet...
Page 42 - Use
42 Deleting on the Index (triple-image) screen (continued) , Press the MENU button, and select [DELETE] using the V on the control button, then press the center z . At this point, the image has not yet been deleted. , Select [OK] using v on the control button, then press the center z . When “MEMORY ...
Page 43 - Formatting a “ Memory Stick”; When you; To cancel the formatting
43 D e le tin g s till ima g e s Formatting a “ Memory Stick” , Insert the “Memory Stick” you want to format into the camera. Set the mode dial to SET UP, and turn on the power. • The term “formatting” means preparing a “Memory Stick” to record images; this process is also called “initialization.” T...
Page 44 - Recommended Windows environment; USB mode; OS; Copying still images to your computer
44 Copying still images to your computer Follow the steps below to copy the images you shot to your computer. Steps required by your OS (Operating System) • Step 1 may be unnecessary depending on your OS. • After you complete the installation of the USB driver, step 1 is unnecessary. Recommended com...
Page 45 - Installing the USB driver; • Shut down all other applications before
45 C o p y in g s till ima g e s to y o u r c o m p u te r 1 Installing the USB driver , Turn on your computer, and insert the supplied CD-ROM into the CD-ROM drive. Do not connect your camera to your computer at this time. The opening window appears. If it does not appear, double-click (My Computer...
Page 46 - Preparing your camera
46 , Click [Yes, I want to restart my computer now], then click [Finish]. Your computer restarts. Then, you can establish the USB connection. • You can use the “PIXELA ImageMixer for Sony” software to copy images to your computer. To install this software, click “PIXELA ImageMixer,” on the opening s...
Page 47 - Connecting your camera to your computer; Click; For Windows 98 or 98SE users; Carry out only Step 5 above.
47 C o p y in g s till ima g e s to y o u r c o m p u te r 3 Connecting your camera to your computer , Open the jack cover, and connect the supplied USB cable to your camera. Then, connect the other end of the USB cable to your computer. • When using a desktop computer, connect the USB cable to the ...
Page 48 - Copying images; The “100MSDCF” folder opens.
48 4 Copying images , Double-click [My Computer], then double-click [Removable Disk]. The contents of the “Memory Stick” inserted in your camera appear. • This section describes an example of copying images into the “My Documents” folder. • When using Windows XP, see pages 49 to 51. • When the “Remo...
Page 49 - Click here
49 C o p y in g s till ima g e s to y o u r c o m p u te r 4 Copying images , Click [Copy pictures to a folder on my computer using Microsoft Scanner and Camera Wizard] window, then click [OK]. The “Scanner and Camera Wizard” window appears. • When following the steps on page 47, the copy wizard app...
Page 51 - The wizard window closes.; Image file storage destinations and file names; Folder containing E-mail mode image data
51 C o p y in g s till ima g e s to y o u r c o m p u te r , Click [Finish]. The wizard window closes. • When you want to continue copying other images, disconnect the USB cable once and reconnect it. Then, follow the process from Step 1 . 6 Click here Image file storage destinations and file names ...
Page 52 - Note on the table
52 Image file storage destinations and file names (continued) Note on the table • The meanings of the file names are as above: ssss stands for any number within the range from 0001 to 9999. • The numerical portions of the following files are the same. – A small-size image file shot in E-MAIL mode an...
Page 53 - Viewing the images on your computer; The “My Documents” folder opens.
53 C o p y in g s till ima g e s to y o u r c o m p u te r 5 Viewing the images on your computer , Double-click [My Documents] on the desktop. The “My Documents” folder opens. • This section describes the steps followed for copying images to the “My Documents” folder on pages 48, 49. • When using Wi...
Page 54 - For Macintosh users
54 For Macintosh users Follow the steps below, according to your OS. 1 Installing the USB driver (For Mac OS 8.5.1, 8.6, or 9.0 users only) 1 Turn on your computer, and set the supplied CD-ROM to the CD-ROM drive.The “PIXELA ImageMixer” window appears. 2 Double-click (Setup Menu). 3 Click (USB Drive...
Page 55 - Changing menu settings; Press the MENU button.; Mode Dial; Before advanced operations
55 B e fo re adv a nced op er at io ns How to setup and operate your camera Here we will explain the most commonly used menus and the SET UP screen. Changing menu settings a Press the MENU button and the menu will be displayed. b Select the setting item you want to change using b / B on the control ...
Page 56 - • When the subject is at the brightest or; Shooting techniques; Advanced still image shooting
56 Adjusting the exposure – EV adjustment Mode dial: /SCN/ Used when you want to change the automatic exposure to one of your own choice. The value can be set over a range from +2.0EV to –2.0EV, in 1/3EV increments. a Set the mode dial to , SCN, or . b Press the MENU button. The menu appears. c Sele...
Page 57 - Adjusting color tones; – WHITE BALANCE; Used when shooting under a cloudy sky.; In Step; Control button
57 Adv a nced s til l i m age s hoot ing Adjusting color tones – WHITE BALANCE Mode dial: /SCN/ When shooting images using automatic features, the white balance is set automatically in response to the condition of the subject, and the overall color balance is adjusted accordingly. When you want to f...
Page 58 - Multipoint AF
58 Choosing a focus method – MULTI AF/CENTER AF Mode dial: /SCN/ Multipoint AF When you use Multipoint AF, it calculates the distance in three places, in the center of the image, and to both the left and right of the center, you can shoot with the auto focus function without being dependent on the c...
Page 59 - AF range finder
59 Adv a nced s til l i m age s hoot ing Shooting with the AF lock using Center AF If it is difficult to focus because the subject is not in the center of the frame, you can focus in this situation using the AF range finder. For example, when you are shooting two human subjects, and there is a gap b...
Page 60 - To return to auto focus; Press the MENU button again, select; Adding special effects; SOLARIZE; SEPIA
60 Setting the distance to the subject – Focus preset Mode dial: /SCN/ When shooting an image using a previously set distance to the subject, or when shooting a subject through a net or through window glass, it is difficult to get the proper focus using the auto focus function. This is when use of t...
Page 61 - Shutter button
61 Adv a nced s til l i m age s hoot ing a Set the mode dial to , SCN, or . b Press the MENU button. The menu appears. c Select [PFX] (P. EFFECT) using b / B , then select the desired mode using v / V . To cancel Picture Effect In Step 3 , select [OFF] Spot light-metering Mode dial: /SCN/ When there...
Page 63 - Before using Clip Motion
63 Adv a nced s til l i m age s hoot ing Before using Clip Motion In [MOVING IMAGE] in SET UP, select [CLIP MOTION] (pages 55, 97). a Set the mode dial to . b Press the MENU button. The menu appears. c Select (IMAGE SIZE) using b / B , and select the desired mode using v / V . d Shoot one frame. e S...
Page 64 - Before using Multi Burst
64 Shooting in Multi Burst mode – MULTI BURST Mode dial: Pressing the shutter once records 16 frames in a row. This is convenient for checking your form in sports, for example. You can set the interval between frames using the menu. Before using Multi Burst In [MOVING IMAGE] in SET UP, select [MULTI...
Page 65 - All of the frames are deleted.; To return to Normal mode
65 Adv a nced s til l i m age s hoot ing Deleting shot images When using this mode, you cannot delete only certain frames. When you delete images, all 16 of the frames are deleted at the same time. a Set the mode dial to . b Press the MENU button and select [DELETE] from the menu, then press the cen...
Page 66 - Enlarging an image; – Playback; Press the center; Advanced still image viewing
66 Enlarging a portion of a still image Mode dial: You can enlarge an image up to five times the size of the original image. You can also record the enlarged image as a new file. Enlarging an image – Playback zoom a Set the mode dial to . b Display the image you want to enlarge. c Press the T zoom b...
Page 67 - – Trimming
67 A d van c e d s til l image view ing Recording an enlarged image – Trimming a After you have viewed an image using playback zoom, press the MENU button. b Select [TRIMMING] using B , then press the center z . c Select the image size using v / V , then press the center z . The image is recorded, a...
Page 68 - Rotating still images
68 To stop the playback of the slide show Press the center z , select [EXIT] using B , then press the center z . To fast forward or to go back to a previous image during a slide show Press the B (Forward), or the b (Backward). • The interval settings are just guidelines. The actual intervals differ,...
Page 69 - Protecting images; For single images; mark is shown on the screen.; Still image editting
69 S til l i m a g e e d itti n g Protecting images – PROTECT Mode dial: To prevent accidental erasure of an important image, you can protect it. For single images a Set the mode dial to . b Display the image you want to protect using b / B . c Press the MENU button. The menu appears. d Select [PROT...
Page 71 - Changing image size
71 S til l i m a g e e d itti n g To remove protection from previously protected images In Step 4 , select the image from which you want to remove protection, and press the center z . To remove protection from all of your images, repeat this process for each of them. Changing image size – RESIZE Mod...
Page 74 - Shooting movies; Enjoying movies
74 Shooting movies Mode dial: You can shoot movies. Sound cannot be recorded with movies. Before starting In [MOVING IMAGE] in SET UP, select [MPEG MOVIE] (pages 55, 97). a Set the mode dial to . b Press the MENU button. The menu appears. c Select (Image size) using b / B , and select the desired mo...
Page 75 - Playback bar
75 E n jo yi ng mo v ies Viewing movies on the LCD screen Mode dial: You can view movies on the LCD screen of the camera. a Set the mode dial to . b Select the desired movie using b / B . Movies are displayed a size smaller than still images. c Press the center z . The movie is played back. B (PLAYB...
Page 76 - Deleting movies; center
76 Deleting movies Mode dial: Deleting on the single screen a Set the mode dial to . b Select the movie you want to delete using b / B . c Press the MENU button. The menu appears. d Select [DELETE] using b / B and press the center z . The movie has not yet been deleted at this point. e Select [OK] u...
Page 78 - Editing movies; Cutting movies; The playback of the movie starts.; Delete scene A and B if they are
78 Editing movies Mode dial: With the mode dial, you can cut movies, or delete unnecessary portions of movies. This is the recommended mode to use when the “Memory Stick” capacity is insufficient, or when you attach movies to your e-mail messages. The file numbers assigned when movies are cut The fi...
Page 80 - Before starting; Install the USB driver.; For Windows XP users
80 Copying movies to your computer Follow the steps below to copy movies you shot to your computer. Before starting 1 Install the USB driver. 2 Insert the “Memory Stick” on which the movies are stored, into your camera. Then, turn on the camera. 3 Connect the camera to your computer. • For details, ...
Page 82 - If the; ss; Batteries and Power; RESET button; Symptom; Troubleshooting
82 Troubleshooting If you have trouble with your camera, try the following solutions. 1 Check the items on pages 82 to 88. If the screen or the display window shows “C: ss : ss ”, the self- diagnostics function is working. Please see page 90. 2 Press the RESET button (pages 9, 11, 13) on the bottom ...
Page 83 - Shooting Still images/Movies
83 Troubl e s hoo ting Shooting Still images/Movies Symptom Cause Solution The LCD screen does not light when the power is turned on. • The power was turned off with the LCD screen set to [OFF] the last time the camera was used. p Turn the LCD screen [ON] (page 32). The subject is not visible on the...
Page 85 - Viewing images
85 Troubl e s hoo ting Viewing images Deleting/Editing an image Symptom Cause Solution The image cannot be played back. • The mode dial is not set to . • When you load an image modified using the retouch software on your computer or directly on the camera, the image format differs so the “FILE ERROR...
Page 86 - Computers; • The USB connectors on your personal computer; You cannot copy images.; • The camera is not correctly connected to your
86 Computers Symptom Cause Solution You do not know the OS of your computer. — p Check “Recommended computer environment” (page 44). You cannot install the USB driver. — p In Windows 2000, log on as Administrators (page 45). Your personal computer does not recognize your camera. • The camera is turn...
Page 87 - “Memory Stick”
87 Troubl e s hoo ting Computers (continued) “Memory Stick” Others Symptom Cause Solution The image is affected by noise when you play back an image on a computer. • You are playing back the file directly from the “Memory Stick.” p Copy the file to the hard disk of the computer and then play the fil...
Page 88 - The lens gets fogged.; • Condensation is occurring.
88 The power is on, but the camera does not work. • The built-in microcomputer is not working properly. p Remove, and then, after one minute, reinstall the battery. If this doesn’t work, press the RESET button on the bottom of the camera with pointed object, then turn the power on again. (This will ...
Page 90 - Self-diagnostics display; Code; • Turn the power off and on again
90 Self-Diagnostics Display – When a message starting with a letter of the alphabet appears Your camera has a self-diagnostics display. This function displays the condition of the camera on the LCD screen using a combination of a letter and four numerical digits. If this occurs, check the following ...
Page 91 - Clip Motion; Additional information
91 A d d ition a l info rm a tio n The number of images that can be saved/shooting time The number of images that can be saved and the shooting time are different, depending on the capacity of the “Memory Stick,” the image size, and the image quality. Refer to the following charts when you choose a ...
Page 92 - Menu items; Item
92 Menu items Menu items that can be changed differ depending on the position of the mode dial. The LCD screen shows only the items you can operate based on the current position of the mode dial. Factory settings are indicated with x . When the mode dial is set to , SCN Item Setting Description SCN ...
Page 97 - SET UP items
97 A d d ition a l info rm a tio n SET UP items CAMERA SETUP 1 Item Setting Description MOVING IMAGE x MPEG MOVIE / CLIP MOTION / MULTI BURST Selects the shooting mode (pages 55, 62, 64, 74). DATE/TIME DAY & TIME / DATE / x OFF Selects whether to insert the date and time into the image (page 32)...
Page 99 - Precautions; Cleaning; • The camera is brought from a cold
99 A d d ition a l info rm a tio n Precautions Cleaning Cleaning the LCD screen Clean the screen surface with an LCD cleaning kit (not supplied) to remove fingerprints, dust, etc. Cleaning the lens Wipe the lens with a soft cloth to remove fingerprints, dust, etc. Cleaning the camera surface Clean t...
Page 100 - The “ Memory Stick”; Effective use of the battery; • Battery performance decreases in low-; Connector
100 The “ Memory Stick” “Memory Stick” is a new compact, portable and versatile IC recording medium with a data capacity that exceeds the capacity of a floppy disk. There are two types of “Memory Stick”: an ordinary “Memory Stick” and a “MagicGate Memory Stick” that are equipped with the MagicGate c...
Page 101 - Battery life; • The battery life is limited. Battery; Specifications; System
101 A d d ition a l info rm a tio n Battery life • The battery life is limited. Battery capacity decreases little by little as you use it more and more, and as time passes. When the battery operating time seems to have been considerably shortened, a probable cause is that the battery pack has reache...
Page 102 - LCD screen; Accessories
102 LCD screen LCD panel used DSC-P71 3.8 cm (1.5 type) TFT drive DSC-P51 4.0 cm (1.6 type) TFT drive DSC-P31 4.0 cm (1.6 type) TFT drive Total number of dots DSC-P71 123 200 (560×220) dots DSC-P51 61 600 (280×220) dots DSC-P31 61 600 (280×220) dots Power, etc. Power AA nickel hydride batteries (2)2...
Page 103 - The LCD screen; For shooting still images
103 A d d ition a l info rm a tio n The LCD screen For shooting still images A Image size indicator (24, 25) B Recording mode indicator (65) C AE/AF LOCK indicator (26, 59) D Remaining battery indicator display (16) E Flash mode (30) /Red-eye reduction (31) /White balance indicator (57) /AF illumina...
Page 104 - For shooting movies; qa
104 For shooting movies A Recording mode indicator (74) B Remaining battery indicator display (16) C White balance indicator (57) D Picture effect indicator (60) E Spot light-metering aiming point (61) F AF range finder (58) G Image size indicator (74) H Recording time remaining indicator (Maximum r...
Page 105 - For still image playback
105 A d d ition a l info rm a tio n For still image playback A Recording mode indicator (65) B Protection indicator (69) /Print mark indicator (72) C Zoom indicator (66) D File name (52) E Number of pages recorded in “Memory Stick” (25) F Remaining “Memory Stick” capacity indicator (25) G Image numb...
Page 106 - Index
106 Index A Access lamp ..................................................... 23 AE/AF lock ................................................ 26, 59 AE/AF lock lamp ............................................... 9 AF illuminator ..................................... 12, 31, 97 AF lock .................
Page 108 - Sony Corporation Printed in Japan
307435113 Sony Corporation Printed in Japan Printed on recycled paper using VOC (Volatile Organic Compound)-free vegetable oil based ink.


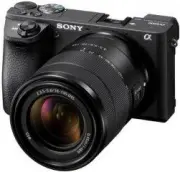
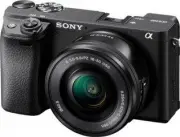 Sony A6400 + SEL-P1650 Black (ILCE-6400L/B)
User Manual
Sony A6400 + SEL-P1650 Black (ILCE-6400L/B)
User Manual
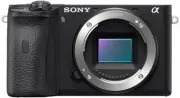 Sony A6600 Body Black (ILCE-6600/B)
User Manual
Sony A6600 Body Black (ILCE-6600/B)
User Manual
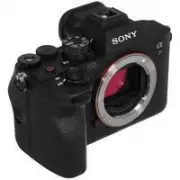
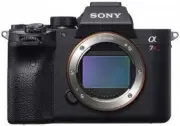 Sony A7R Mark IV Body (ILCE-7RM4)
User Manual
Sony A7R Mark IV Body (ILCE-7RM4)
User Manual
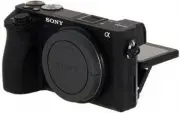 Sony Alpha 6500 (ILCE-6500)
User Manual
Sony Alpha 6500 (ILCE-6500)
User Manual
 Sony Alpha 6500 + 18-135mm (ILCE-6500M/B)
User Manual
Sony Alpha 6500 + 18-135mm (ILCE-6500M/B)
User Manual
 Sony Alpha 7 III
User Manual
Sony Alpha 7 III
User Manual
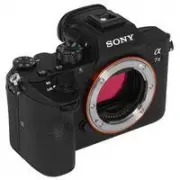
 Sony Alpha 7 IV
User Manual
Sony Alpha 7 IV
User Manual
 Sony Alpha 7C
User Manual
Sony Alpha 7C
User Manual
 Sony Alpha 7C Body Silver
User Manual
Sony Alpha 7C Body Silver
User Manual
 Sony Alpha a6400 + E 16-55 mm f/2.8 G (ILCE6400G.CEC)
User Manual
Sony Alpha a6400 + E 16-55 mm f/2.8 G (ILCE6400G.CEC)
User Manual
 Sony Alpha a6500 body (ILCE6500B.CEC)
User Manual
Sony Alpha a6500 body (ILCE6500B.CEC)
User Manual
 Sony Cyber-shot DSC-H55 Black
User Manual
Sony Cyber-shot DSC-H55 Black
User Manual
 Sony Cyber-shot DSC-HX10 Black
User Manual
Sony Cyber-shot DSC-HX10 Black
User Manual
 Sony Cyber-shot DSC-RX10
User Manual
Sony Cyber-shot DSC-RX10
User Manual
 Sony Cyber-shot DSC-W710 Pink
User Manual
Sony Cyber-shot DSC-W710 Pink
User Manual
 Sony DCZV1/B
User Manual
Sony DCZV1/B
User Manual
 Sony DSC-F77
Manual
Sony DSC-F77
Manual