Page 2 - Overview
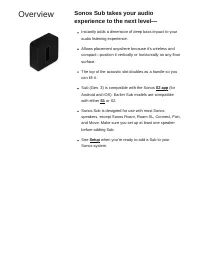
Overview Sonos Sub takes your audioexperience to the next level— Instantly adds a dimension of deep bass impact to youraudio listening experience. Allows placement anywhere because it’s wireless andcompact—position it vertically or horizontally on any floorsurface. The top of the acoustic slot doubl...
Page 3 - Controls and buttons
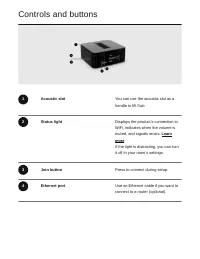
Controls and buttons 1 Acoustic slot You can use the acoustic slot as ahandle to lift Sub. 2 Status light Displays the product's connection toWiFi, indicates when the volume ismuted, and signals errors. Learn more If the light is distracting, you can turnit off in your room’s settings. 3 Join button...
Page 4 - Select a location
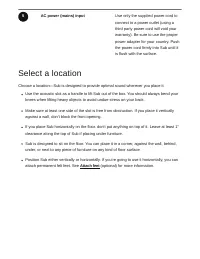
5 AC power (mains) input Use only the supplied power cord toconnect to a power outlet (using athird party power cord will void yourwarranty). Be sure to use the properpower adapter for your country. Pushthe power cord firmly into Sub until itis flush with the surface. Select a location Choose a loca...
Page 5 - Connect the cables
Connect the cables 1 Attach the power cord and plug inSub. Be sure to push the power cordfirmly into Sub until it is flush with thesurface. 2 Download the Sonos app from theapp store if you don't already have it.You’ll use it to set up and control yourSonos system. See Setup for more information. No...
Page 6 - Product settings
Attach feet (optional) If you’re placing Sub horizontally on a floor, you can attach permanent felt feet ( purchased separately ) to protect your floor. If you’re putting it on a rug or using it vertically, no need to adhere the felt feet. Note: The felt feet are not removable—a strong adhesive will...
Page 7 - Change speaker pairing
Sub Toggle On or Off to turn the sound from Sub on and off. Sub level Use the slider to increase or decreasevolume. (You can use this setting to matchthe subwoofer level to the level of yourmain speakers.) Phase control Choose 0° or 180° to set the phasecontrol for your Sonos Sub or third-partysubwo...
Page 8 - Connect a second Sub
Connect a second Sub You can easily connect a second Sub to your Sonos system. Note : At least one Sub must be a Sub (Gen 3). If the button on the side is round instead of square, it's a Sub (Gen 3). You cannot pair a Sub Mini with a Sub. 1. Go to > System and choose the speaker Sub is paired wit...
Page 9 - Specifications; AUDIO; NETWORKING
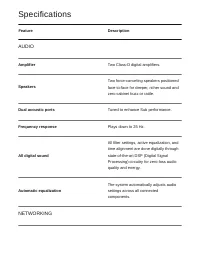
Specifications Feature Description AUDIO Amplifier Two Class-D digital amplifiers. Speakers Two force-canceling speakers positionedface-to-face for deeper, richer sound andzero cabinet buzz or rattle. Dual acoustic ports Tuned to enhance Sub performance. Frequency response Plays down to 25 Hz. All d...
Page 10 - GENERAL
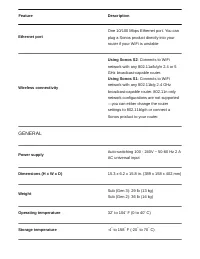
Feature Description Ethernet port One 10/100 Mbps Ethernet port. You canplug a Sonos product directly into yourrouter if your WiFi is unstable Wireless connectivity Using Sonos S2 : Connects to WiFi network with any 802.11a/b/g/n 2.4 or 5GHz broadcast-capable router. Using Sonos S1 : Connects to WiF...
Page 12 - Important safety information
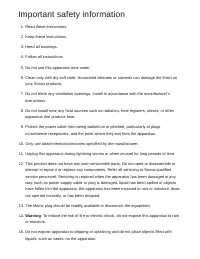
Important safety information 1. Read these instructions. 2. Keep these instructions. 3. Heed all warnings. 4. Follow all instructions. 5. Do not use this apparatus near water. 6. Clean only with dry soft cloth. Household cleaners or solvents can damage the finish on your Sonos products. 7. Do not bl...