Page 2 - Before You Use Your Microwave; CONTENTS; General information; Attach Mounting Plate to Wall; Installation Instructions
Before You Use Your Microwave CONTENTS General information Important Safety Instructions .................................. 3 Electrical Requirements .......................................... 3 Damage – Shipment/Installation.............................. 4 Parts Included...............................
Page 4 - If the unit is damaged in shipment,; return the; If the unit is damaged by the customer,; repair or; If the unit is damaged by the installer; Some extra parts are included.; HARDWARE PACKET; PART; PARTS INCLUDED; ADDITIONAL PARTS; Manual; CHARCOAL
PART QUANTITY Wood Screws 2 ( 1 ⁄ 4 “ x 2“) Toggle Bolts (andwing nuts) ( 3 ⁄ 16 “ x 3“) Self-Aligning Machine 3 Screws ( 1 ⁄ 4 “-28 x 3 1 ⁄ 4 “) Nylon Grommet(for metal cabinets) 1 • If the unit is damaged in shipment, return the unit to the store in which it was bought for repairor replacement. • ...
Page 5 - TOOLS YOU WILL NEED; or; MOUNTING SPACE; out from wall using adequate materials supporting
TOOLS YOU WILL NEED Pencil Ruler or tape measure andstraight edge Carpenter square(optional) Tin snips (for cuttingdamper, if required) Electric drill with 3 ⁄ 16 “ , 1 ⁄ 2 “ and 5 ⁄ 8 “ drill bits Hammer (optional) Stud finder or Filler blocks or scrapwood pieces, if needed for top cabinet spacing(...
Page 6 - Draw a line down the center of the studs.; FINDING THE WALL STUDS; Center; Pull the carton up and off the oven.
PLACEMENT OF THE MOUNTING PLATE 1 Installation Instructions Find the studs, using one of the followingmethods: A. Stud finder – a magnetic device whichlocates nails. B. Use a hammer to tap lightly across themounting surface to find a solid sound.This will indicate a stud location. After locating the...
Page 7 - DETERMINING WALL PLATE LOCATION UNDER YOUR CABINET; THE MICROWAVE MUST BE LEVEL.
DETERMINING WALL PLATE LOCATION UNDER YOUR CABINET C. Installation Instructions Plate position flat bottom cabinet Draw a line on theback wall equal to the depth of the frontoverhang. to Cooktop C 3/8" TO EDGE ...
Page 8 - ALIGNING THE WALL PLATE; Wear gloves; NOTE: DO NOT MOUNT THE PLATE AT THIS; toggle bolt in 2 other locations at or as close to
Installation Instructions ALIGNING THE WALL PLATE D. CAUTION: Wear gloves to avoid cutting fingers onsharp edges. Hole A Hole B Centerlinenotches Draw a Vertical Line on Wall from Center of Top Cabinet Draw a horizontal line on wall at thebottom of “Rear Wall Template”. Horizontal Line Horizontal Li...
Page 9 - INSTALLATION TYPES; OUTSIDE TOP EXHAUST; Adaptor in Place for
A INSTALLATION TYPES This microwave oven is designed for adaptation tothe following three types of ventilation: A. Outside Top Exhaust (Vertical Duct)B. Outside Back Exhaust (Horizontal Duct)C. Recirculating (Non-Vented Ductless) proceed to that section. OUTSIDE TOP EXHAUST (VERTICAL DUCT) OUTSIDE B...
Page 10 - Total Ductwork; Maximum duct length:; INSTALLATION INSTRUCTIONS FOR EXTERNAL EXHAUST DUCTING; diameter duct is acceptable to use.
EQUIVALENT NUMBER EQUIVALENT DUCT PIECES LENGTH x USED = LENGTH Rectangular-to-Round 5 Ft. (1.5 m) x ( ) = Ft. or m Transition Adaptor* Wall Cap 40 Ft. (12.2 m) x ( ) = Ft. or m 90° Elbow 10 Ft. (3 m) x ( ) = Ft. or m 45° Elbow 5 Ft. (1.5 m) x ( ) = Ft. or m 90° Elbow 25 Ft. (7.6 m) x ( ) = Ft. or m...
Page 11 - Roof Cap; Wall Cap; Total Length; EXTERNAL EXHAUST DUCTING
EQUIVALENT NUMBER EQUIVALENT DUCT PIECES LENGTH x USED = LENGTH Roof Cap 24 Ft. (7.3 m) x (1) = 24 Ft. (7.3 m) 12 Ft. (3.6 m) Straight Duct 12 Ft. (3.6 m) x (1) = 12 Ft. (3.6 m) (6”/15.2 cm Round) Rectangular-to-Round 5 Ft. (1.5 m) x (1) = 5 Ft. (1.5 m) Transition Adaptor* Equivalent lengths of duct...
Page 12 - INSTALLATION OVERVIEW; Wall
Place the mounting plate against the wall andinsert the toggle wings into the holes in the wall to mount the plate. NOTE: Before tightening toggle bolts and wood screw, make sure the bottom of the mounting plate centered under the cabinet. CAUTION: Be careful to avoid pinching fingers between the ba...
Page 13 - Blower Plate; EXHAUST; Before Rotation; Openings Facing Top
USE TOP CABINET TEMPLATEFOR PREPARATION OF TOPCABINET You need to drill holes for the top support screws, ahole large enough for the power cord to fit through,and a cutout large enough for the exhaust adaptor. A2. • Read the instructions on the TOP CABINET TEMPLATE. • Tape it underneath the top cabi...
Page 14 - IMPORTANT: If filler blocks are; Exhaust Adaptor; heat shield and door.; one of the top
3 MOUNT THE MICROWAVEOVEN FOR EASIER INSTALLATION AND PERSONALSAFETY, WE RECOMMEND THAT TWO PEOPLEINSTALL THIS MICROWAVE OVEN. NOTE: If your cabinet is metal, use the nylon grommet around the power cord hole to prevent cutting of the cord. NOTE: We recommend using filler blocks if the cabinet front ...
Page 15 - Attach the microwave oven to the top cabinet.; CONNECTING DUCTWORK; furnance; for high temperature applications.; House Duct; Insert 2nd self aligning
4 Attach the microwave oven to the top cabinet. 8 7 Cabinet Front Cabinet Bottom Shelf Tighten the outer two screws to the top of themicrowave oven. (While tightening screws, holdthe microwave oven in place against the wall andthe top cabinet.) Filler Block Microwave Oven Top Equivalent to Depth of ...
Page 16 - REMOVE BLOWER PLATE
INSTALLATION OVERVIEW B1. Prepare Rear Wall B3. Attach Mounting Plate to Wall B4. Prepare Top Cabinet B5. Adjust Blower B6. Mount the Microwave Oven IMPORTANT NOTES: • Make sure the screws for the blower motor and blower plate are securely tightened when they are reinstalled. This will help to preve...
Page 17 - USE TOP CABINET TEMPLATE; rear wall template
ATTACH THE MOUNTINGPLATE TO THE WALL B3. • Read the instructions on the TOP CABINETTEMPLATE. • Tape it underneath the top cabinet. • Drill the holes, following the instructions on theTOP CABINET TEMPLATE. CAUTION: Wear safety goggles when drilling holes in the cabinet bottom. Wall Mounting Plate Spa...
Page 18 - Remove the knockout plates in the back of the unit
Attach the exhaust adaptor to the rear of theoven by sliding it into the guides at the topcenter of the back of the oven. AFTER: Fan BladeOpenings Facing Back Place the blower unit back into the opening. Replace the blower plate in the same position is tight. Roll the blower unit 90° so that fan bla...
Page 19 - IMPORTANT: If filler blocks are not; Cabinet Front; IMPORTANT: Do not grip or use the handle
Attach the microwave oven to the top cabinet. Installation Instructions 3 MOUNT THE MICROWAVEOVEN B6. FOR EASIER INSTALLATION AND PERSONALSAFETY, WE RECOMMEND THAT TWO PEOPLEINSTALL THIS MICROWAVE OVEN. NOTE: If your cabinet is metal, use the nylon grommet around the power cord hole to preventcuttin...
Page 20 - RECIRCULATING; Cabinet
INSTALLATION OVERVIEW C1. Attach Mounting Plate to Wall C2. Prepare Top Cabinet C4.C5. Mount the Microwave Oven Installation Instructions Place the mounting plate against the wall andinsert the toggle wings into the holes in the wall to mount the plate. NOTE: Before tightening toggle bolts and wood ...
Page 21 - MOUNT THE MICROWAVE OVEN
Installation Instructions Attach the microwave oven to the top cabinet. Cabinet Front Cabinet Bottom Shelf Filler Block Microwave Oven Top Equivalent to Depthof Cabinet Recess 3 MOUNT THE MICROWAVE OVEN FOR EASIER INSTALLATION AND PERSONALSAFETY, WE RECOMMEND THAT TWO PEOPLEINSTALL THIS MICROWAVE OV...
Page 22 - MOUNT THE MICROWAVE; packed with the microwave.; C5. INSTALLING OR CHANGE; Unplug microwave oven or disconnect power.
Installation Instructions 5 MOUNT THE MICROWAVE OVEN (cont.) 8 7 microwave oven. (While tightening screws, holdthe microwave oven in place against the wall andthe top cabinet.) packed with the microwave. C4. Install grease filters. See the Use &&&&and Care C5. INSTALLING OR CHANGE TH...
Page 23 - lose the microwave door. Plug in microwave
Installation Instructions C lose the microwave door. Plug in microwave oven or reconnect power. Press the bottom of charcoal filter to place it into the correct position. 5 6 7 EN-23 Reinstall the vent cover by pushing the bottom into place. Push the vent top into position and hold in place. Replace...
Page 25 - Printed in China; Remove all packing materials from the oven.
Printed in China EN-25 Installation Instructions Operational check 1. Make sure the unit has been installed according to these instructions. 2. Remove all packing materials from the oven. 3. Replace house fuse or turn circuit breaker back on. 4. Plug power cord into receptacle . 5. Read operating in...
Page 28 - H o r n o s d e M i c r o o n d a s s o b r e :; MANUAL DE INSTALLACIÓN
H o r n o s d e M i c r o o n d a s s o b r e : MANUAL DE INSTALLACIÓN S M O 1 7 5 9 J S
Page 29 - CONTENIDOS; Información general; Colocación de la Placa de montaje; Instrucciones de Instalación
Adaptación del Ventilador de Microondas para el Escape Exterior Trasero ......................... Instalación del Horno de Microondas ..................................... Recirculación .................................... Fijación de la Placa de Montaje a la Pared .....................................
Page 30 - REQUISITOS
Este producto necesita un tomacorriente con conexión a tierra de tres clavijas. El instalador debe realizar una verificación de continuidad de tierra en la caja de salida de alimentación antes de comenzar la instalación para asegurarse de que la caja de salida esté debidamente conectada a tierra. Si...
Page 31 - Tornillos para; Si la unidad es dañada durante el envío,; INSTALACIÓN; PAQUETE DE HERRAMIENTAS; PIEZAS INCLUIDAS; PIEZAS ADICIONALES
PIEZA CANTIDAD Tornillos para Madera ( 1 / 4 "×2") 2 Tornillos de Fiador (y tuercas de alas) ( 3 / 16 "×3") 3 Tornillos Autoalineadores para Máquina ( 1 / 4 "-28×3 1 / 4 ") Ojal de Nylón (para gabinetes de metal) 1 • Si la unidad es dañada durante el envío, devuélvalo a la ti...
Page 32 - ESPACIO DE MONTAJE
HERRAMIENTAS QUE NECESITARÁ Lápiz Regla o cinta métrica y borde recto Escuadra de carpintero (opcional) Tijeras de hojalatero (para cortar el amortiguador, si es necesario) Taladro eléctrico con brocas de 3 / 16 ", 1 / 2 " y 5 / 8 " Detector de vigas Bloques de relleno o pedazos de mader...
Page 33 - EL MICROONDAS DEBE ESTAR CONECTADO; ELIMINACIÓN DEL HORNO; COLOCACIÓN DE LA PLACA DE MONTAJE; ENCUENTRO DE LOS
Instrucciones de Instalación Encuentre los montantes a través de una de las siguientes maneras: A. Buscador de montantes - un dispositivo magnético que localiza los clavos. B. Use un martillo para golpear ligeramente la superficie de montaje para encontrar un sonido sólido. Esto indicará la posición...
Page 34 - EL HORNO DE MICROONDAS DEBE ESTAR
C. DETERMINACIÓN DE LA UBICACIÓN DE LA PLACA DE PARED DEBAJO DE SU GABINETE Instrucciones de Instalación Posición de la placa - debajo del gabinete plano inferior CL Al menos 30" Sus gabinetes pueden tener moldura decorativa que interfiere con la instalación del horno de microondas. Saque la...
Page 35 - NOTA: NO INSTALE LA PLACA EN ESTE; al menos un tornillo para madera; ALINEACIÓN DE LA PLACA DE PARED
Instrucciones de Instalación PRECAUCIÓN: Lleve guantes para evitar que se corten los dedos en bordes afilados. Orificio B Dibuje Una Línea Vertical en la Pared desde el Centro del Gabinete Superior Dibuje una línea horizontal en la pared en la parte inferior de la "Plantilla de la Pared Trasera&...
Page 36 - TIPOS DE INSTALACIÓN; ESCAPE SUPERIOR; Consulte la página 12; NOTA: Lea las siguientes dos páginas solo si planea ventilar su
A TIPOS DE INSTALACIÓN (Elija A, B o C) Este horno de microondas se diseña para adaptarse a los siguientes tres tipos de ventilación: A. Escape Superior Exterior (Conducto Vertical) B. Escape Exterior Trasera (Conducto Horizontal) C. Recirculación (Sin Conductos de Ventilación) NOTA: Este horno de m...
Page 37 - no debe exceder los 120; Longitud máxima del conducto:; no; Los codos, transiciones, tapas de paredes y; INSTRUCCIONES DE INSTALACIÓN PARA CONDUCTO DE ESCAPE EXTERIOR
LONGITUD EQUIVALENTE NÚMERO UTILIZADO LONGITUD EQUIVALENTE PIEZAS DE CONDUCTO x = 5 Ft. (1 , 5 m) x ( ) = Ft. o m Adaptador de Transición de Rectangular a Redondo* Tapa de Pared 40 Ft. (12 , 2 m) x ( ) = Codo de 90º 10 Ft. (3 m) x ( ) = Codo de 45º 5 Ft. (1 , 5 m) x ( ) = Codo de 90º 25 Ft. (7 , 6 m...
Page 39 - Para usar los tornillos de fiador:; ESCAPE SUPERIOR EXTERIOR; Conducto Vertical
Ubique la placa de montaje contra la pared e inserte las alas de fiador en los orificios de la pared para instalar la placa. NOTA: Antes de apretar los tornillos de fiador y el tornillo para madera, asegúrese de que la parte inferior de la placa de montaje tenga contacto con la parte inferior de la ...
Page 40 - ADAPTACIÓN DEL; PRECAUCIÓN: No tire ni estire los cables de
USO DE LA PLANTILLA DEL GABINETE SUPERIOR PARA PREPARAR EL GABINETE SUPERIOR Es necesario perforar orificios para los tornillos de soporte superiores, un orificio de largo suficiente para que pase el cable de alimentación y un corte de largo suficiente para el adaptador de escape. A2. • Lea las inst...
Page 41 - INSTALACIÓN DEL PRODUCTO SEA REALIZADA
3 INSTALACIÓN DEL HORNO DE MICROONDAS PARA FACILITAR LA INSTALACIÓN Y GARANTIZAR LA SEGURIDAD PERSONAL, SE RECOMIENDA QUE LA INSTALACIÓN DEL PRODUCTO SEA REALIZADA POR DOS PERSONAS. IMPORTANTE: No sujete ni use la manija o el protector térmico durante la instalación. No retire los espaciadores de ca...
Page 42 - AJUSTE DEL ADAPTADOR; Inserte el segundo tornillo
4 Fije el horno de microondas al gabinete superior. 8 7 Frente del Gabinete Estante de la Parte Inferior del Gabinete Apriete los dos tornillos exteriores a la parte superior del horno de microondas. (Al apretar los tornillos, sostenga el horno de microondas en su posición contra la pared y el gabin...
Page 43 - ESCAPE EXTERIOR TRASERA; Conducto Horizontal
PERSPECTIVA DE INSTALACIÓN B1. Preparación de la Pared Trasera B2. Eliminación de la Placa del Ventilador B3. Fijación de la Placa de Montaje a la Pared B4. Preparación del Gabinete Superior B5. Ajuste del Ventilador B6. Instalación del Horno de Microondas NOTAS IMPORTANTES: • • Asegúrese de que los...
Page 45 - NOTA: Las aberturas de escape de la
Conecte el adaptador de escape a la espalda del horno deslizándolo en las guías en la parte superior central de la espalda del horno. DESPUÉS: Abertura de Aspas del Ventilador Mirando Hacia Atrás Reponga la unidad del ventilador en la abertura. Reponga la placa del ventilador en la posición original...
Page 46 - INSTALACIÓN DEL HORNO; dos vueltas completas
Fije el horno de microondas al gabinete superior. Instrucciones de Instalación 3 INSTALACIÓN DEL HORNO DE MICROONDAS B6. PARA FACILITAR LA INSTALACIÓN Y GARANTIZAR LA SEGURIDAD PERSONAL, SE RECOMIENDA QUE LA INSTALACIÓN DEL PRODUCTO SEA REALIZADA POR DOS PERSONAS. IMPORTANTE: No sujete ni use la man...
Page 47 - PERSPECTIVA DE INSTALACIÓN; FIJAR LA PLACA DE; RECIRCULACIÓN; Sin Conductos de Ventilación
PERSPECTIVA DE INSTALACIÓN Instrucciones de Instalación Ubique la placa de montaje contra la pared e inserte las alas de fiador en los orificios de la pared para instalar la placa. NOTA: Antes de apretar los tornillos de fiador y el tornillo para madera, asegúrese de que la parte inferior de la plac...
Page 50 - Cierre la puerta del horno. Enchufe el horno
Instrucciones de Instalación Cierre la puerta del horno. Enchufe el horno de microondas o vuelva a conectar la alimentación. Presione la parte inferior del filtro de carbón para colocarlo en la posición correcta. 5 6 7 E S -23 Instale nuevamente la cubierta de ventilación empujando la parte inferior...
Page 51 - PRECAUCIONES ANTES DEL USO
Retire todos los materiales de embalaje del horno de microondas. 2. Compruebe que la unidad se ha instalado de acuerdo con estas instrucciones. 1. PRECAUCIONES ANTES DEL USO Asegúrese de que exista una conexión a tierra correcta antes del uso 3. Instale el anillo del plato giratorio, el acoplador y ...
Page 52 - Impreso en China; Inspección del funcionamiento; Retire todos los materiales de embalaje del horno de microondas.
Impreso en China E S -25 Inspección del funcionamiento 1. Compruebe que la unidad se ha instalado de acuerdo con estas instrucciones. 2. Retire todos los materiales de embalaje del horno de microondas. 3. Recupere el fusible de la casa o vuelva a encender el disyuntor. 4. Enchufe el cable de aliment...


 Sharp AX1100JS
User Manual
Sharp AX1100JS
User Manual
 Sharp AX1500JS
User Manual
Sharp AX1500JS
User Manual
 Sharp KB6524PSY
User Manual
Sharp KB6524PSY
User Manual
 Sharp R1210TY
User Manual
Sharp R1210TY
User Manual
 Sharp R1214TY
User Manual
Sharp R1214TY
User Manual
 Sharp R1514TY
User Manual
Sharp R1514TY
User Manual
 Sharp R1874TY
User Manual
Sharp R1874TY
User Manual
 Sharp R1881LSY
User Manual
Sharp R1881LSY
User Manual
 Sharp R20A0W
User Manual
Sharp R20A0W
User Manual
 Sharp R210DW
User Manual
Sharp R210DW
User Manual
 Sharp R211DB
User Manual
Sharp R211DB
User Manual
 Sharp R211DW
User Manual
Sharp R211DW
User Manual
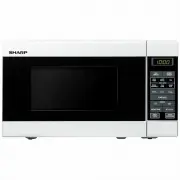
 Sharp R-217E
User Manual
Sharp R-217E
User Manual
 Sharp R-21LCFS
User Manual
Sharp R-21LCFS
User Manual
 Sharp R231ZS
User Manual
Sharp R231ZS
User Manual
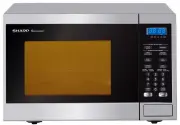
 Sharp R-247E
User Manual
Sharp R-247E
User Manual
 Sharp R291ZST
User Manual
Sharp R291ZST
User Manual
 Sharp R30A0W
User Manual
Sharp R30A0W
User Manual
 Sharp R32BST
User Manual
Sharp R32BST
User Manual