Sharp R820EBK - Manuals
User Manual Sharp R820EBK


Summary
i Congratulations on Your Purchase! This Sharp product is warranted against faults in material and manufacture for the period as stated in the table below.If service is required during the warranty period, please contact your nearest Sharp Approved Service Centre. These repairs would be carried out ...
R201T(W) [01-15].indd 1 6/8/10 7:32:07 PM ii FOR LOCATION ENQUIRIES WITHIN NEW ZEALAND REGARDING YOUR LOCAL SHARP CORPORATION OF NEW ZEALAND LIMITED VISIT OUR WEBSITE AT SHARP CUSTOMER SERVICES TELEPHONE: 09 573 0111 FACSIMILE: 09 573 0113 FOR LOCATION ENQUIRIES WITHIN AUSTRALIA REGARDING YOUR LOCAL...
IMPORTANT SAFETY INSTRUCTIONS IMPORTANT SAFETY INSTRUCTIONS: READ CAREFULLY AND KEEP FOR FUTURE REFERENCE 1. This oven is designed to be used on a countertop or on a shelf. The appliance must not be installed behind a decorative door in order to avoid overheating. See page 4 for full installation in...
Sharp Microwaves Manuals
-
 Sharp AX1100JS
User Manual
Sharp AX1100JS
User Manual
-
 Sharp AX1500JS
User Manual
Sharp AX1500JS
User Manual
-
 Sharp KB6524PSY
User Manual
Sharp KB6524PSY
User Manual
-
 Sharp R1210TY
User Manual
Sharp R1210TY
User Manual
-
Sharp R1211TY
User Manual
-
 Sharp R1214TY
User Manual
Sharp R1214TY
User Manual
-
 Sharp R1514TY
User Manual
Sharp R1514TY
User Manual
-
 Sharp R1874TY
User Manual
Sharp R1874TY
User Manual
-
 Sharp R1881LSY
User Manual
Sharp R1881LSY
User Manual
-
 Sharp R20A0W
User Manual
Sharp R20A0W
User Manual
-
 Sharp R210DW
User Manual
Sharp R210DW
User Manual
-
 Sharp R211DB
User Manual
Sharp R211DB
User Manual
-
 Sharp R211DW
User Manual
Sharp R211DW
User Manual
-
 Sharp R-217E
User Manual
Sharp R-217E
User Manual
-
 Sharp R-21LCFS
User Manual
Sharp R-21LCFS
User Manual
-
 Sharp R231ZS
User Manual
Sharp R231ZS
User Manual
-
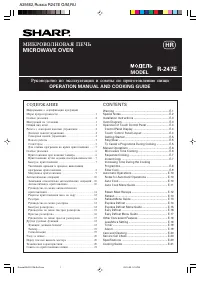 Sharp R-247E
User Manual
Sharp R-247E
User Manual
-
 Sharp R291ZST
User Manual
Sharp R291ZST
User Manual
-
 Sharp R30A0W
User Manual
Sharp R30A0W
User Manual
-
 Sharp R32BST
User Manual
Sharp R32BST
User Manual