Page 3 - CONTENTS
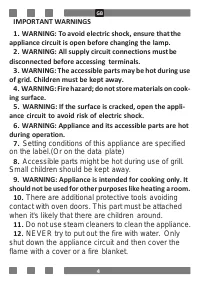
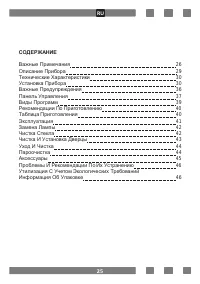
GB 3 CONTENTS Important Warnings 4 Introducing The Appliance 6 Technical Specifications 7 Installation Of Appliance 7 Important Warnings 13 Control Panel 14 Program Types 16 Cooking Recommendations 17 Cooking Table 17 Using The Oven 18 Replacing Oven Lamp 19 Cleaning Oven Glass 19 Cleaning And Mount...
Page 6 - INTRODUCING THE APPLIANCE; Control Panel
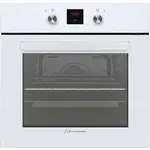
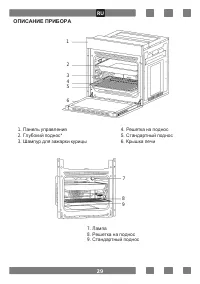
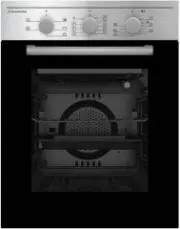
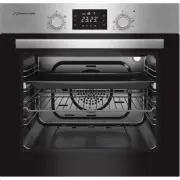
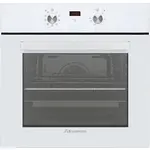
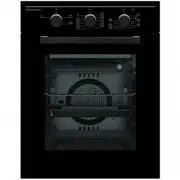
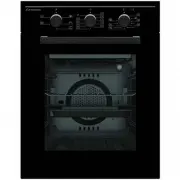
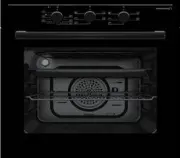
GB 6 INTRODUCING THE APPLIANCE 1. Control Panel 4.In Tray Wire Grill 2. Deep Tray* 5.Standard Tray 3. Roast Chicken Skewer 6.Oven door 7 8 9 7. Lamp 8. In Tray Wire Grill 9. Standard Tray 1 2 3 4 5 6
Page 7 - TECHNICAL SPECIFICATIONS; SPECIFICATIONS; INSTALLATION OF APPLIANCE; It is customer's responsibility to prepare the location the
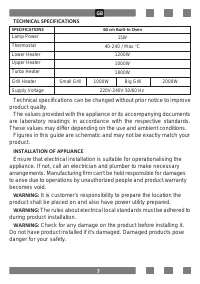
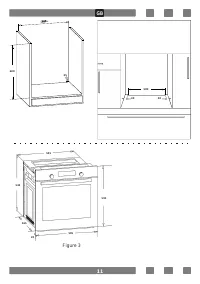
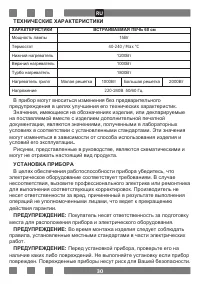
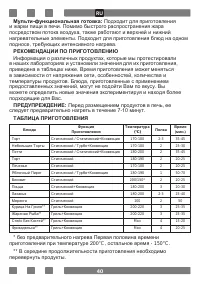
GB 7 TECHNICAL SPECIFICATIONS SPECIFICATIONS 60 cm Built-In Oven Lamp Power 15W Thermostat 40-240 / Max ° C Lower Heater 1200W Upper Heater 1000W Turbo Heater 1800W Grill Heater Small Grill 1000W Big Grill 2000W Supply Voltage 220V-240V 50/60 Hz Technical specifications can be changed without prior ...
Page 8 - Important Warnings for Installation:; Figure 1; Right Place For Installation
GB 8 Important Warnings for Installation: Cooling fan shall take extra steam out and prevent outer surfaces of appliance from overheating during operation of oven. This is a necessary condition for better appliance operation and better cooking. Cooling fan shall continue operation after cooking is f...
Page 10 - Electrical Connection; al electrical requirements.; Mounting; Figure 2
GB 10 Supply cord mustn't be under the oven, squeeze in between oven and furniture or bend. Fix the oven to the furniture by using the screws provided with the product. Screws must be mounted as shown in Figure 5 by passing them through plastics attached to frame of the product. Screws mustn't be ov...
Page 11 - Figure 3
GB 11 Figure 3 500 30 30 560** 600 35 555 545 595 565 595 22
Page 12 - Figure 4
Page 13 - Figure 5; IMPORTANT WARNINGS; This oven must be installed and connected to its place correctly
GB 13 Figure 5 IMPORTANT WARNINGS Electrical Connection and Safety This oven must be installed and connected to its place correctly according to manufacturer instructions and by an authorized service. Appliance must be installed in an oven enclosure providing high ventilation. Electrical connections...
Page 14 - CONTROL PANEL; Digital Panel Visual; Adjustment can be made only when button is popped for models with
GB 14 supply compliant and requires a 16 Amp fuse. If your power network is different that these indicated values, refer to an electrician or your authorized service. When you need to replace the electrical fuse, please ensure that electrical connection is made as follows: • Phase (to live terminal)...
Page 15 - Figure 8; Helps to set cooking temperature; Figure 9; Helps to set with which heaters the
GB 15 Figure 7* Figure 8 You can make necessary adjustments by turning right or left when button is popped enough. Thermostat Button: Helps to set cooking temperature of the food to be cooked in the oven. You can set the desired temperature by turning the button after placing the food into the oven....
Page 17 - Multi Functional Cooking:; Suitable for baking and roasting. Lower and; COOKING RECOMMENDATIONS; Oven must be preheated for 7-10 minutes before placing the; COOKING TABLE; * Do not preheat. First half of cooking time is recommended to be at
GB 17 Multi Functional Cooking: Suitable for baking and roasting. Lower and upper heaters operate as well as quick transmission of heat via air flow. Suitable for cooking requiring single tray and intense heat. COOKING RECOMMENDATIONS You can find in the following table the information of food types...
Page 19 - REPLACING OVEN LAMP; To avoid electric shock, ensure that the appliance circuit is; CLEANING OVEN GLASS
GB 19 REPLACING OVEN LAMP WARNING: To avoid electric shock, ensure that the appliance circuit is open before changing the lamp. (having circuit open means power is off) First disconnect the power of appliance and en- sure that appliance is cold. Remove the glass protection by turning as indicated in...
Page 20 - CLEANING AND MOUNTING OVEN DOOR; reinstall oven door back.
GB 20 CLEANING AND MOUNTING OVEN DOOR Figure 16 Figure 17 Figure 16.1 Figure 16.2 Figure 17.1 Figure 17.2 Open the door fully by pulling the ov en door toward your- self. Then perform unlock operation by pulling the hinge lock up- wards with the aid of screwdriv er as indicated in Figure 16.1 . Set ...
Page 21 - MAINTENANCE AND CLEANING
GB 21 MAINTENANCE AND CLEANING 1. Remove the power plug from electrical socket. 2. Do not clean inner parts, panel, trays and other parts of the product with hard tools such as bristle brush, wire wool or knife. Do not use abrasive, scratching materials or detergent. 3. Rinse after wiping the parts ...
Page 23 - TROUBLESHOOTING; You can solve the problems you can face with your product by; ENVIRONMENTALLY-FRIENDLY DISPOSAL
GB 23 TROUBLESHOOTING You can solve the problems you can face with your product by checking the following points before calling the technical service. If Oven Doesn't Work; • Check if electrical cable of the oven is plugged. • Safely check if there is power in the network. • Check the fuses. • Check...
Page 24 - Уважаемый покупатель,; мы благодарим Вас за доверие, оказанное данному продукту.
RU 24 Уважаемый покупатель, мы благодарим Вас за доверие, оказанное данному продукту. Наша цель - обеспечить для Вас наиболее производительное использование данного продукта, который был произведен в соответствии с нашим пониманием качества, на современных заводах, в чистой рабочей атмосфере и без в...
Page 25 - СОДЕРЖАНИЕ
RU 25 СОДЕРЖАНИЕ Важные Примечания 26 Описание Прибора 29 Технические Характеристики 30 Установка Прибора 30 Важные Предупреждения 36 Панель Управления 37 Виды Программ 39 Рекомендации По Приготовлению 40 Таблица Приготовления 40 Эксплуатация 41 Замена Лампы 42 Чистка Стекла 42 Чистка И Установка Дв...
Page 27 - ПРЕДУПРЕЖДЕНИЕ: Прибор предназначен
RU 27 9. ПРЕДУПРЕЖДЕНИЕ: Прибор предназначен исключительно для приготовления пищи. Не подлежит использованию для других целей, таких как обогрев помещения. 10. Имеются дополнительные ограничители, препятствующие контакту с дверцами печи. Данные детали следует устанавливать в случае возможности прису...
Page 29 - ОПИСАНИЕ ПРИБОРА
RU 29 ОПИСАНИЕ ПРИБОРА 1. Панель управления 4. Решетка на поднос 2. Глубокий поднос* 5. Стандартный поднос 3. Шампур для зажарки курицы 6. Крышка печи 7 8 9 7. Лампа 8. Решетка на поднос 9. Стандартный поднос 1 2 3 4 5 6
Page 30 - ТЕХНИЧЕСКИЕ ХАРАКТЕРИСТИКИ; УСТАНОВКА ПРИБОРА
RU 30 ТЕХНИЧЕСКИЕ ХАРАКТЕРИСТИКИ ХАРАКТЕРИСТИКИ ВСТРАИВАЕМАЯ ПЕЧЬ 60 см Мощность лампы 15Вт Термостат 40-240 / Max °C Нижний нагреватель 1200Вт Верхний нагреватель 1000Вт Турбо нагреватель 1800Вт Нагреватель гриля Малая решетка 1000Вт Большая решетка 2000Вт Напряжение 220- 240B 50/60 Гц. В прибор мо...
Page 36 - Установка и соединения данной печи должны выполняться
RU 36 Рис. 5 ВАЖНЫЕ ПРЕДУПРЕЖДЕНИЯ Электрическое соединение и Безопасность Установка и соединения данной печи должны выполняться уполномоченным сервисом и в соответствии с указаниями производителя. Прибор следует устанавливать в отсек для печи, обеспечивающий хорошую вентилируемость. Соединение приб...
Page 37 - ПАНЕЛЬ УПРАВЛЕНИЯ; Изображение цифровой панели
RU 37 Ваша печь изготовлена в соответствии с электропитанием 220-240 V 50/60 Hz. AC и требует установки предохранителя мощностью 16 Amp . Если Ваша сеть отличается от указанных значений, свяжитесь с уполномоченным сервисом или профессиональным электриком. В случае необходимости замены электрического...
Page 38 - Реле программы готовки:; Используется
RU 38 Рис. 7 * Рис. 8 Рис. 9 Рис. 10 Когда реле выдвинуто вперед, можно осуществлять необходимые настройки поворотами влево или вправо. Реле Термостата: Используется для установки температуры приготовления пищи в печи. Послу размещения блюда в печи, поверните реле и установите желаемую температуру. ...
Page 42 - ЗАМЕНА ЛАМПЫ; Во избежание поражения электрическим током,; ЧИСТКА СТЕКЛА; Нажмите на пластиковые защелки по левой и правой стороне дверцы,
RU 42 ЗАМЕНА ЛАМПЫ ПРЕДУПРЕЖДЕНИЕ: Во избежание поражения электрическим током, перед заменой лампы убедитесь, что прибор отключен от цепи питания. (Отключение от цепи питание означает отключение от магистральной сети). Сначала отключите питание прибора и убедитесь в том, что он остыл. Поверните и сн...
Page 43 - ЧИСТКА И УСТАНОВКА ДВЕРЦЫ; Для установки дверцы на место выполняйте действия, описанные для
RU 43 ЧИСТКА И УСТАНОВКА ДВЕРЦЫ Рис. 16 Рис. 17 Рис. 16.1 Рис. 16.2 Рис. 17.1 Рис. 17.2 Потяните дверцу печи на себя и откройте ее до предела. Затем, потяните замок петли при помощи отвертки и выполните процедуру открытия замка, как показано на рисунке 16.1 . Приведите замок петли в максимально откр...
Page 44 - УХОД И ЧИСТКА
RU 44 УХОД И ЧИСТКА 1- Отсоедините вилку питания от розетки. 2- Не используйте жесткие щетки, металлические щетки или ножи для чистки внутренних частей, панели, подносов и прочих частей печи. Не используйте абразивные, царапающие материалы или моющие средства. 3- Протрите части печи мыльной тканью и...
Page 46 - ПРОБЛЕМЫ И РЕКОМЕНДАЦИИ ПО ИХ УСТРАНЕНИЮ; Перед тем, как вызвать технический сервис, попробуйте; Если плита не работает; Упаковочные материалы холодильника изготовлены из материалов,
RU 46 ПРОБЛЕМЫ И РЕКОМЕНДАЦИИ ПО ИХ УСТРАНЕНИЮ Перед тем, как вызвать технический сервис, попробуйте воспользоваться следующими рекомендациями для устранения проблем. Если плита не работает; • Проверьте, вставлена ли штепсельная вилка электрического шнура в розетку. • Проверьте безопасными способами...