Samsung SM-F956B/DS - Manuals
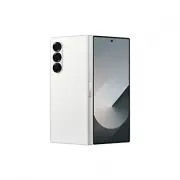
Samsung SM-F956B/DS – User Manual, Repair Manual in PDF format online.
Manuals:
User Manual Samsung SM-F956B/DS
Repair Manual Samsung SM-F956B/DS
Summary
2 Table of Contents Usage Notices 5 Precautions for Repair6 ESD (Electrostatic Discharge) Precautions7 Instructional Icons Software Update 8 Updating Software through FOTA8 Software Update Failure8 Updating Software through Smart Switch9 Recovering from a Software Update Failure9 Recovering on Anoth...
Usage Notices 5 Usage Notices All functionality, features, specifications, and other device information provided in this document, including but not limited to, benefits, design, pricing, components, performance, availability, and capabilities of the device are subject to change without notice. Sams...
Usage Notices 6 • Make sure to wear the appropriate safety equipment before carrying out repairs. Samsung is not responsible for injuries that may occur because of not wearing the proper safety equipment. Refer to Tools for Disassembly and Assembly for a list of tools that you will need for assembli...
Usage Notices 7 Instructional Icons Warning : situations that could cause injury to yourself or others Caution : situations that could cause damage to your device or other equipment Notice : notes, usage tips, or additional information
Software Update 8 Software Update Updating Software through FOTA Update your device’s software through the firmware over-the-air (FOTA) service. You can also schedule software updates.Launch the Settings app and tap Software update → Download and install . • Install now : Install updates. • Schedule...
Software Update 10 3 On the devices list, click the device that failed to update the software and check the recovery code. 4 On another computer, launch Smart Switch . 5 Click → Emergency Software Recovery and Reset → Emergency code recovery . 6 Enter the recovery code and click OK . 7 Follow the on...
Software Update 11 3 Tap Reset → Delete all . All data will be deleted when rebooting. During a factory data reset, the device may repeat rebooting and the logo may be displayed for a long time.
Quality Test 12 Quality Test Quality Test Using the Samsung Members App It is recommended to evaluate your device through the Samsung Members app after it has been repaired to guarantee its performance. If the test results show any abnormalities or that another malfunction has occurred because of th...
Quality Test 13 3 Tap Test all . The device performs a test on all items.When the test is finished, you can check the test results. • Tick mark: Working normally • Exclamation mark: Needs further inspection • The test proceeds automatically, but you may need to follow the on-screen instructions depe...
Quality Test 18 Camera • Function: Check whether the rear and front cameras are working normally. • How to check:Tap the camera button to test the rear and front cameras.The picture that was taken will be displayed to check the quality of the pictures. • Provided information ‒ Status: View the statu...
Quality Test 23 S Pen • Purpose: Check whether the S Pen is recognized in all areas of the touchscreen. • How to check: 1) Tap all the rectangles on the screen with the S Pen. The tapped or dragged rectangles will turn blue. 2) Hover the S Pen over the screen and move from A to B. The blue circle wi...
Calibrations 26 Calibrations Calibrations In order to guarantee the stable and correct performance of components or sensors, it is required to conduct calibrations through the Self Repair Assistant app after repair. If the calibration results show any malfunctions, visit a Samsung Service Center for...
Calibrations 27 • Depending on the model, the screen module may include batteries. So when the screen module is replaced, the battery also has to be selected and a battery cycle reset must be performed. • In the Fold models, touch screen panel calibration is performed for both the main and cover scr...
Calibrations 28 3 Read Privacy Notice and tap Continue . • If you are not signed in to your Samsung account, a button will appear to sign in. • If you select the link to read the full Privacy Notice, you will be directed to our site.
Calibrations 30 6 Read the on-screen instructions and tap Start . Refer to Optical Fingerprint Sensor Calibration , Resetting the Battery Cycle Count , Range Sensor Calibration , Touch Screen Panel Calibration , Speaker Calibration , Under-display Camera Calibration (Fold Models Only) , and Digital ...
Calibrations 31 7 Check the results of each calibration item. • Completed : Calibration was done normally. • Failed : Calibration failed. • Skipped : Calibration was skipped. 8 On the calibration results page, tap Close to close the app.Restart your device to finish calibrating.
Calibrations 32 Optical Fingerprint Sensor Calibration Whenever the screen is replaced, the optical fingerprint sensor must be calibrated to guarantee optimized fingerprint sensor performance for devices that have it.Optical fingerprint sensor calibration is available through the Self Repair Assista...
Calibrations 35 8 Check the result of the calibration. Completed appears only when the calibration is successfully completed. If Completed does not appear, try calibrating again. Resetting the Battery Cycle Count The battery cycle count should be reset whenever your device’s battery is replaced. 1 L...
Calibrations 38 Range Sensor Calibration When replacing screens, batteries, back glasses, or charging ports, range sensor calibration is required to ensure the range sensors of devices equipped with them are optimized.Range sensor calibration is available through the Self Repair Assistant app. Some ...
Calibrations 40 Touch Screen Panel Calibration When replacing screens, touch screen panel calibration is required to ensure accurate touch input.Touch screen panel calibration is available through the Self Repair Assistant app. In the Fold models, touch screen panel calibration is performed for both...
Calibrations 42 Speaker Calibration When replacing speakers, the speaker must be calibrated to guarantee optimized speaker performance for devices that have it.Speaker calibration is available through the Self Repair Assistant app. 1 Launch the Self Repair Assistant app. 2 Select the part that you h...
Calibrations 46 Digital Hall Sensor Calibration (Fold and Flip Models Only) Whenever the screen is replaced, the digital hall sensor must be calibrated to guarantee optimized digital hall sensor performance for devices that have it.Digital hall sensor calibration is available through the Self Repair...
Exploded View and Parts List 49 Exploded View and Parts List • The 5G mmWave antenna modules are only supplied with United States devices. • The product’s composition may vary depending on the country, region, or carrier. Exploded View
Exploded View and Parts List 50 Parts List Number Name QCR97 Screw 2262 QCR244 Screw 3404 QCR258 Screw 3442 QAN02 Antenna (Top) QAN01 Wireless Charging Module QME07 Main Flex Cable (Main lower board to PBA) QCA01 Front Camera QCA02 Rear Camera (Ultra Wide) QCA03 Rear Camera (Wide) QCA04 Rear Camera ...
Disassembly and Assembly 52 Disassembly and Assembly Tools for Disassembly and Assembly When repairing devices, you absolutely must wear protective equipment for your safety. Tool & Part Code Image Description Safety Goggles Prevents accidents during repair (protective equipment) Safety Gloves (...
Disassembly and Assembly 55 Fasteners (Adhesives and Materials) for Assembly The fasteners composition may vary depending on the repair parts, country, region, or carrier. Item Quantity Image Description Back Cover Adhesive Tape GH81-26091A 1 Double sided adhesive tape for attaching the back cover t...
Disassembly and Assembly 59 Disassembly and Reassembly for replacement The product’s composition may vary depending on the country, region, or carrier. Before disassembling: • Unplug and turn off device before disassembling. • Wear an anti-static wrist strap and connect it to the grounded ESD safe m...
Disassembly and Assembly 61 SIM Card Tray Disassembly Prepare the device to repair by yourself. Insert the ejection pin into the hole of the SIM card tray to loosen the tray and pull out the tray gently from the tray slot.
Disassembly and Assembly 62 Reassembly Leaving screws inside the device may damage internal components, such as the battery. During assembly, be extra careful not to leave any unassembled screws inside the device. Insert the SIM card tray back into the slot. Ensure that there are no abnormalities.
Disassembly and Assembly 63 Back Cover Disassembly When removing the back cover, ensure that the device is fixed on a flat surface. 1 Heat the microwaveable heating bag and apply it on the back cover for 3 minutes to soften the adhesive. • It is possible for the device or battery to be damaged by he...
Disassembly and Assembly 74 Cover Screen Disassembly When removing the cover screen, ensure that the device is fixed on a flat surface.When removing the cover screen, you need to use the metal opening tool because of its strong adhesion. 1 Heat the microwaveable heating bag and apply it on the cover...
Disassembly and Assembly 87 Main Microphone Disassembly Remove the Back Cover first before you begin. 1 Check the screws at the 9 different points and remove them using a cross-head screwdriver. Be careful not to damage the camera frame and the main board.Check the number of screws that have been re...
Disassembly and Assembly 95 Charging Port Disassembly Remove the Back Cover first before you begin. 1 Check for disassembly steps of the Main Microphone and separate the battery connector from the main board. Make sure to first disconnect the battery connector for your own safety.
Disassembly and Assembly 108 Main Board The PBA can only be replaced at an authorized repair shop. If the PBA is faulty, contact Samsung for further instruction. Disassembly Remove the Back Cover first before you begin. 1 Check the screws at the 6 different points and remove them using a cross-head ...
Disassembly and Assembly 118 Front Camera Disassembly Remove the Back Cover first before you begin. 1 Check for the disassembly steps of the Main Board and separate the battery connector from the main board. Make sure to first disconnect the battery connector for your own safety.
Disassembly and Assembly 122 Rear Camera Disassembly • Remove the Back Cover and Main Board first before you begin. • You only need to disassemble if you repair the camera. Turn the separated main board upside down. Using the tweezers, carefully separate the 3 camera connectors one by one. Then, usi...
Disassembly and Assembly 124 Top Speaker Disassembly Remove the Cover Screen first before you begin. 1 Check the screws at the 6 different points on the top speaker module and remove them using a cross-head screwdriver. Be careful not to damage the top speaker module and the near components.Check th...
Disassembly and Assembly 128 Bottom Speaker Disassembly Remove the Cover Screen first before you begin. 1 Check the screws at the 10 different points on the top and bottom speaker and remove them using a cross-head screwdriver. Be careful not to damage the speaker module and the near components.Chec...
Disassembly and Assembly 134 Sub PBA Disassembly Remove the Cover Screen and Top Speaker first before you begin. 1 Using the tweezers, first disconnect the battery connector from the Sub PBA. Then, disconnect the remaining 5 connectors. • Make sure to first disconnect the battery connector for your ...
Disassembly and Assembly 140 Cover Camera Disassembly • Remove the Cover Screen , Top Speaker , and Sub PBA first before you begin. • You only need to disassemble if you repair the camera. Turn the separated Sub PBA upside down, and then carefully separate the camera connector. Leave the camera lens...
Disassembly and Assembly 142 Side Button (Fingerprint Recognition Sensor) • The buttons are already built into the screen module. Disassemble the buttons only if the buttons themselves require repairs. • The Side button has a built-in fingerprint recognition sensor. Thus, it cannot be removed direct...
Disassembly and Assembly 154 Volume Button The buttons are already built into the screen module. Disassemble the buttons only if the buttons themselves require repairs. Disassembly To remove the Volume button, lightly press one end of the button with your fingers so that the other end protrudes. Pus...
Disassembly and Assembly 157 Screen Module Disassembly Remove the SIM Card Tray and Back Cover first before you begin. 1 Check for the disassembly steps of the Main Microphone and separate the battery connector from the main board. Make sure to first disconnect the battery connector for your own saf...
Disassembly and Assembly 179 Battery • The 2 batteries should always be replaced at the same time. • The battery can only be replaced at an authorized repair shop. If the battery is faulty, contact Samsung for further action. Disassembly Remove the SIM Card Tray , Back Cover , Cover Screen , and Mai...
Disassembly and Assembly 193 16 Press the Sub battery with your fingers softly so that the battery can be attached well. Be careful not to damage the battery. • The FPCB cables and connectors have to positioned outside so as not to interfere when assembling the battery. • Be careful not to damage th...
MEMORY SENSOR MOTOR AUDIO 2 nd MIC SPK1/RCV SPK2 SUB DISP. CONN. MAIN1 TUNER MAIN2 TUNER AP PMIC 6 Axis SENSOR #1 CAMERA DISPLAY AP SUB PMIC POWER SIM/BT/NFC/SNVM ~ CLK Gen. C T C MAIN DISP. PMIC MAIN DIGITIZER MIC FPCB 3 rd MIC UPPER_SPK_ AMP 2 nd MIC UPPER SPK...
Samsung Manuals
-
Samsung UN24H4000AFXZA-IP01
User Manual
-
Samsung RF25HMEDBSR/AA-10
User Manual
-
Samsung WF350ANW/XAA-01
User Manual
-
Samsung PN60F5500AFXZA-US01
User Manual
-
Samsung UN50EH5300FXZA-CH01
User Manual
-
Samsung SMH1926S/XAA-00
User Manual
-
Samsung SMH1926S/XAA-00
Installation Manual
-
Samsung UN49KU6500FXZA-FA01
User Manual
-
Samsung DV56H9000GP/A2-00
User Manual
-
Samsung WF455ARGSWR/AA-01
User Manual
-
Samsung RFG298AARS
User Manual
-
Samsung RFG298AARS
Manual
-
Samsung PN51F4500BFXZA-TS02
User Manual
-
Samsung HW-HM60/ZA-ZZ01
User Manual
-
Samsung DV48J7700GW/A2-02
User Manual
-
Samsung WF330ANB/XAA-02
User Manual
-
Samsung UN55KU6300FXZA-FA01
User Manual
-
Samsung WF36J4000AW/A2-00
User Manual
-
Samsung UN60F7100AFXZA
User Manual
-
Samsung WF419AAW/XAA-00
User Manual