Page 2 - Table of contents; Before Using the Product
Table of contents Before Using the Product Safety Precautions 6 Safety symbols 6 Electricity and Safety 7 Installation 8Operation 8Cleaning 10 Preparations Checking the Components 11 Parts 12 Front Side 12 Reverse Side 13 BRIDGE BOX 14 Remote Control 15 Prior to Installation 17 Precautions for insta...
Page 3 - ENTERTAINMENT
Table of contents ENTERTAINMENT Notification 30 Settings 30 Picture Mode 30Sound Mode 30Sound Output 31Game Mode 31Caption 31Sleep Timer 31Network 31More 31 Source 31 Connection Guide 31Universal Remote Setup 32 Search 32 Apps 32 Screen Adjustment Picture Mode 33 Picture Size Settings 33 Picture Siz...
Page 4 - General; Support
Table of contents General Intelligent Mode Settings 39 Intelligent Mode 39Adaptive Brightness 39 Bixby Voice settings 39 Before Using Bixby 40Requirements for Bixby Use 40 Using Bixby 40Starting Bixby using buttons on the Samsung Smart Remote 41Getting to Know the Explore Bixby Screen 42 Network 43 ...
Page 5 - Specifications; Appendix
Table of contents 5 Specifications General 63 Preset Timing Modes 64 Appendix Responsibility for the Pay Service (Cost to Customers) 66 Not a product defect 66 A Product damage caused by customer's fault 66Others 66 License 67
Page 6 - Safety Precautions; Safety symbols
6 Before Using the Product Chapter 01 Safety Precautions The following safety instructions are to ensure your personal safety and prevent property damage. Please read the following to ensure the proper use of the product. Safety symbols Symbol Name Meaning Warning A serious or fatal injury may resul...
Page 7 - Electricity and Safety
7 Electricity and Safety " The following images are for reference only. Real-life situations may differ from what is shown in the images. Warning Do not touch the power plug with wet hands. Otherwise, an electric shock may result. Do not bend or pull the power cable with force. Be careful not to...
Page 8 - Installation; Operation
8 Installation Warning Before moving the product, turn off the power switch and disconnect the power cable and all other connected cables. Damage to the cable may cause a fire or electric shock. When installing the product, keep it at a distance from the wall so that it is well ventilated. An increa...
Page 9 - Caution
9 Do not place objects containing liquid (vases, pots, bottles, etc) or metallic objects on top of the product. • If foreign substances such as water enter the product, be sure to disconnect the power cord. Then contact Samsung Customer Service Center. • Product failure, an electric shock or fire ma...
Page 10 - Cleaning
10 Cleaning Warning Do not spray water or cleaner directly on the product. • The product’s surface may be damaged, or the markings may be erased. • An electric shock or fire may result. Caution When cleaning, be sure to disconnect the power plug and wipe gently with a soft and dry cloth such as supe...
Page 11 - Preparations; Checking the Components
11 Preparations Chapter 02 " Contact the vendor where you purchased the product if any components are missing. " The appearance of the components may differ from the images shown. Checking the Components Simple User Guide Warranty card (Not available in some locations) Power cord Batteries (...
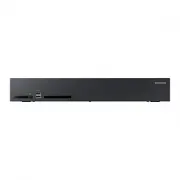
Page 12 - Front Side
12 Parts Front Side " The color and shape of parts may differ from what is shown. Specifications are subject to change without notice to improve quality. Parts Description P Turn the product on or off. USB 2.0 Connect to a USB memory device.
Page 13 - Reverse Side
13 Reverse Side " The color and shape of parts may differ from what is shown. Specifications are subject to change without notice to improve quality. Parts Description ONE CONNECT (L1, L2, L3, L4) Connects to a cable using an LC fiber cable. ONE CONNECT (R1, R2, R3, R4) LAN Connect to a network ...
Page 14 - BRIDGE BOX
14 BRIDGE BOX " The color and shape of parts may differ from what is shown. Specifications are subject to change without notice to improve quality. Parts Description BLUETOOTH / WI-FI Connects to the Bluetooth/Wi-Fi module using the Bluetooth/Wi-Fi module cable. Connects to the BLUETOOTH / WI-FI...
Page 15 - Remote Control
15 " The product connects with the Samsung Smart Remote automatically when powered on. If the automatic pairing does not work, direct the Samsung Smart Remote at the front side of the product and press and together for 3 seconds. " Hold the remote control directing at the cabinet bottom and ...
Page 16 - Installing batteries into the Samsung Smart Remote
16 Installing batteries into the Samsung Smart Remote 1 Press the button at the top rear of the Samsung Smart Remote. The body will pop out slightly from the body cover. 2 Turn the remote over, and then slide the body of the remote upwards until the battery compartment is revealed. 3 If there are ba...
Page 17 - Prior to Installation; Precautions for installation; Installing M-Box on Rack Case
17 Prior to Installation Precautions for installation • It is recommended that this device be installed in a 19-inch rack case, rather than under general consumer environment conditions. • Make sure that the ambient temperature inside the rack does not exceed 35°C. • If installing more than one M-Bo...
Page 18 - Connecting and using devices; Before Connecting; Pre-connection Checkpoints; Connecting to a PC; Connection Using an HDMI Cable
18 Connecting and using devices Chapter 03 Before Connecting Pre-connection Checkpoints " Also refer to the user guide for the source device you want to connect with.The number and location of ports available on the source device may vary. " Do not connect the power cable until all connectio...
Page 19 - Connecting to a Video Device; Connection Using an HDMI-DVI Cable
19 Connection Using an HDMI-DVI Cable " Connecting parts may differ in different products. HDMI IN Connecting to a Video Device • Do not connect the power cable before connecting all other cables. Ensure you connect a source device first before connecting the power cable. • You can connect a vid...
Page 20 - Using an HDMI Cable or HDMI to DVI Cable; Connecting the LAN Cable
20 Connection Using an HDMI Cable " Connecting parts may differ in different products. Using an HDMI Cable or HDMI to DVI Cable • For better picture and audio quality, connect to a digital device using an HDMI cable. • If the product is connected to an external device that is compatible with an ...
Page 21 - Connecting a Optical Cable; Multiple Display Control; Cable Connection; LAN Cable
21 Connecting a Optical Cable " Connecting parts may differ in different products. ONE CONNECT • Use special caution to ensure that the connector is connected correctly. Incorrect connection may cause malfunction. Connect the cable to the connector in the direction shown in the figure. Insert th...
Page 23 - Connection
23 Connection DATA IN LAN ONE CONNECT HDBT OUT DATA IN DATA OUT2 HDBT IN DATA IN DATA OUT 1 BLUETOOTH WI-FI Last cabinet (Vertical Pillar) (IW008R) M-Box (SBB-MBOX) BRIDGE BOX First cabinet (IW008R) Last cabinet (Horizontal Pillar) (IW008R)
Page 24 - External Device Connection Cables
24 External Device Connection Cables These are descriptions on connection cables used to connect external devices to the product. Connection Cable Image Description HDMI to HDMI Transmits digital video and audio signals from the external device simultaneously via the product’s HDMI port.The cables c...
Page 25 - Connecting using an HDMI Cable
25 Connecting using an HDMI Cable • The following types of HDMI cables are recommended: – High Speed HDMI Cable – High Speed HDMI Cable with Ethernet – Premium High Speed HDMI Cable – Premium High Speed HDMI Cable with Ethernet – Ultra High Speed HDMI Cable • Use an HDMI cable that is less than 17 m...
Page 26 - Changing the Input source; Sources; Connection Guide; Universal Remote Setup
26 Changing the Input source Sources × → s Source ENTERTAINMENT Sources Connection Guide Universal Remote Setup Source AMBIENT " The displayed image may differ depending on the model. s Source allows you to select a variety of sources and change source device names. You can display the screen of...
Page 27 - AMBIENT; Ambient Settings; Auto Brightness; Sleep After; Reset All Photos; My W Edition; About My W Edition
27 AMBIENT Ambient Settings Ú → Ù Ambient Settings Configure AMBIENT settings shown below. Auto Brightness Change automatic brightness settings for AMBIENT . " If this function is set to Off , The Wall screen brightness will not automatically be adjusted based on the ambient light intensity. • O...
Page 28 - Décor; About Décor; Nature; About Nature; Art; About Art; Media Art; About Media Art
28 Décor Ú → Décor About Décor Use a variety of decoration themes to improve the elegance of your interior space. Choose preferred content or nature scenery that would match naturally with the space around The Wall. • Rotating Tiles / Light Grid / Light Cones / Rotating Discs / Moving Rods / Moving ...
Page 29 - My Collection; About My Collection; Background Theme; Using content effects
29 My Collection Ú → My Collection About My Collection Import photos or images from your tablet to turn your home space into a unique gallery. Background Theme Ú → Background Theme Background Theme Enjoy the experience of viewing the various themes of The Wall harmonizing well with your space. • Lig...
Page 30 - otification; Picture Mode; Sound Mode
30 ENTERTAINMENT N otification × → ¾ Notification View the list of event notifications for the product.Notifications appear on the screen at the scheduled viewing time or when there is an event on a registered device. Settings × → ¿ Settings Press Settings to display Quick Settings at the bottom of ...
Page 31 - Network Status; Source; Video Device
31 Sound Output Select the preferred speaker to play The Wall sound from. • Optical / Bluetooth Speaker List Game Mode When connecting to a game console such as PlayStation™ or Xbox™, you can enjoy a more realistic gaming experience by selecting game mode. • Off / On " If you connect other exter...
Page 32 - Search
32 Audio Device • HDMI (ARC) / Optical / Bluetooth / Wi-Fi / Wi-Fi Speaker Surround Setup / HDMI Troubleshooting PC • HDMI / Screen Sharing (Wireless) / Apple AirPlay / HDMI Troubleshooting SmartPhone • Screen Sharing (Smart View) / SmartThings / Apple AirPlay External Storage • USB Flash Drive / Ha...
Page 33 - Screen Adjustment; Picture Size Settings; Picture Size
33 Screen Adjustment Configure the Picture settings ( Brightness , Color Tone , etc.). The layout of the Picture menu options may vary depending on the product. Picture Mode × → ¿ Settings → ¿ More → Picture → Picture Mode Customize the screen and sound settings to suit your preferences and viewing ...
Page 34 - Fit to Screen; Zoom and Position; Expert Settings; Apply Picture Settings
34 Fit to Screen Adjusts the picture position. When selected, the full program image will be displayed. No part of the image will be cut off. • Off / On / Auto Zoom and Position Adjusts the picture zoom and position. " If you want to reset the picture to its original position, select Reset in th...
Page 35 - Auto Motion Plus
35 Digital Clean View Reduce picture noise to avoid distractions such as flickering. • Auto / Low / Off Auto Motion Plus Settings Enhance picture sharpness to optimise for fast-moving images. Auto Motion Plus Removes blur and judder from scenes with larger amounts of rapid movement to provide a clea...
Page 36 - White Balance; Point; Gamma; Color Space; Reset Picture
36 White Balance Adjust the colour temperature of the picture so that white objects appear brighter. " This option cannot be accessed while Picture Mode is set to Dynamic or Natural . 2 Point Adjust red, green, and blue luminosity levels in two sections for precise white balance optimisation. • ...
Page 37 - Sound Adjustment; Sound Output
37 Sound Adjustment Sound Output × → ¿ Settings → ¿ More → Sound → Sound Output Select the preferred speaker to play The Wall sound from. • Optical / Bluetooth Speaker List Sound Mode × → ¿ Settings → ¿ More → Sound → Sound Mode You can select a sound mode to suit your personal preferences. " So...
Page 38 - Digital Output Audio Format; Digital Output Audio Delay; Reset Sound
38 Wi-Fi Speaker Surround Setup × → ¿ Settings → ¿ More → Sound → Wi-Fi Speaker Surround Setup Configure a stereo or surround system using the Samsung Soundbar and wireless speakers connected via Wi-Fi. Expert Settings × → ¿ Settings → ¿ More → Sound → Expert Settings Configure advanced sound settin...
Page 39 - Intelligent Mode Settings; Intelligent Mode; Adaptive Brightness; Bixby Voice settings
39 General Intelligent Mode Settings × → ¿ Settings → ¿ More → General → Intelligent Mode Settings Intelligent Mode analyzes the surrounding environment, usage pattern, and content to provide an optimal viewing experience. It’s possible to enable or disable the following options. Configure these opt...
Page 42 - Getting to Know the Explore Bixby Screen
42 Getting to Know the Explore Bixby Screen Explore Bixby "Show me previous channel" View Tutorial You can say something like: All Services " The actual menu screen may differ depending on the product model. Number Description Navigate to the My Profile screen and log out or register a v...
Page 43 - Network; Open Network Settings; Network Type
43 Network × → ¿ Settings → ¿ More → General → Network Configure The Wall's network. Network Status You can check the current network and Internet status. Open Network Settings Configure network settings to connect to an available network. Network Type Configure the network connection mode. • Wirele...
Page 44 - Connecting to a Wired Network
44 Network Settings (Wired) Connecting to a Wired Network There are three ways to attach your product to your LAN using cable. • You can attach your product to your LAN by connecting the LAN port on the back of your product to an external modem using a LAN cable. See the diagram below. The Modem Por...
Page 46 - Connecting to a Wireless Network
46 Network Settings (Wireless) Connecting to a Wireless Network The LAN Port on the Wall LAN Cable Wireless IP sharer (router having DHCP server) Samsung recommends using IEEE 802.11n. When you play video over a network connection, the video may not play smoothly. " Select a channel for the wire...
Page 48 - Reset Network; Power On with Mobile; System Manager; Time; Clock Set; Sleep Timer
48 Reset Network Restore the network settings to the factory default. Expert Settings Configure advanced network settings. Power On with Mobile You can turn the product on or off using a mobile device connected to the same network as the product. • Off ( ) / On ( ) IP Remote Remotely connect an IP c...
Page 49 - Off Timer; Scan
49 Off Timer Schedule automatic turn-off. • Setup : Select Off , Once , Everyday , Mon~Fri , Mon~Sat , Sat~Sun or Manual . If you select Manual , you can choose the days you want Off Timer to turn off your product. " The check mark indicates days you’ve selected. • Time : Set the hour and minute...
Page 50 - External Device Manager
50 External Device Manager × → ¿ Settings → ¿ More → General → External Device Manager Manage external devices connected to Samsung The Wall. Anynet+ (HDMI-CEC) Anynet+ is a function that enables you to control all connected Samsung devices that support Anynet+ with your Samsung product remote contr...
Page 52 - Game Mode; Input Signal Plus; HDMI Black Level; Access N; Apple AirPlay Settings
52 Game Mode When connecting to a game console such as PlayStation™ or Xbox™, you can enjoy a more realistic gaming experience by selecting game mode. • Auto / On / Off " If you connect other external devices while Game Mode is on, the screen may not be in good condition. Input Signal Plus Expan...
Page 53 - Eco Solution; Ambient Light Detection; Minimum Backlight; Power Saving Mode; Motion Lighting
53 Eco Solution × → ¿ Settings → ¿ More → General → Eco Solution Configure energy saving options. Ambient Light Detection Set to adjust the screen brightness automatically based on the ambient light to reduce power consumption.If you find the screen getting too bright or dark while using Ambient Lig...
Page 54 - Accessibility; Voice Guide Settings; Voice Guide; High Contrast
54 Accessibility × → ¿ Settings → ¿ More → General → Accessibility Accessibility Shortcuts allows quick access to various settings to accommodate special needs. Press the volume button for 1 second or longer. Quickly enable or disable options such as Voice Guide , High Contrast , Enlarge , Grayscale...
Page 55 - Caption Mode; Remote Button Repeat Settings; Smart Features; Autorun Last App; Reset
55 Color Inversion Invert the colours on the screen. White become black, black becomes white, orange becomes blue, and so on. • Off ( ) / On ( ) Enlarge Set whether to enlarge the highlighted item in the menu. • Off ( ) / On ( ) Caption Settings Set Caption to On . • Off ( ) / On ( ) " If the pr...
Page 56 - Software Update; Update Now; Auto update; Self Diagnosis; Start Picture Test
56 Support Software Update × → ¿ Settings → ¿ More → Support → Software Update The Software Update menu lets you upgrade your product software to the latest version. " Be careful not to turn off the power until the upgrade is complete. The product will turn off and on automatically after complet...
Page 57 - Reset Smart Hub; Remote Management; About Samsung The Wall
57 Samsung The Wall Device Manager Scans and cleans the Samsung The Wall's CPU, RAM, and storage space. Start Smart Hub Connection Test Use this to check the Smart Hub connection if you have a problem with using the network connection and product services. Reset Smart Hub Use this to reset all saved...
Page 58 - Troubleshooting Guide; Checking the Resolution and Frequency
58 Troubleshooting Guide Requirements Before Contacting Samsung Customer Service Center Testing the Product Check if your product is operating normally by using the product test function.If the screen remains blank while the power indicator blinks even when the product is correctly connected to a PC...
Page 59 - Check the followings.
59 Check the followings. Installation issue (PC mode) The screen keeps switching on and off. Check that the cable between the product and the PC is connected correctly. Blank spaces are found on all four sides of the screen when an HDMI or an HDMI-DVI cable is connected between the product and PC. T...
Page 66 - Not a product defect; A Product damage caused by customer's fault; Others
66 Appendix Responsibility for the Pay Service (Cost to Customers) " When the service is requested, in spite of in warranty, we may charge you for a visit from a service technician in the following cases. Not a product defect Cleaning of the product, Adjustment, Explanation, Re-installation and ...
Page 67 - License
67 License The terms HDMI and HDMI High-Definition Multimedia Interface, and the HDMI Logo are trademarks or registered trademarks of HDMI Licensing LLC in the United States and other countries. Open Source Licence NoticeIn the case of using open source software, Open Source Licences are available o...


 Samsung 820DXN-2
User Manual
Samsung 820DXN-2
User Manual
 Samsung BE43A-H
User Manual
Samsung BE43A-H
User Manual
 Samsung BE43C-H
User Manual
Samsung BE43C-H
User Manual
 Samsung BE43T-H
User Manual
Samsung BE43T-H
User Manual
 Samsung BE50A-H
User Manual
Samsung BE50A-H
User Manual
 Samsung BE50C-H
User Manual
Samsung BE50C-H
User Manual
 Samsung BE50T-H
User Manual
Samsung BE50T-H
User Manual
 Samsung BE55A-H
User Manual
Samsung BE55A-H
User Manual
 Samsung BE55C-H
User Manual
Samsung BE55C-H
User Manual
 Samsung BE55T-H
User Manual
Samsung BE55T-H
User Manual
 Samsung BE65A-H
User Manual
Samsung BE65A-H
User Manual
 Samsung BE65C-H
User Manual
Samsung BE65C-H
User Manual
 Samsung BE65T-H
User Manual
Samsung BE65T-H
User Manual
 Samsung BE70T-H
User Manual
Samsung BE70T-H
User Manual