Page 2 - Safety Information; Warning; CAUTION; WARNING
Safety Information 2 English Warning TO REDUCE THE RISK OF ELECTRIC SHOCK, DO NOT REMOVE THE COVER (OR BACK). NO USER-SERVICEABLE PARTS ARE INSIDE. REFER SERVICING TO QUALIFIED SERVICE PERSONNEL. CAUTION RISK OF ELECTRIC SHOCK DO NOT OPEN CAUTION: TO PREVENT ELECTRIC SHOCK, MATCH WIDE BLADE OF PLUG ...
Page 3 - Precautions
01 Safety Information 3 English Precautions • Ensure that the AC power supply in your house complies with the identification sticker located on the back of your product. • Install your product horizontally, on a suitable base (furniture), with enough space around it for ventilation (3 - 4 inches/7.5...
Page 4 - Disc and Format Compatibility
Safety Information 4 English Disc and Format Compatibility This product does not support Secure (DRM) Media files. CD-R Discs • Some CD-R discs may not be playable depending on the disc recording device (CD-Recorder or PC) and the condition of the disc. • Use 650MB/74 minute CD-R discs. Do not use C...
Page 5 - Contents; Safety InformatIon
Contents Contents 5 English Safety InformatIon 2 Warning 3 Precautions 3 Disc Storage & Management 4 Disc and Format Compatibility 4 Supported Audio Formats GettInG Started 7 Front Panel 8 Rear Panel 9 Remote Control 10 Accessories 10 Connecting the Speakers 10 Cautions on Moving the Speakers 11...
Page 6 - appendIx
Contents 6 English 21 Timer Function 21 Setting the Clock 21 Setting the Timer 23 Cancelling the Timer 23 The Recording Function 23 Basic Recording 24 Recording Speed 25 Special Sound Effects 25 Selecting EQ Mode 25 FOOTBALL MODE function 25 GOAL Function 26 GIGA SOUND Function 26 BEAT WAVING Functi...
Page 7 - Getting Started; Front Panel
02 Getting Started Getting Started Front Panel 1 Display Panel 2 BACKWARD SEARCH/SKIP button 3 CD/Bluetooth button 4 DISC slot 5 GIGA SOUND BEAT button 6 TUNER/AUX button 7 FORWARD SEARCH/SKIP button 8 PROGRAM button 9 Eject button for Disc 0 VOLUME/SEARCH JOG ! EQ button @ SEARCH button # POWER but...
Page 8 - Rear Panel
Getting Started Rear Panel 1 Cooling fan • The fan operates while the unit is powered on. If you set the unit to the minimum volume, the fan won't operate. Secure a minimum 6 inches (15 cm) of clear space on from all sides of the fan when installing the product. 2 POWER • Insert only the provided po...
Page 9 - Installing Batteries In The Remote Control; Remote Control
02 Getting Started Installing Batteries In The Remote Control • Place batteries in the remote control so they match the polarity of the illustrations in the battery compartment. : (+) to (+) and (–) to (–). • Do not dispose of batteries in a fire. • Do not short circuit, disassemble, or overheat the...
Page 10 - Accessories; Cautions on Moving the Speakers
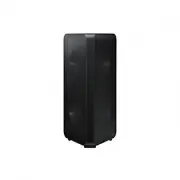
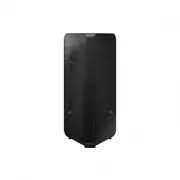
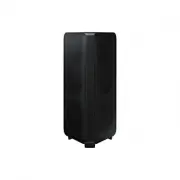
Getting Started Accessories Check for the supplied accessories below. User Manual Remote Control/Batteries FM Antenna Power Cable Toroidal ferrite core • Figures and illustrations in this user's manual are provided for reference only and may differ from actual product appearance. Connecting the Spea...
Page 11 - Attaching the toroidal ferrite core to the power cord; Looping the power cable around the toroidal core
02 Getting Started Attaching the toroidal ferrite core to the power cord Attaching the Toroidal ferrite core to the power cord helps prevent RF interference from radio signals. 1. Pull the fixing tab of the Toroidal ferrite core to open it. 2. Make two loops around the core with the power cable. See...
Page 12 - Functions; The Display function; Changing Display mode; To cancel the Demo Music mode; Playing a CD; Loading a Compact Disc
Functions The Display function You can view functions available on the display, adjust the brightness of the display and set the Display/LED either on or off. Changing Display mode Press the DISPLAY/DEMO button on the product.Each time you press this button, the mode will change as follows: • The Di...
Page 13 - Selecting a Track; To play the previous track; Repeat One or All Tracks on a CD
03 Functions 3. To adjust the volume: • Turn the VOLUME control on the product. • Press the VOL+ or VOL- button on the remote control. The volume level can be adjusted in 31 steps (VOLUME MIN, VOLUME 01 ~ VOLUME 29, and VOLUME MAX). 4. Pausing playback Main Unit To pause playback temporarily, press ...
Page 14 - Playing USB Devices; USB Device Playback; To Select a File from a USB Device; To repeat
Functions 2. When you want to stop the repeat function, press the REPEAT button until " OFF " is displayed. • OFF : Cancels repeat playback. • TRACK : Repeatedly plays the selected track. • DIR (DIRECTORY) : Repeatedly plays all tracks in the selected folder. • ALL : Repeatedly plays the ent...
Page 15 - To Use High Speed Search; To Delete a File; To safely remove a USB device
03 Functions To Use High Speed Search You can search a desired section quickly while the product is playing.Press the 3 , 4 button. • Each time you press the button, you move through the section forward/backward quickly. | IMPORTANT | ✎ The product does not output sound during a high speed search. ✎...
Page 16 - Searching for a Track Quickly; Viewing or Editing Programmed Tracks
Functions Searching for a Track Quickly You can select a track directly without the 1 , 2 button. CDDA/MP3-CD/USB 1. Press the SEARCH button. After pressing the SEARCH button, turn the VOLUME/SEARCH JOG control on the product to the left or right to select a desired track. • You can move to the sele...
Page 17 - Bluetooth
03 Functions Bluetooth You can use a Bluetooth device to enjoy music with high quality stereo sound, all without wires! What is Bluetooth? Bluetooth is a technology that enables Bluetooth compliant devices to interconnect easily with each other using a short, wireless connection. • A Bluetooth devic...
Page 18 - Using Bluetooth Power On
Functions ✎ Only one Bluetooth device can be paired at a time. ✎ Once you have turned off the Hi-Fi Component and the pairing is disconnected, the pairing will not be restored automatically. To reconnect, you must pair the device again. ✎ The Hi-Fi Component system may not search or connect properly...
Page 19 - TV SoundConnect
03 Functions TV SoundConnect You can listen to the sound from your SoundConnect Compatible Samsung TV through the Hi-Fi Component by using the TV SoundConnect function. To connect the Hi-Fi Component to a SoundConnect Compatible Samsung TV Before activating this function, be sure to set the Samsung ...
Page 20 - Using My Karaoke; To Store the Stations You Want
Functions Using My Karaoke You can use the MY Karaoke function to sing along with your favorite CDs and USB tracks. 1. Connect the microphone to the MIC jack on the front of the product. • If your microphone plug is larger than the 3.5 mm MIC jack, you need a Connector-Adaptor (not supplied) to comp...
Page 21 - Selecting a Stored Station; Setting the Clock
03 Functions 3. Find a station by: • Pressing and holding the TUNING/ ALBUM , or . button on the remote control to automatically search for broadcasting stations. 4. Press the MO/ST button to switch between stereo and mono. • In a poor reception area, select MONO for a clear, interference-free broad...
Page 23 - Cancelling the Timer; The Recording Function; Basic Recording
03 Functions Cancelling the Timer After you have set the timer, it will start automatically. When it starts, the TIMER ON message appears on the display. If you no longer want to use the timer, you must cancel it. • To cancel the timer, Press the TIMER ON/OFF button once. • To restart the timer, Pre...
Page 24 - Recording Speed
Functions • If a microphone is connected to the product and you press the USB REC button, you activate the MP3 Recording function, not the Copy function. • Press the USB REC button for a second to start FILE COPY. Press and hold the USB REC button for a few seconds to start FOLDER COPY. External Sou...
Page 25 - Special Sound Effects; Selecting EQ Mode; FOOTBALL MODE function
03 Functions Special Sound Effects Selecting EQ Mode Your Hi-Fi Component system provides predefined equalizer settings that are optimized for particular music genre. You can also adjust the bass, middle, and treble levels manually. 1. Press the EQ button. Each time you press the EQ button or turn t...
Page 26 - GIGA SOUND Function; BEAT WAVING Function; DJ BEAT Function
Functions | NOTES | ✎ Press the GOAL button to output the currently playing sound file mixed with the GOAL sound . GIGA SOUND Function The GIGA SOUND function amplifies the bass sound and provides twice the bass for powerful, realistic sound. 1. Press the GIGA SOUND BEAT button on the main unit or t...
Page 27 - NON-STOP MUSIC RELAY Function; DANCE TIME Function; TEMPO Function; Booting Sound Function
03 Functions +PANNING Funcion Increases the left and right speaker's output in turn and makes it seem as if the sound is moving from side to side. | NOTES | ✎ To apply the PANNING effect to another effect, press the +PANNING button when the other effect is active or press another effect button when ...
Page 28 - Appendix
Appendix Troubleshooting Refer to the chart below when this product does not function properly. If the problem you are experiencing is not listed below or if the instructions below do not help, turn off the product, disconnect the power cord, and contact the nearest authorized dealer or Samsung Elec...
Page 29 - Specifications; Open Source Announcement
04 Appendix Specifications General Weight Main unit 6.1 Kg Speaker 55.17 Kg Dimensions Main unit 550 (W) x 212 (H) x 367 (D) mm Speaker 648 (W) x 652 (H) x 440 (D) mm Operating Temperature Range +5°C~+35°C Operating Humidity Range 10 % to 75 % FM Tuner Signal/Noise ratio 55 dB Usable sensitivity 10 ...