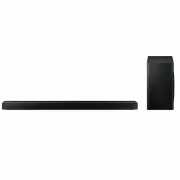
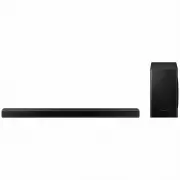
Page 2 - SAFETY INFORMATION; SAFETY WARNINGS; WARNING; CAUTION
ENG - 2 SAFETY INFORMATION SAFETY WARNINGS TO REDUCE THE RISK OF ELECTRIC SHOCK, DO NOT REMOVE THE COVER (OR BACK). NO USER-SERVICEABLE PARTS ARE INSIDE. REFER SERVICING TO QUALIFIED SERVICE PERSONNEL.Refer to the table below for an explanation of symbols which may be on your Samsung product. CAUTIO...
Page 3 - PRECAUTIONS; Fabric cleaning
ENG - 3 PRECAUTIONS 1. Ensure that the AC power supply in your house complies with the power requirements listed on the identification sticker located on the bottom of your product. Install your product horizontally, on a suitable base (furniture), with enough space around it for ventilation (7~10 c...
Page 4 - CONTENTS
ENG - 4 CONTENTS 01 Checking the Components 6 02 Product Overview 7 Top Panel of the Soundbar ------------------------- 7 Bottom Panel of the Soundbar ------------------------- 8 03 Using the Soundbar Remote Control 9 Inserting Batteries before using the Remote Control (AA batteries X 2) -----------...
Page 5 - Specifications and Guide
ENG - 5 08 Connecting a Mobile Device 26 Method 1. Connecting via Bluetooth ------------------------- 26 Method 2. Connecting via Wi-Fi (Wireless Network) ------------------------- 29 Configuring Amazon Alexa ------------------------- 30 Using the Tap Sound ------------------------- 32 09 Installing...
Page 6 - 1 CHECKING THE COMPONENTS
ENG - 6 01 CHECKING THE COMPONENTS VOL WOOFER SOUNDBAR SOUND MODE PAIR Soundbar Main Unit Soundbar Remote Control / Batteries Subwoofer POWER x 2 x 4 Surround Speaker (Left / Right) Power Cord (Subwoofer, Surround Speaker, Soundbar) HDMI Cable x 2 (M4 x L10) x 2 Wall Mount Guide Holder-Screw Screw x...
Page 7 - 2 PRODUCT OVERVIEW; Top Panel of the Soundbar; Settings; External Speaker
ENG - 7 02 PRODUCT OVERVIEW Top Panel of the Soundbar Position the product so that the SAMSUNG logo is located on the top. (Multi Function) Button • In standby mode, press the (Multi Function) button to turn on the Soundbar. • Press the (Multi Function) button to change the input source. • Press the...
Page 8 - Bottom Panel of the Soundbar
ENG - 8 Bottom Panel of the Soundbar ID SET HDMI IN 1 HDMI IN 2 POWER NETWORK SERVICE DIGITAL AUDIO IN (OPTICAL) HDMI TO TV (eARC/ARC) HDMI 2 HDMI 1 ID SET (WOOFER/REAR) POWER ID SET NETWORK SERVICE ID SET (WOOFER/REAR) DIGITAL AUDIO IN (OPTICAL) HDMI TO TV (eARC/ARC) HDMI 2 HDMI 1 ID SET HDMI IN 1 ...
Page 9 - How to Use the Remote Control
ENG - 9 03 USING THE SOUNDBAR REMOTE CONTROL Inserting Batteries before using the Remote Control (AA batteries X 2) Slide the back cover in the direction of the arrow until it is completely removed. Insert 2 AA batteries (1.5V) oriented so that their polarity is correct. Slide the back cover back in...
Page 12 - SOUND MODE; SURROUND
ENG - 12 Using the Hidden Buttons (Buttons with more than one function) Hidden Button Reference page Remote Control Button Function WOOFER (Up) TV remote control On/Off (Standby) page 13 Up ID SET page 16 (Sound Control) 7 Band EQ page 11 Output specifications for the different sound effect modes Ef...
Page 13 - Adjusting the Soundbar volume with a TV remote control
ENG - 13 Adjusting the Soundbar volume with a TV remote control Adjust the Soundbar volume using the TV’s remote control. • This function can be used with IR remote controls only. Bluetooth remote controls (remote controls that require pairing) are not supported. • Set the TV speaker to External Spe...
Page 14 - 4 CONNECTING THE SOUNDBAR; Connecting the power and units
ENG - 14 04 CONNECTING THE SOUNDBAR Connecting the power and units Use the Power cord to connect the Subwoofer, Surround Speakers, and Soundbar to an electrical outlet in the following order: • For more information about the required electrical power and power consumption, refer to the label attache...
Page 15 - NOTES; Recommended Speaker Layout
ENG - 15 4. Connect power to the Soundbar, Subwoofer and Surround Speakers. The Subwoofer and Surround Speakers are automatically connected when the Soundbar is turned on. LINK LED - Blue is On NOTES • Connect the Subwoofer and Surround Speakers power before connecting to the Soundbar. The Subwoofer...
Page 16 - Manually connecting the Subwoofer or Surround Speakers; Before performing the manual connection procedure below:; Up; ID SET
ENG - 16 Manually connecting the Subwoofer or Surround Speakers Before performing the manual connection procedure below: • Check whether the power cables for the Soundbar and subwoofer or Surround Speakers are connected properly. • Make sure that the Soundbar is turned off. 1. Turn off the Soundbar ...
Page 17 - LED
ENG - 17 4. Check if the LINK LED is solid blue (connection complete). LINK LED - Blue is On The LINK LED indicator stops blinking and glows a solid blue when a connection is established between the Soundbar and the Wireless Subwoofer, surround speakers. LED Indicator Lights on the Rear of Subwoofer...
Page 19 - 5 USING A WIRED CONNECTION TO THE TV; Method 1. Connecting with HDMI; Connecting the TV that supports HDMI ARC (Audio Return Channel); TV ARC
ENG - 19 05 USING A WIRED CONNECTION TO THE TV Method 1. Connecting with HDMI CAUTION • When both the HDMI cable and optical cable are connected, the HDMI signal is received first. • To connect the HDMI cable between the TV and Soundbar, be sure to connect the terminals marked ARC. Otherwise, the TV...
Page 20 - eARC; Method 2. Connecting using an Optical Cable; Pre-connection Checklist
ENG - 20 • When connecting a Samsung TV that supports the eARC function, “ eARC ” appears on the display and the sound is heard. • If “ TV ARC ” does not appear in the display window of the Soundbar main unit, confirm that the HDMI cable is connected to the correct port. • Use the volume buttons on ...
Page 21 - Using the Q-Symphony Function; Sound Output
ENG - 21 1. With the TV and Soundbar turned off, connect the DIGITAL AUDIO IN (OPTICAL) port on the Soundbar and the OPTICAL output port on the TV with the optical cable (not supplied), as shown in the figure. 2. Turn on the Soundbar and TV. 3. Press the (Multi Function) button at the top of the Sou...
Page 22 - 6 USING A WIRELESS CONNECTION TO THE TV; Connecting via Bluetooth; BT PAIRING; The initial connection
ENG - 22 06 USING A WIRELESS CONNECTION TO THE TV Connecting via Bluetooth When a Samsung TV is connected using Bluetooth, you can hear stereo sound without the hassle of cabling. • Only one Samsung TV can be connected at a time. • Samsung TV that supports Bluetooth can be connected. Check the speci...
Page 23 - If the device fails to connect; Disconnecting the Soundbar from the Samsung TV; BT”; What is the difference between BT READY and BT PAIRING?; BT READY; Notes on Bluetooth connection
ENG - 23 If the device fails to connect • If you have an existing Soundbar (e.g., [AV] Samsung Soundbar Q950T ) on the list of speakers on the Samsung TV, delete it. • Then repeat steps 1 through 3. Disconnecting the Soundbar from the Samsung TV Press the (Multi Function) button at the top of the So...
Page 24 - 7 CONNECTING AN EXTERNAL DEVICE; Method 1. Connecting using an HDMI Cable (Capable of Dolby; HDMI 1; HDMI
ENG - 24 07 CONNECTING AN EXTERNAL DEVICE Method 1. Connecting using an HDMI Cable (Capable of Dolby Atmos decoding and playback) Pre-connection Checklist • Dolby Atmos® and DTS:X are supported in HDMI mode only. • If the Audio Output options include Secondary Audio, make sure Secondary Audio is set...
Page 26 - 8 CONNECTING A MOBILE DEVICE; Method 1. Connecting via Bluetooth
ENG - 26 08 CONNECTING A MOBILE DEVICE Method 1. Connecting via Bluetooth When a mobile device is connected using Bluetooth, you can hear stereo sound without the hassle of cabling. • When you connect a paired Bluetooth device with the Soundbar off, the Soundbar automatically turns on. OR SOUN D MOD...
Page 27 - BT
ENG - 27 What is the difference between BT READY and BT PAIRING? • BT READY : In this mode, you can reconnect any Samsung TV or mobile device that was connected before. • BT PAIRING : In this mode, you can connect a new device to the Soundbar. (Press the PAIR button on the Soundbar remote control or...
Page 28 - Disconnecting the Bluetooth device from a Soundbar; BT DISCONNECTED; Disconnecting the Soundbar from the Bluetooth device
ENG - 28 • Note that your Soundbar cannot be paired with other Bluetooth devices while using the Bluetooth option. • This wireless device may cause electrical interference during operation. Disconnecting the Bluetooth device from a Soundbar You can disconnect a Bluetooth device from the Soundbar. Fo...
Page 29 - SmartThings
ENG - 29 Method 2. Connecting via Wi-Fi (Wireless Network) To connect a Soundbar to a mobile device via a wireless network (Wi-Fi), the SmartThings app is required. The initial connection 1. Install and launch the SmartThings app from your mobile device (smartphone or tablet). 2. On the app, follow ...
Page 31 - Use voice commands to control the Soundbar; Things to try; “Alexa, turn down the volume”
ENG - 31 Use voice commands to control the Soundbar Trigger + Command Things to try Example of what to say Volume control "Alexa, turn up the volume." “Alexa, turn down the volume” Listening to streaming content from Amazon Music "Alexa, play some jazz music " Playback control "A...
Page 32 - Using the Tap Sound; Setting the Tap Sound function
ENG - 32 Using the Tap Sound Tap the Soundbar with your mobile device to play the sound of content on the mobile device through the Soundbar. • This function may not be supported, depending on the mobile device. • This function is only compatible with Samsung mobile devices with Android 8.1 or later...
Page 33 - Installation Precautions; Wallmount Components; Wall Mount Guide; Wall Mount Guide
ENG - 33 09 INSTALLING THE WALL MOUNT Installation Precautions • Install on a vertical wall only. • Do not install in a place with high temperature or humidity. • Verify whether the wall is strong enough to support the product’s weight. If not, reinforce the wall or choose another installation point...
Page 35 - Installing the Surround; Notes for Wall Mounting the Surround
ENG - 35 7. Install the Soundbar with the attached Bracket-Wall Mounts by hanging the Bracket-Wall Mounts on the Holder-Screws on the wall. 8. Slide the Soundbar down as shown below so that the Bracket-Wall Mounts rest securely on the Holder-Screws . • Insert the Holder-Screws into the wide (bottom)...
Page 36 - Component; Microphone
ENG - 36 10 INSTALLING THE SOUNDBAR ABOVE A TV STAND Component x 4 Rubber-Foot To install, attach the Rubber-Feet to the bottom of the Soundbar before placing it in position above the TV stand. Make sure you attach the Rubber-Feet so they do not lie outside the edges of the TV stand. Refer to the fi...
Page 37 - UPDATE; Auto Update; system firmware in the future.; Initialisation; INIT
ENG - 37 11 SOFTWARE UPDATE Auto Update When the Soundbar is connected to the Internet, software updates automatically occur even when the Soundbar is turned off. • To use the Auto Update function, the Soundbar must be connected to the Internet. The Wi-Fi connection to the Soundbar will be terminate...
Page 38 - 2 TROUBLESHOOTING
ENG - 38 12 TROUBLESHOOTING Before seeking assistance, check the following. In case the power is not turned on ; Check whether the power cord of the Soundbar is correctly inserted into the outlet. In case the functions do not work properly ; After removing the power cord, insert it again. ; Remote t...
Page 40 - When Alexa is not configured correctly
ENG - 40 In case Alexa does not respond When the microphone is turned off or its reception is poor ; Press the (Mic On/Off) button at the top of the Soundbar to enable the microphone. ; Voice recognition may be unavailable due to ambient noise. Reduce the noise and try again. When the network is dis...
Page 42 - 6 SPECIFICATIONS AND GUIDE; For India Only
ENG - 42 16 SPECIFICATIONS AND GUIDE Specifications Model Name HW-Q950T Weight 7.1 kg Dimensions (W x H x D) 1232.0 x 69.5 x 138.0 mm Operating Temperature Range +5°C to +35°C Operating Humidity Range 10 % ~ 75 % AMPLIFIER Rated Output power (18W x 6) + (10W x 3) + (18W x 6) + 160W + (35W x 4) Suppo...