Page 2 - features of your new laser product; SPECIAL FEATURES
2 _Features of your new laser product features of your new laser product Your new machine is equipped with a number of special features that improve the quality of the documents you print.With the machine, you can: Print with excellent quality and speed • You can print in a full range of colors usin...
Page 3 - FEATURES BY MODELS
Features of your new laser product_ 3 FEATURES BY MODELS The machine is designed to support all of your document needs – from printing and copying, to more advanced networking solutions for your business.Basic features of this machine include: ( : Included, Blank: Not Available) ABOUT THIS USER’S GU...
Page 4 - FINDING MORE INFORMATION
4 _Features of your new laser product FINDING MORE INFORMATION You can find information for setting up and using your machine from the following resources, either as a print-out or onscreen. Quick Install Guide Provides information on setting up your machine and this requires that you follow the ins...
Page 5 - safety information; IMPORTANT SAFETY SYMBOLS AND PRECAUTIONS; What the icons and signs in this user’s guide mean:
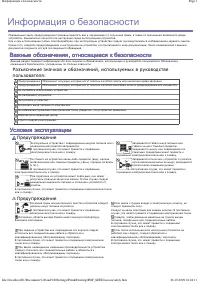
Safety information_ 5 safety information IMPORTANT SAFETY SYMBOLS AND PRECAUTIONS What the icons and signs in this user’s guide mean: These warning signs are here to prevent injury to you and others. Follow them explicitly. After reading this section, keep it in a safe place for future reference. WA...
Page 6 - LASER SAFETY STATEMENT; WARNING
6 _Safety information LASER SAFETY STATEMENT The printer is certified in the U.S. to conform to the requirements of DHHS 21 CFR, chapter 1 Subchapter J for Class I(1) laser products, and elsewhere is certified as a Class I laser product conforming to the requirements of IEC 825.Class I laser product...
Page 7 - POWER SAVER; FCC Information to the User
Safety information_ 7 OZONE SAFETY During normal operation, this machine produces ozone. The ozone produced does not present a hazard to the operator. However, it is advisable that the machine be operated in a well ventilated area.If you need additional information about ozone, request your nearest ...
Page 8 - Canadian Radio Interference Regulations; UNITED STATES OF AMERICA; FCC Statement for Wireless LAN use:; FAX BRANDING
8 _Safety information • Consult the dealer or experienced radio TV technician for help. Canadian Radio Interference Regulations This digital apparatus does not exceed the Class B limits for radio noise emissions from digital apparatus as set out in the interference-causing equipment standard entitle...
Page 9 - RINGER EQUIVALENCE NUMBER; You should also know that:
Safety information_ 9 RINGER EQUIVALENCE NUMBER The Ringer Equivalence Number and FCC Registration Number for this machine may be found on the label located on the bottom or rear of the machine. In some instances you may need to provide these numbers to the telephone company.The Ringer Equivalence N...
Page 10 - DECLARATION OF CONFORMITY (EUROPEAN COUNTRIES); Approvals and Certifications
10 _Safety information REPLACING THE FITTED PLUG (FOR UK ONLY) Important The mains lead for this machine is fitted with a standard (BS 1363) 13 amp plug and has a 13 amp fuse. When you change or examine the fuse, you must re-fit the correct 13 amp fuse. You then need to replace the fuse cover. If yo...
Page 11 - European Radio Approval Information
Safety information_ 11 European Radio Approval Information (for products fitted with EU-approved radio devices) Low power, Radio LAN type devices (radio frequency (RF) wireless communication devices), operating in the 2.4 GHz/5 GHz band, may be present (embedded) in your printer system which is inte...
Page 12 - REGULATORY COMPLIANCE STATEMENTS; Wireless Guidance
12 _Safety information REGULATORY COMPLIANCE STATEMENTS Wireless Guidance Low power, Radio LAN type devices (radio frequency (RF) wireless communication devices), operating in the 2.4 GHz/5 GHz Band, may be present (embedded) in your printer system. The following section is a general overview of con...
Page 13 - OPENSSL LICENSE; ORIGINAL SSLEAY LICENSE
Safety information_ 13 OPENSSL LICENSE Copyright (c) 1998-2001 The OpenSSL Project. All rights reserved.Redistribution and use in source and binary forms, with or without modification, are permitted provided that the following conditions are met: 1. Redistributions of source code must retain the abo...
Page 16 - contents
16 _Contents 2 Features of your new laser product5 Safety information INTRODUCTION 20 20 Machine overview 20 Front view 20 Rear view 21 Control panel overview 22 Understanding the Status LED 22 Acknowledging the status of the toner cartridge 23 Menu overview 24 Supplied software 24 Printer driver fe...
Page 17 - SCANNING; BASIC PRINTING
Contents_ 17 contents 41 Reduced or enlarged copy 42 Changing the default copy settings 42 ID card copying 42 Using special copy features 42 2-up or 4-up copying 42 Poster copying 43 Clone copying 43 Erasing background images 43 Gray enhance copying 43 Setting copy timeout SCANNING 44 44 Scanning ba...
Page 18 - USING USB MEMORY DEVICE
18 _Contents contents 56 Changing the default document settings 56 Printing sent fax report automatically 56 Setting up Address Book USING USB MEMORY DEVICE 58 58 About USB memory 58 Plugging in a USB memory device 58 Scanning to a USB memory device 58 Scanning 59 Customizing Scan to USB 59 Printing...
Page 19 - ORDERING SUPPLIES
Contents_ 19 contents 82 Fax problems 82 Common Windows problems 83 Common Linux problems 84 Common Macintosh problems ORDERING SUPPLIES 85 85 Supplies 85 How to purchase SPECIFICATIONS 86 86 General specifications 87 Printer specifications 87 Scanner specifications 87 Copier specifications 88 Facsi...
Page 20 - introduction; These are the main components of your machine:; MACHINE OVERVIEW; Front view
20 _ Introduction introduction These are the main components of your machine: This chapter includes: • Machine overview • Control panel overview • Understanding the Status LED • Acknowledging the status of the toner cartridge • Menu overview • Supplied software • Printer driver features MACHINE OVER...
Page 21 - CONTROL PANEL OVERVIEW
Introduction _ 21 CONTROL PANEL OVERVIEW 1 ID Copy You can copy both sides of the ID Card like a driver’s license to a single side of paper. (See "ID card copying" on page 42.) 2 Direct USB Allows you to directly print files stored on a USB Memory device when it is inserted into the USB memo...
Page 22 - UNDERSTANDING THE STATUS LED
22 _ Introduction UNDERSTANDING THE STATUS LED The color of the Status LED indicates the machine's current status. ACKNOWLEDGING THE STATUS OF THE TONER CARTRIDGE The status of toner cartridges is indicated by the Status LED and the LCD display. If the toner cartridge is low or needs to be replaced,...
Page 23 - MENU OVERVIEW
23 _ Introduction MENU OVERVIEW The control panel provides access to various menus to set up the machine or use the machine’s functions. These menus can be accessed by pressing Menu . Refer to the following diagram. Some menus may not appear in the display depending on options or models. If so, it i...
Page 24 - SUPPLIED SOFTWARE; Printer driver
24 _ Introduction SUPPLIED SOFTWARE You must install the machine software using the supplied CD to use your machine as a printer and a scanner, after you have set up your machine and connected it to your computer. CD provides you with the following software. PRINTER DRIVER FEATURES Your printer driv...
Page 25 - getting started; SETTING UP THE HARDWARE
25 _ Getting started getting started This chapter gives you step-by-step instructions for setting up the machine. This chapter includes: • Setting up the hardware • System requirements • Setting up the network • Installing the software • Using a wireless network(CLX-3175FW only) • Machine's basic se...
Page 26 - SYSTEM REQUIREMENTS; Windows
26 _ Getting started SYSTEM REQUIREMENTS Before you begin, ensure that your system meets the following requirements: Windows Your machine supports the following Windows operating systems. Macintosh Linux OPERATING SYSTEM REQUIREMENT (RECOMMENDED) CPU RAM FREE HDD SPACE Windows 2000 Pentium II 400 MH...
Page 27 - SETTING UP THE NETWORK; Supported operating environments; Installing the program
Getting started _ 27 SETTING UP THE NETWORK You need to set up the network protocols on the machine to use it in the network environment. You can set up the basic network settings through the machine's control panel. Supported operating environments The following table shows the network environments...
Page 28 - INSTALLING THE SOFTWARE
28 _ Getting started INSTALLING THE SOFTWARE You have to install the machine software for printing. The software includes drivers, applications, and other user friendly programs. The following procedure is based on Windows XP. If you use Macintosh or Linux OS, see Software section. 1. Connect the ne...
Page 29 - Wizard mode
Getting started _ 29 USING A WIRELESS NETWORK(CLX-3175FW ONLY) You must configure the appropriate network parameters to use your printer in a wireless network. To do this, you can use both control panel and SyncThru Web Service , an embedded web site of your printer. This section gives you basic inf...
Page 30 - Configuring wireless network from syncthru web
30 _ Getting started Configuring wireless network from syncthru web service You must configure the appropriate network parameters to use your printer in a wireless network. You can use SyncThru™ Web Service , an embedded web site of your printer. This section gives you basic information on 802.11b/g...
Page 31 - MACHINE'S BASIC SETTINGS
Getting started _ 31 MACHINE'S BASIC SETTINGS After installation is complete, you may want to set the machine's default settings. Refer to the next section if you would like to set or change values. Altitude adjustment The print quality is affected by atmospheric pressure, which is determined by the...
Page 32 - Entering characters using the number keypad
32 _ Getting started • Alarm Sound: Turns the alarm sound on or off. With this option set to On , an alarm tone sounds when an error occurs or fax communication ends. • Speaker: Turns on or off the sounds from the telephone line through the speaker, such as a dial tone or a fax tone. With this optio...
Page 33 - Auto continue
Getting started _ 33 Auto continue This is the option to set the machine to continue printing or not, in case the paper size you have set and the paper within the tray mismatches. 1. Press Menu until System Setup appears on the bottom line of the display and press OK . 2. Press OK when Machine Setup...
Page 34 - loading originals and print media; LOADING ORIGINALS; On the scanner glass
Loading originals and print media _ 34 loading originals and print media This chapter introduces you how to load originals and print media into your machine. This chapter includes: • Loading originals • Selecting print media • Changing the size of the paper in the paper tray • Printing on special pr...
Page 35 - SELECTING PRINT MEDIA
Loading originals and print media _ 35 2. Load the original face up into the ADF. Make sure that the bottom of the original stack matches the paper size marked on the document input tray. 3. Adjust the document width guides to the paper size. SELECTING PRINT MEDIA You can print on a variety of print...
Page 36 - Specifications on print media
Loading originals and print media _ 36 Specifications on print media TYPE SIZE DIMENSIONS WEIGHT A CAPACITY B Plain paper Letter 216 x 279 mm (8.5 x 11 inches) 60 to 105 g/m 2 (16 to 28 lb bond) • 150 sheets of 75 g/m 2 (20 lb bond) paper for the tray Legal 216 x 356 mm (8.5 x 14 inches) US Folio 21...
Page 37 - Media sizes supported in each mode
Loading originals and print media _ 37 Media sizes supported in each mode Guidelines for special print media MODE SIZE SOURCE Copy mode Letter, A4, Legal, Oficio, US Folio, Executive, JIS B5, A5, A6 tray 1 Print mode All sizes supported by the machine tray 1 Fax mode Letter, A4, Legal tray 1 MEDIA T...
Page 38 - CHANGING THE SIZE OF THE PAPER IN THE
38 _ Loading originals and print media CHANGING THE SIZE OF THE PAPER IN THE PAPER TRAY To load longer sizes of paper, such as Legal-sized paper, you need to adjust the paper guides to extend the paper tray. To change the tray 1 size to other size, you must adjust the paper length guide properly. 1....
Page 40 - PRINTING ON SPECIAL PRINT MATERIALS; Feeding the print material manually; SETTING THE PAPER SIZE AND TYPE
40 _ Loading originals and print media PRINTING ON SPECIAL PRINT MATERIALS The machine can hold special sizes and types of print material, such as postcards, note cards, and envelopes. Especially, it is useful for single page printing on letterhead or colored paper. Feeding the print material manual...
Page 41 - copying; COPYING; Darkness; To select from the predefined copy sizes:
41 _ Copying copying This chapter gives you step-by-step instructions for copying documents. This chapter includes: • Copying • Changing the settings for each copy • Changing the default copy settings • Using special copy features • Setting copy timeout COPYING 1. Press Copy . Ready to Copy appears ...
Page 42 - CHANGING THE DEFAULT COPY SETTINGS; Poster copying
42 _ Copying CHANGING THE DEFAULT COPY SETTINGS The copy options, including darkness, original type, copy size, and number of copies, can be set to those most frequently used. When you copy a document, the default settings are used unless they have been changed by using the corresponding buttons on ...
Page 43 - Clone copying; SETTING COPY TIMEOUT
Copying _ 43 5. Press Stop/Clear to return to ready mode. Your original is divided into 9 portions. Each portion is scanned and printed one by one in the following order: Clone copying Your machine can print multiple image copies from the original document on a single page. The number of images is a...
Page 44 - scanning; SCANNING BASICS; SCANNING FROM THE CONTROL PANEL; Setting scan information in Samsung Scan Manager.
Scanning _ 44 scanning Scanning with your machine lets you turn pictures and text into digital files that can be stored on your computer. This chapter includes: • Scanning basics • Scanning from the control panel • Scanning by a network connection • Changing the settings for each scan job • Changing...
Page 45 - SCANNING BY A NETWORK CONNECTION; Setting up an e-mail account; Scanning to Email
Scanning _ 45 5. Press the left/right arrow until Local PC appears on the bottom line of the display and press OK . If the machine connected to a network, select Network PC and press OK . 6. From Scan Destination , press the left/right arrow until the application program you want appears, then press...
Page 46 - CHANGING THE SETTINGS FOR EACH SCAN; Registering speed email numbers; Speed email numbers; Searching Address Book for an entry; Searching sequentially through memory
46 _ Scanning 10. Press the left/right arrow until the file format you want appears and press OK or Start . The machine begins scanning and then sends the email. 11. If the machine asks if you want to log off your account, press the left/right arrow to select Yes or No and press OK . 12. Press Stop/...
Page 47 - Searching with a particular first letter; Printing Address Book
Scanning _ 47 Searching with a particular first letter 1. If necessary, press Scan/Email . 2. Press Address Book until Search & Send appears on the bottom line of the display and press OK . 3. Press the left/right arrow until the number category you want appears and press OK . 4. Press the left/...
Page 49 - basic printing; This chapter explains common printing tasks.; PRINTING A DOCUMENT; CANCELING A PRINT JOB
Basic printing _ 49 basic printing This chapter explains common printing tasks. This chapter includes: • Printing a document • Canceling a print job PRINTING A DOCUMENT Your machine allows you to print from various Windows, Macintosh, or Linux applications. The exact steps for printing a document ma...
Page 50 - faxing; SENDING A FAX; Setting the fax header; Resolution
50 _ Faxing faxing This chapter gives you information about using your machine as a fax machine. This chapter includes: • Sending a fax • Receiving a fax • Fax setup SENDING A FAX Setting the fax header In some countries, you are required by law to indicate your fax number on any fax you send. The M...
Page 52 - Sending a delayed fax; Adding pages to a delayed fax; Sending a priority fax
52 _ Faxing 9. When you have finished entering fax numbers, press the left/right arrow to select No at the Another No.? prompt and press OK . The original is scanned into memory before transmission. The display shows memory capacity and the number of pages being stored in memory. 10. If an original ...
Page 53 - RECEIVING A FAX
Faxing _ 53 RECEIVING A FAX Changing receiving modes 1. Press Fax . 2. Press Menu until Fax Setup appears on the bottom line of the display and press OK . 3. Press the left/right arrow until Receiving appears and press OK . 4. Press OK when Receive Mode appears. 5. Press the left/right arrow until t...
Page 54 - Receiving in secure receiving mode; Printing received faxes; Receiving faxes in memory; Forwarding sent faxes to another fax machine
54 _ Faxing 6. When your machine begins to ring, do not answer the call. The machine requires several rings to learn the pattern. When the machine completes learning, the display shows Completed DRPD Setup . If the DRPD setup fails, Error DRPD Ring appears. Press OK when DRPD Mode appears and start ...
Page 55 - Forwarding received faxes to email address; FAX SETUP; Changing the fax setup options; Sending options
Faxing _ 55 7. Enter the number of the fax machine to which faxes are to be sent and press OK . 8. Enter the starting time and press OK . 9. Enter the ending time and press OK . 10. Press Stop/Clear to return to ready mode. Subsequent received faxes will be forwarded to the specified fax machine. Fo...
Page 56 - Changing the default document settings; Speed dial numbers
56 _ Faxing Changing the default document settings The fax options, including resolution and darkness, can be set to the most frequently used modes. When you send a fax, the default settings are used if they are not changed by using the corresponding button and menu. 1. Press Fax . 2. Press Menu unt...
Page 57 - Group dial numbers; Deleting a Address Book entry
Faxing _ 57 Group dial numbers If you frequently send the same document to several destinations, you can group these destinations and set them under a group dial number. You can then use a group dial number to send a document to all of the destinations within the group. You can set up to 200 (0 thro...
Page 58 - using USB memory device; ABOUT USB MEMORY
58 _ Using USB memory device using USB memory device This chapter explains how to use a USB memory device with your machine. This chapter includes: • About USB memory • Plugging in a USB memory device • Scanning to a USB memory device • Printing from a USB memory device • Backing up data • Managing ...
Page 59 - Customizing Scan to USB; PRINTING FROM A USB MEMORY DEVICE; To print a document from a USB memory device:; BACKING UP DATA; Backing up data
Using USB memory device _ 59 6. Press OK when Yes appears to scan more pages. Load an original and press Color Start or Black Start . Regardless of the button you press, the color mode is decided as customized. (See “Customizing Scan to USB” on page 59.) Otherwise, press the left/right arrow to sele...
Page 60 - MANAGING USB MEMORY; Deleting an image file; PRINTING DIRECTLY FROM A DIGITAL CAMERA
60 _ Using USB memory device MANAGING USB MEMORY You can delete image files stored on a USB memory device one by one or all at once by reformatting the device. Deleting an image file 1. Insert the USB memory device into the USB memory port on your machine. 2. Press Direct USB . 3. Press the left/rig...
Page 61 - maintenance; PRINTING REPORTS; Printing a report; ADJUSTING THE COLOR CONTRAST
Maintenance _ 61 maintenance This chapter provides information for maintaining your machine and the toner cartridge. This chapter includes: • Printing reports • Clearing memory • Cleaning your machine • Maintaining the cartridge • Replacing the toner cartridge • Replacing the imaging unit • Replacin...
Page 62 - CLEARING MEMORY; Cleaning the outside
62 _ Maintenance CLEARING MEMORY You can selectively clear information stored in your machine’s memory. 1. Press Menu until System Setup appears on the bottom line of the display and press OK . 2. Press the left/right arrow until Clear Setting appears and press OK . 3. Press the left/right arrow unt...
Page 64 - Cleaning the scan unit
64 _ Maintenance Cleaning the scan unit Keeping the scan unit clean helps ensure the best possible copies. We suggest that you clean the scan unit at the start of each day and during the day, as needed. 1. Slightly dampen a soft lint-free cloth or paper towel with water. 2. Open the scanner lid. 3. ...
Page 65 - MAINTAINING THE CARTRIDGE; Toner cartridge storage; REPLACING THE TONER CARTRIDGE
Maintenance _ 65 MAINTAINING THE CARTRIDGE Toner cartridge storage To get the most from the toner cartridge, keep the following guidelines in mind:• Do not remove the toner cartridge from its package until ready for use. • Do not refill the toner cartridge. The machine warranty does not cover damage...
Page 67 - REPLACING THE IMAGING UNIT
Maintenance _ 67 REPLACING THE IMAGING UNIT When the life span of the imaging unit has expired, the Smart Panel program window appears on the computer, indicating the imaging unit needs to be replaced. Otherwise your machine stops printing. 1. Turn the machine off, then wait a few minutes for the ma...
Page 68 - REPLACING THE WASTE TONER CONTAINER
68 _ Maintenance 8. Insert the waste toner container into position and then push it to make sure that it is firmly seated in place. 9. Slide four toner cartridges back into the machine. 10. Close the front cover firmly. 11. Turn the machine on. REPLACING THE WASTE TONER CONTAINER When the life span ...
Page 69 - MAINTENANCE PARTS; Checking replaceables; MANAGING YOUR MACHINE FROM THE; To access SyncThruTM Web Service:; CHECKING THE MACHINE’S SERIAL NUMBER
Maintenance _ 69 6. Insert the new container into position and then push it to make sure that it is firmly seated in place. 7. Close the front cover firmly. 8. Turn the machine on. MAINTENANCE PARTS To avoid print quality and paper feed problems resulting from worn parts, and to maintain your machin...
Page 70 - troubleshooting; TIPS FOR AVOIDING PAPER JAMS; Exit misfeed
70 _ Troubleshooting troubleshooting This chapter gives helpful information for what to do if you encounter an error. This chapter includes: • Tips for avoiding paper jams • Clearing document jams • Clearing paper jams • Understanding display messages • Solving other problems TIPS FOR AVOIDING PAPER...
Page 71 - Roller misfeed; CLEARING PAPER JAMS; In the tray 1
Troubleshooting _ 71 Roller misfeed 1. Open the scanner lid. 2. Seize the misfeed paper, and remove the paper from the feed area by carefully pulling it to the right using both hands. 3. Close the scanner lid. Then load the removed pages back into the ADF. CLEARING PAPER JAMS When a paper jam occurs...
Page 72 - In the paper exit area
72 _ Troubleshooting 2. Open the inner cover. 3. Carefully take the jammed paper out of the machine. 4. Close the inner cover. 5. Lowering down the scan unit gently and slowly until it is completely closed. Make sure that it is securely latched.Be careful not to pinch your fingers! In the paper exit...
Page 74 - UNDERSTANDING DISPLAY MESSAGES
74 _ Troubleshooting UNDERSTANDING DISPLAY MESSAGES Messages appear on the control panel display to indicate the machine’s status or errors. Refer to the tables below to understand the messages’ meaning and correct the problem if necessary. Messages and their meanings are listed in alphabetical orde...
Page 77 - SOLVING OTHER PROBLEMS; Paper feeding
Troubleshooting _ 77 SOLVING OTHER PROBLEMS The following chart lists some conditions that may occur and the recommended solutions. Follow the suggested solutions until the problem is corrected. If the problem persists, call for service Paper feeding Printing problems CONDITION SUGGESTED SOLUTIONS P...
Page 78 - Printing quality problems
78 _ Troubleshooting Printing quality problems If the inside of the machine is dirty or paper has been loaded improperly, you may notice a reduction in print quality. See the table below to clear the problem. The machine selects print materials from the wrong paper source. The paper source selection...
Page 79 - Bb
Troubleshooting _ 79 Toner specks • The paper may not meet specifications; for example, the paper is too moist or too rough. (See "Selecting print media" on page 35.) • The paper path may need cleaning. (See "Cleaning the inside" on page 62.) Dropouts If faded areas, generally rounde...
Page 80 - Copying problems; AaBbCc
80 _ Troubleshooting Copying problems Page skew • Ensure that the paper is loaded properly. • Check the paper type and quality. (See "Selecting print media" on page 35.) • Ensure that the paper or other material is loaded correctly and the guides are not too tight or too loose against the pa...
Page 81 - Scanning problems
Troubleshooting _ 81 Scanning problems Samsung Scan Manager problems Smears, lines, marks, or spots appears on copies. • If defects are on the original, press Darkness to lighten the background of your copies. • If no defects are on the original, clean the scan unit. (See "Cleaning the scan unit...
Page 83 - Common Linux problems
Troubleshooting _ 83 Common Linux problems CONDITION SUGGESTED SOLUTIONS The machine does not print. • Check if the printer driver is installed in your system. Open Unified Driver configurator and switch to the Printers tab in Printers configuration window to look at the list of available printers. ...
Page 84 - Common Macintosh problems
84 _ Troubleshooting Common Macintosh problems The machine does not appear on the scanners list. • Check if your machine is attached to your computer. Make sure that it is connected properly via the USB port and is turned on. • Check if the scanner driver for your machine is installed in your system...
Page 85 - ordering supplies; SUPPLIES
Ordering supplies _ 85 ordering supplies This chapter provides information on purchasing cartridges and accessories available for your machine. This chapter includes: • Supplies • How to purchase SUPPLIES When the toner runs out, you can order the following type of toner cartridge for your machine: ...
Page 86 - specifications; GENERAL SPECIFICATIONS
86 _ Specifications specifications This chapter guides you about this machine’s specifications such as various features. This chapter include: • General specifications • Printer specifications • Scanner specifications • Copier specifications • Facsimile specifications GENERAL SPECIFICATIONS The symb...
Page 87 - PRINTER SPECIFICATIONS
Specifications _ 87 PRINTER SPECIFICATIONS SCANNER SPECIFICATIONS COPIER SPECIFICATIONS ITEM DESCRIPTION Printing method Color laser beam printing Printing speed a a. It will be affected by operating system used, computing performance, application software, connecting method, media type, media size ...
Page 88 - FACSIMILE SPECIFICATIONS
88 _ Specifications FACSIMILE SPECIFICATIONS The fax feature may not be supported depending on machines. ITEM DESCRIPTION Compatibility ITU-T G3 Applicable line Public Switched Telephone Network (PSTN) or behind PABX Data coding MH/MR/MMR/JBIG/JPEG Modem speed 33.6 Kbps Transmission speed Up to 3 se...
Page 89 - glossary
Glossary _ 89 glossary ADF An Automatic Document Feeder (ADF) is a mechanism that will automatically feed an original sheet of paper so that the machine can scan some amount of the paper at once. AppleTalk AppleTalk is a proprietary suite of protocols developed by Apple, Inc for computer networking....
Page 93 - index
Index_ 93 index A Address Book group dial numbers 57 speed dial numbers 56 Address Book, use 46 ADF 20 ADF, load 34 adjustment altitude 31 alarm sound 32 Ans/Fax mode, receiving mode 53 B background image, adjust 43 C characters, enter 32 cleaning inside 62outside 62 scan unit 64 clock mode 31 contr...
Page 95 - contact SAMSUNG worldwide
95 _ Contact SAMSUNG worldwide contact SAMSUNG worldwide If you have any comments or questions regarding Samsung products, contact the Samsung customer care center. COUNTRY CUSTOMER CARE CENTER WEB SITE ARGENTINE 0800-333-3733 www.samsung.com/ar AUSTRALIA 1300 362 603 www.samsung.com AUSTRIA 0800-SA...
Page 104 - RADIO FREQUENCY EMISSIONS
Safety information_ 8 OZONE SAFETY During normal operation, this machine produces ozone. The ozone produced does not present a hazard to the operator. However, it is advisable that the machine be operated in a well ventilated area.If you need additional information about ozone, request your nearest ...
Page 107 - EC Certification
11 _Safety information REPLACING THE FITTED PLUG (FOR UK ONLY) Important The mains lead for this machine is fitted with a standard (BS 1363) 13 amp plug and has a 13 amp fuse. When you change or examine the fuse, you must re-fit the correct 13 amp fuse. You then need to replace the fuse cover. If yo...
Page 124 - Altitude adjustment; Key sound, and alarm sound; Using the save modes; Power Save mode
Getting started _ 28 MACHINE'S BASIC SETTINGS After installation is complete, you may want to set the machine's default settings. Refer to the next section if you would like to set or change values. Altitude adjustment The print quality is affected by atmospheric pressure, which is determined by the...
Page 136 - CHANGING THE SETTINGS FOR SCAN JOB
Scanning _ 40 5. Press the left/right arrow until Local PC appears on the bottom line of the display and press OK . If the machine connected to a network, select Network PC and press OK . 6. From Scan Destination , press the left/right arrow until the application program you want appears, then press...
Page 143 - CLEANING YOUR MACHINE
47 _ Maintenance CLEANING YOUR MACHINE To maintain print and scan quality, follow the cleaning procedures below each time the toner cartridge is replaced or if print and scan quality problems occur. Cleaning the outside Clean the cabinet of the machine with a soft lint-free cloth. You can dampen the...
Page 160 - Samsung Scan Manager problems
Troubleshooting _ 64 Samsung Scan Manager problems Common Windows problems Common Linux problems CONDITION SUGGESTED SOLUTIONS I cannot use the Samsung Scan Manager. Check your operating system. Supporting operating systems are Windows 2000/XP/ Vista. CONDITION SUGGESTED SOLUTIONS “File in Use” mess...
Page 175 - Samsung Printer
Page 176 - ONTENTS
1 S OFTWARE SECTION C ONTENTS Chapter 1: I NSTALLING P RINTER S OFTWARE IN W INDOWS Installing Printer Software ........................................................................................................ 4 Installing Software for Local Printing .............................................
Page 179 - Installing Printer; Installing Printer Software; Installing Software for Local Printing
Installing Printer Software in Windows 4 1 Installing Printer Software in Windows This chapter includes: • Installing Printer Software• Reinstalling Printer Software• Removing Printer Software• Installing mono printer driver N OTE : The following procedure is based on Windows XP, for other operating...
Page 185 - Reinstalling Printer Software
Installing Printer Software in Windows 10 the network, set the printer as the default printer, and change the port name of each printer. Click Next . To install this software on a server, select the Setting up this printer on a server checkbox. 7 After the installation is finished, a window appears ...
Page 186 - Removing Printer Software
Installing Printer Software in Windows 11 will start and a test page will not be printed at the end of the installation. • The reinstallation window that appears in this User’s Guide may differ depending on the printer and interface in use. 5 Select the components you want to reinstall and click Nex...
Page 187 - Basic Printing; Printing a Document
Basic Printing 12 2 Basic Printing this chapter explains the printing options and common printing tasks in windows. This chapter includes: • Printing a Document• Printing to a file (PRN)• Printer Settings - Layout Tab- Paper Tab- Graphics Tab- Extras Tab- About Tab- Using a Favorite Setting- Using H...
Page 188 - Printer Settings
Basic Printing 13 Printing to a file (PRN) You will sometimes need to save the print data as a file for your purpose. To create a file: 1 Check the Print to file box at the Print window. 2 Select the folder and assign a name of the file and then click OK. Printer Settings You can use the printer pro...
Page 189 - Layout Tab; Paper Tab
Basic Printing 14 Layout Tab The Layout tab provides options to adjust how the document appears on the printed page. The Layout Options includes Multiple Pages per Side , Poster Printing and Booklet Printing . See “Printing a Document” on page 12 for more information on accessing printer properties....
Page 190 - Graphics Tab
Basic Printing 15 Color Paper : 20 lb to 24 lb (75~90 g/m 2 ) color-backgrounded paper. Archive Paper : If you need to keep print-out for a long period time such as archives, select this option. Scaling Printing Scaling Printing allows you to automatically or manually scale your print job on a page....
Page 191 - Extras Tab
Basic Printing 16 Extras Tab You can select output options for your document. See “Printing a Document” on page 12 for more information about accessing the printer properties.Click the Extras tab to access the following feature: Watermark You can create a background text image to be printed on each ...
Page 192 - Advanced Printing
Advanced Printing 17 3 Advanced Printing This chapter explains printing options and advanced printing tasks. N OTE : • Your printer driver Properties window that appears in this User’s Guide may differ depending on the printer in use. However the composition of the printer properties window is simil...
Page 193 - Printing Posters
Advanced Printing 18 Printing Posters This feature allows you to print a single-page document onto 4, 9, or 16 sheets of paper, for the purpose of pasting the sheets together to form one poster-size document. 1 To change the print settings from your software application, access printer properties. S...
Page 194 - Printing on Both Sides of Paper
Advanced Printing 19 Printing on Both Sides of Paper You can print on both sides of a sheet of paper. Before printing, decide how you want your document oriented.The options are: • None • Long Edge , which is the conventional layout used in book binding. • Short Edge , which is the type often used w...
Page 195 - Using Watermarks; Using an Existing Watermark; Creating a Watermark
Advanced Printing 20 Using Watermarks The Watermark option allows you to print text over an existing document. For example, you may want to have large gray letters reading “DRAFT” or “CONFIDENTIAL” printed diagonally across the first page or all pages of a document. There are several predefined wate...
Page 196 - Using Overlays; Creating a New Page Overlay; Using a Page Overlay; Deleting a Page Overlay
Advanced Printing 21 Using Overlays What is an Overlay? An overlay is text and/or images stored in the computer hard disk drive (HDD) as a special file format that can be printed on any document. Overlays are often used to take the place of preprinted forms and letterhead paper. Rather than using pr...
Page 197 - Sharing the Printer; Setting Up a Host Computer
Sharing the Printer Locally 22 4 Sharing the Printer Locally You can connect the printer directly to a selected computer, which is called “host computer,” on the network. The following procedure is for Windows XP. For other Windows OS, refer to the corresponding Windows User's Guide or online help. ...
Page 198 - Uninstalling Samsung SmarThru; Using Samsung SmarThru
Scanning 23 5 Scanning Scanning with your machine lets you turn pictures and text into digital files on your computer. Then you can fax or e-mail the files, display them on your web site or use them to create projects that you can print using Samsung SmarThru software or the WIA driver.This chapter ...
Page 199 - Using Onscreen Help File
Scanning 24 The SmarThru 4 window opens. •Scan To Allows you to scan an image and save it to an application or folder, email it, or publish it on a web site. •Image Allows you to edit an image you have saved as a graphic file and send it to a selected application or folder, email it, or publish it o...
Page 200 - Scanning Using the WIA Driver; Windows XP
Scanning 25 Scanning Process with TWAIN-enabled Software If you want to scan documents using other software, you will need to use TWAIN-compliant software, such as Adobe Photoshop. The first time you scan with your machine, select it as your TWAIN source in the application you use. The basic scannin...
Page 201 - Using Smart Panel; Understanding Smart Panel
Using Smart Panel 26 6 Using Smart Panel Smart Panel is a program that monitors and informs you of the status of the printer, and allows you to customize the printer’s settings. Smart Panel is installed automatically when you install the printer software. N OTES : • To use this program, you need: - ...
Page 202 - Using Printer Settings Utility
Using Smart Panel 27 Driver Setting (Only for Windows) You can use the printer properties window, which allows you to access all of the printer options you need for using your printer. For details, See “Printer Settings” on page 13. Opening the Troubleshooting Guide Using the troubleshooting guide, ...
Page 203 - Using Your Printer in; Getting Started; Installing the Unified Linux Driver
Using Your Printer in Linux 28 7 Using Your Printer in Linux You can use your machine in a Linux environment. This chapter includes: • Getting Started• Installing the Unified Linux Driver• Using SetIP program• Using the Unified Driver Configurator• Configuring Printer Properties• Printing a Document...
Page 204 - Uninstalling the Unified Linux Driver
Using Your Printer in Linux 29 4 When the welcome screen appears, click Next . 5 When the installation is complete, click Finish . The installation program has added the Unified Driver Configurator desktop icon and Samsung Unified Driver group to the system menu for your convenience. If you have any...
Page 205 - Using SetIP program; Starting the program
Using Your Printer in Linux 30 Using SetIP program This program is for the network IP setting using the MAC address which is the hardware serial number of the network printer card or interface. Especially, it is for the network administrator to set several network IPs at the same time. You can only ...
Page 206 - Printers Configuration; Scanners Configuration
Using Your Printer in Linux 31 Printers Configuration Printers configuration has the two tabs: Printers and Classes . Printers Tab You can see the current system’s printer configuration by clicking on the printer icon button on the left side of the Unified Driver Configurator window. You can use the...
Page 207 - Ports Configuration; Configuring Printer Properties
Using Your Printer in Linux 32 Ports Configuration In this window, you can view the list of available ports, check the status of each port and release a port that is stalled in busy state when its owner is terminated for any reason. • Refresh : Renews the available ports list. • Release port : Relea...
Page 208 - Printing from Applications
Using Your Printer in Linux 33 Printing a Document Printing from Applications There are a lot of Linux applications that you are allowed to print from using Common UNIX Printing System (CUPS). You can print on your machine from any such application. 1 From the application you are using, select Print...
Page 209 - Scanning a Document
Using Your Printer in Linux 34 Scanning a Document You can scan a document using the Unified Driver Configurator window. 1 Double-click the Unified Driver Configurator on your desktop. 2 Click the button to switch to Scanners Configuration. 3 Select the scanner on the list. When you have only one MF...
Page 210 - Using the Image Manager
Using Your Printer in Linux 35 If you want to edit the scanned image, use the toolbar. For further details about editing an image, see page 35. 10 When you are finished, click Save on the toolbar. 11 Select the file directory where you want to save the image and enter the file name. 12 Click Save . ...
Page 212 - Installing Software; Uninstalling software
37 8 Using Your Printer with a Macintosh Your printer supports Macintosh systems with a built-in USB interface or 10/100 Base-TX network interface card. When you print a file from a Macintosh computer, you can use the CUPS driver by installing the PPD file. N OTE : Some printers do not support a net...
Page 213 - Setting Up the Printer; For a Network-connected
38 Using SetIP program This program is for the network IP setting using the MAC address which is the hardware serial number of the network printer card or interface. Especially, it is for the network administrator to set several network IPs at the same time. You can only use SetIP program when your ...
Page 215 - Printing
Using Your Printer with a Macintosh 40 Printing N OTES : • The Macintosh printer’s properties window that appears in this User’s Guide may differ depending on the printer in use. However the composition of the printer properties window is similar. • You can check your printer name in the supplied CD...
Page 217 - Scanning with USB; Scanning with network
Using Your Printer with a Macintosh 42 Scanning You can scan docoments using Image Capture program. Macintosh OS offers Image Capture program. Scanning with USB 1 Make sure that your machine and computer are turned on and properly connected to each other. 2 Place a single document face down on the d...
Page 218 - NDEX
43 S OFTWARE SECTION I NDEX A advanced printing, use 17 B booklet printing 18 C canceling scan 25 D document, print Macintosh 40 Windows 12 double-sided printing 19 E Extras properties, set 16 F favorites settings, use 16 G Graphics properties, set 15 H help, use 16 I install printer driver Macintos...