Page 2 - WORK AREA SAFETY; ELECTRICAL SAFETY; PERSONAL SAFETY; GENERAL POWER TOOL SAFETY WARNINGS; POWER TOOL USE AND CARE
2 - English WARNING! Read all safety warnings and all instructions. Failure to follow the warnings and instructions may result in electric shock, fire and/or serious injury. Save all warnings and instructions for future reference. The term “power tool” in the warnings refers to your mains-operated (...
Page 3 - CIRCULAR SAW SAFETY WARNINGS; SERVICE; KICKBACK CAUSES AND RELATED WARNINGS
3 - English CIRCULAR SAW SAFETY WARNINGS Keep cutting tools sharp and clean. Properly maintained cutting tools with sharp cutting edges are less likely to bind and are easier to control. Use the power tool, accessories and tool bits etc. in accordance with these instructions, taking into account...
Page 4 - LOWER GUARD FUNCTION
4 - English CIRCULAR SAW SAFETY WARNINGS their own weight. Supports must be placed under the panel on both sides, near the line of cut and near the edge of the panel. Do not use dull or damaged blades. Unsharpened or improperly set blades produce narrow kerf causing excessive friction, blade bindi...
Page 5 - SYMBOLS; SYMBOL
5 - English The following signal words and meanings are intended to explain the levels of risk associated with this product. SYMBOL SIGNAL MEANING DANGER: Indicates an imminently hazardous situation, which, if not avoided, will result in death or serious injury. WARNING: Indicates a potentially haza...
Page 6 - EXTENSION CORDS; ELECTRICAL; DOUBLE INSULATION; ELECTRICAL CONNECTION
6 - English EXTENSION CORDS When using a power tool at a considerable distance from a power source, be sure to use an extension cord that has the capacity to handle the current the product will draw. An undersized cord will cause a drop in line voltage, resulting in overheating and loss of power. Us...
Page 7 - UNPACKING; INSTALLING/REMOVING BLADE; PRODUCT SPECIFICATIONS
7 - English FEATURES ASSEMBLY UNPACKING This product requires assembly. Carefully remove the tool and any accessories from the box. All items listed in the Includes section must be included at the time of purchase. WARNING: Items in this Assembly section are not assembled to the product by the man...
Page 8 - ASSEMBLY; CALIFORNIA PROPOSITION 65; OPERATION; APPLICATIONS
8 - English Depress and hold spindle lock. Remove blade screw by turning it counterclockwise with the blade wrench, while keeping the spindle lock depressed. Remove spring washer and then remove outer blade washer (“D” washer). Lift lower blade guard. Remove blade. Depress spindle lock a...
Page 9 - SAW BLADES
9 - English DANGER: Release switch immediately if blade binds or saw stalls. Kickback could cause you to lose control of the saw. Loss of control can lead to serious injury. To guard against kickback, avoid dangerous practices such as the following: Setting blade depth incorrectly Sawing into kn...
Page 10 - STARTING/STOPPING THE SAW; ADJUSTING BLADE DEPTH; USING THE LASER GUIDE; OPERATING THE SAW
10 - English OPERATION STARTING/STOPPING THE SAW See Figure 9, page 16. To start the saw: Depress the switch. Always let the blade reach full speed, then guide the saw into the workpiece. WARNING: The blade coming in contact with the workpiece before it reaches full speed could cause the saw to “kic...
Page 11 - LENGTH OF CUT SCALE; CROSS CUTTING/RIP CUTTING; BEVEL CUTTING; TO ADJUST BEVEL SETTING
11 - English WARNING: Use clamps or other practical way to secure and support the workpiece to a stable platform. Holding the work by hand or against your body is unstable and can lead to loss of control which could cause possible serious injury. To make the best possible cut: Hold the saw firmly ...
Page 12 - TO BEVEL CUT; OPTIONAL DUST NOZZLE KIT
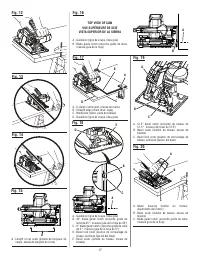
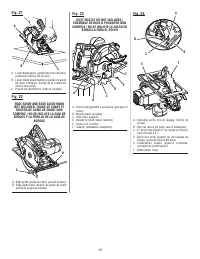
12 - English OPERATION TO BEVEL CUT See Figure 20, page 17. Hold the saw firmly with both hands as shown. Rest the front edge of the base on the workpiece. Start the saw and let the blade reach full speed. Guide the saw into the workpiece and make the cut. Release the switch and allow the ...
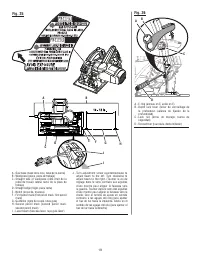
Page 13 - ° BEVEL STOP; ADJUSTING THE DEPTH LOCK LEVER; ADJUSTMENTS
13 - English WARNING: Before performing any adjustment, make sure the tool is unplugged from the power supply and the switch is in the OFF position. Failure to heed this warning could result in serious personal injury. WARNING: Never tie the lower blade guard in a raised position. Leaving the blade ...
Page 14 - GENERAL MAINTENANCE; MAINTENANCE; LUBRICATION; ACCESSORIES; NOTE: ILLUSTRATIONS START ON PAGE 15; This product has a Three-year Limited Warranty.
14 - English WARNING: When servicing, use only identical replacement parts. Use of any other parts can create a hazard or cause product damage. WARNING: Always wear eye protection with side shields marked to comply with ANSI Z87.1. Failure to do so could result in objects being thrown into your eyes...
Page 15 - RÈGLES DE SÉCURITÉ RELATIVES AUX OUTILS ÉLECTRIQUES; SÉCURITÉ DU LIEU DE TRAVAIL
2 - Français RÈGLES DE SÉCURITÉ RELATIVES AUX OUTILS ÉLECTRIQUES AVERTISSEMENT ! Lire tous les avertissements et toutes les instructions. Ne pas suivre l’ensemble des avertissements et des instructions peut entraîner une électrocution, un incendie ou des blessures graves. Conserver les avertissement...
Page 16 - DÉPANNAGE; MÉTHODE DE COUPE
3 - Français affûtés risquent moins de se bloquer et sont plus faciles à contrôler. U t i l i s e r l ’ o u t i l , l e s a c c e s s o i re s e t e m b o u t s , e t c . conformément à ces instrutions pour les applications pour lesquelles ils sont conçus, en tenant compte des conditions et du typ...
Page 17 - RÈGLES SUPPLÉMENTAIRES DE SÉCUIRITÉ; AVERTISSEMENTS DE SÉCURITÉ RELATIFS AU SCIE CIRCULAIRE
4 - Français Soutenir les planches longues afin d’éviter les risques de pincement de la lame et de rebond. Les planches de grande taille ont tendance à ployer sous leur propre poids. Des supports doivent être placés sous la planche, de chaque côté, près du trait de coupe et du bord de la planche...
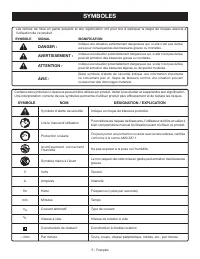
Page 18 - SYMBOLES
5 - Français SYMBOLES Certains des symboles ci-dessous peuvent être utilisés sur produit. Veiller à les étudier et à apprendre leur signification. Une interprétation correcte de ces symboles permettra d’utiliser produit plus efficacement et de réduire les risques. SYMBOLE NOM DÉSIGNATION / EXPLICATI...
Page 19 - CARACTÉRISTIQUES ÉLECTRIQUES; CORDONS PROLONGATEURS; DOUBLE ISOLATION; CONNEXION ÉLECTRIQUE
6 - Français CARACTÉRISTIQUES ÉLECTRIQUES CORDONS PROLONGATEURS Lors de l’utilisation d’un outil électrique à grande distance d’une prise secteur, veiller à utiliser un cordon prolongateur d’une capacité suffisante pour supporter le prélèvement de courant du moteur. Un cordon de capacité insuffisant...
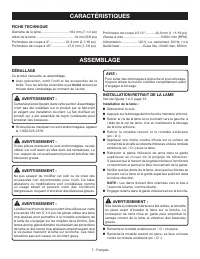
Page 20 - INSTALLATION/RETRAIT DE LA LAME; CARACTÉRISTIQUES; FICHE TECHNIQUE; ASSEMBLAGE; DÉBALLAGE
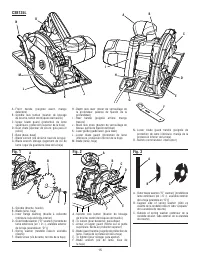
7 - Français AVIS : Pour éviter des dommages à la broche et à son blocage, toujours laisser le moteur s’arrêter complètement avant d’engager le blocage. INSTALLATION/RETRAIT DE LA LAME Voir les figures 1 à 3, page 15. Installation de la lame : Débrancher la scie. Appuyer sur le blocage de broche...
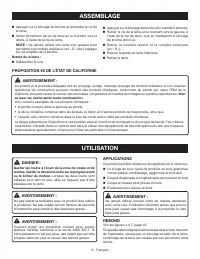
Page 21 - PROPOSITION 65 DE L’ÉTAT DE CALIFORNIE; UTILISATION
8 - Français Appuyer sur le blocage de broche et le maintenir enfoncé. Retirer le vis de la lame en le tournant vers la gauche, à l’aide de la clé de lame, tout en maintenant le blocage de broche enfoncé. Retirer la rondelle ressort et la rondelle extérieure (en « D »). Relever la ga...
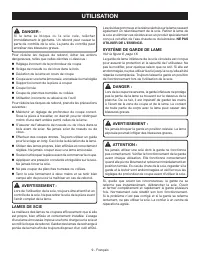
Page 22 - LAMES DE SCIE; SYSTÈME DE GARDE DE LAME
9 - Français DANGER : Si la lame se bloque ou la scie cale, relâcher immédiatement la gâchette. Un rebond peut causer la perte de contrôle de la scie. La perte du contrôle peut entraîner des blessures graves. Pour réduire les risques de rebond, éviter les actions dangereuses, telles que celles décri...
Page 23 - MISE EN MARCHE ET ARRÊT DE LA SCIE; RÉGLAGE DE LA PROFONDEUR DE COUPE; UTILISATION DU GUIDE LASER; UTILISATION DE LA SCIE
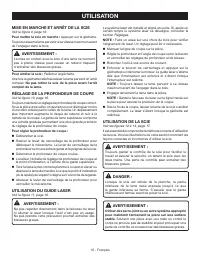
10 - Français UTILISATION MISE EN MARCHE ET ARRÊT DE LA SCIE Voir la figure 9, page 16. Pour mettre la scie en marche : Appuyer sur la gâchette. Toujours laisser la lame parvenir à sa vitesse maximum avant de l’engager dans le bois. AVERTISSEMENT : La mise en contact avec le bois d’une lame ne tourn...
Page 24 - ÉCHELLE DE LONGUEUR DE COUPE; COUPE EN LONG SANS GUIDE DE CHANT; SCIAGE EN BISEAU; POUR SCIER EN BISEAU
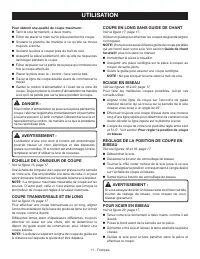
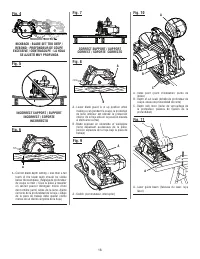
11 - Français Pour obtenir une qualité de coupe maximum : Tenir la scie fermement, à deux mains. Éviter de placer la main sur la pièce pendant la coupe. Soutenir la planche de manière à ce qu’elle se trouve toujours à droite. Soutenir la pièce à couper près du trait de scie. Assu...
Page 25 - DÉCOUPAGE D’UNE OUVERTURE
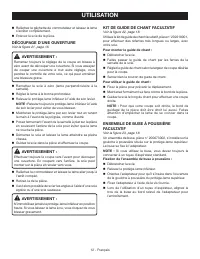
12 - Français UTILISATION Relâchez la gâchette de commutateur et laissez la lame s’arrêter complètement. Enlevez la scie de la pièce. DÉCOUPAGE D’UNE OUVERTURE Voir la figure 21, page 18. AVERTISSEMENT : Remettez toujours le réglage de la coupe en biseau à zéro avant de découper une ouverture. S...
Page 26 - BUTÉE 0° DE COUPE EN BISEAU; RÉGLAGES
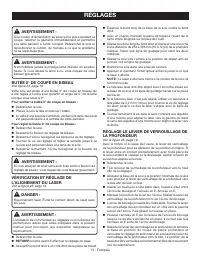
13 - Français AVERTISSEMENT : Si le cordon d’alimentation se pose sur la pièce pendant la coupe, relâcher la gâchette immédiatement et permettre à la lame parvenir à l’arrêt complet. Débrancher la scie et repositionner le cordon, de manière à ce que le problème ne se reproduise plus. AVERTISSEMENT :...
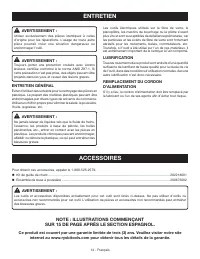
Page 27 - ENTRETIEN; LUBRIFICATION; ACCESSOIRES; NOTE : ILLUSTRATIONS COMMENÇANT; Ce produit est couvert par une garantie limitée de trois (3) ans.
14 - Français ENTRETIEN Les outils électriques utilisés sur la fibre de verre, le placoplâtre, les mastics de bouchage ou le plâtre s’usent plus vite et sont susceptibles de défaillance prématurée, car les particules et les éclats de fibre de verre sont fortement abrasifs pour les roulements, balais...
Page 28 - ADVERTENCIAS DE SEGURIDAD PARA HERRAMIENTAS ELÉCTRICAS; ÁREA DE TRABAJO
2 - Español ADVERTENCIAS DE SEGURIDAD PARA HERRAMIENTAS ELÉCTRICAS ADVERTENCIA! L e a t o d a s l a s a d v e r t e n c i a s d e s e g u r i d a d y l a s instrucciones. La inobservancia de las advertencias e instrucciones puede causar descargas eléctricas, incendios o lesiones graves. Guarde todas...
Page 29 - SERVICIO; PROCEDIMIENTOS DE CORTE; ADVERTENCIAS DE SEGURIDAD SIERRA CIRCULAR
3 - Español Mantenga las herramientas de corte afiladas y limpias. Las herramientas de corte bien cuidadas y con bordes bien afilados, tienen menos probabilidad de atascarse en la pieza de trabajo y son más fáciles de controlar. Utilice la herramienta eléctrica, los accesorios y brocas, hojas y ...
Page 30 - FUNCIÓN DE PROTECCIÓN INFERIOR
4 - Español ADVERTENCIAS DE SEGURIDAD SIERRA CIRCULAR Apoye debidamente los paneles grandes para reducir al mínimo el riesgo de un pellizcamiento de la hoja de corte y de un contragolpe. Los paneles grandes tienden a combarse bajo su propio peso. Deben colocarse soportes bajo ambos lados del panel...
Page 31 - SÍMBOLOS; SÍMBOLO
5 - Español SÍMBOLOS Es posible que se empleen en este producto algunos de los siguientes símbolos. Le suplicamos estudiarlos y aprender su significado. Una correcta interpretación de estos símbolos le permitirá utilizar mejor y de manera más segura el producto. SÍMBOLO NOMBRE DENOMINACIÓN/EXPLICACI...
Page 32 - DOBLE AISLAMIENTO; CONEXIÓN ELÉCTRICA; CORDONES DE EXTENSIÓN; ASPECTOS ELÉCTRICOS
6 - Español DOBLE AISLAMIENTO El doble aislamiento es una característica de seguridad de las herramientas eléctricas, la cual elimina la necesidad de usar el típico cordón eléctrico de tres conductores con conexión a tierra. Todas las partes metálicas expuestas están aisladas de los componentes metá...
Page 33 - CARACTERISTICAS; ESPECIFICACIONES DEL PRODUCTO; ARMADO; DESEMPAQUETADO; MONTAJE/ DESMONTAJE DE LA HOJA
7 - Español CARACTERISTICAS ESPECIFICACIONES DEL PRODUCTO Diámetro de la hoja .......................... 184 mm (7-1/4 pulg.)Eje de la hoja .......................................... 16 mm (5/8 pulg.)Profundidad de corte a 0º ............. 61,9 mm (2-7/16 pulg.)Profundidad de corte a 45º ..............
Page 34 - FUNCIONAMIENTO; USOS
8 - Español Oprima el botón de bloqueo del husillo y vuelva a colocar el tornillo de la hoja. Apriete firmemente el tornillo de la hoja; para ello, gírelo hacia la izquierda con la llave. NOTA: Nunca utilice una hoja tan gruesa que no permita acoplar la arandela exterior de la hoja (arandela en ...
Page 35 - CONTRAGOLPE; HOJAS DE LA SIERRA
9 - Español CONTRAGOLPE Vea las figuras 4 a 7, página 16. El contragolpe sucede cuando la hoja se detiene rápidamente y la sierra sale empujada hacia el operador. El atoramiento de la hoja es causado por cualquier acción que produzca el pellizcamiento de la hoja en la madera. PELIGRO: Si la hoja se ...
Page 36 - ENCENDIDO Y APAGADO DE LA SIERRA; AJUSTE DE LA PROFUNDIDAD DE LA HOJA; UTILIZACIÓN DE LA GUÍA LÁSER; UTILIZACIÓN DE LA SIERRA
10 - Español ENCENDIDO Y APAGADO DE LA SIERRA Vea la figura 9, página 16. Para arrancar la sierra: Oprima el gatillo del interruptor. Siempre permita que la hoja alcance su velocidad máxima, y después guíe la sierra introduciéndola en la pieza de trabajo. ADVERTENCIA: Si la hoja toca la pieza de tra...
Page 37 - CORTES EN BISEL; PARA REGULAR EL AJUSTE EN BISEL
11 - Español PARA CORTAR AL HILO SIN LA GUÍA DE BORDES Vea la figura 17, página 17. Al efectuar cortes al hilo largos o anchos con la sierra utilice una guía. NOTA: Usted también puede usar la guía de bordes que se suministra con su sierra. Consulte la sección Guía de bordes opcional que se incluye ...
Page 38 - JUEGO DE GUÍA DE BORDES OPCIONAL; CORTE DE CAVIDADES
12 - Español JUEGO DE GUÍA DE BORDES OPCIONAL Vea la figura 22, página 18. Use la juego de guía de bordes opcional provista, Pieza No. 202218001, cuando haga cortes largos o anchos con su sierra. Instalacion de la guía de bordes: Desconecte la sierra. Coloque la guía de bordes a través de las ra...
Page 39 - TOPE DE BISEL DE 0°; AJUSTES
13 - Español ADVERTENCIA: Antes de efectuar cualquier ajuste, asegúrese de que la herramienta esté desconectada del suministro de corriente y de que el interruptor esté en la posición de APAGADO. La inobservancia de esta advertencia podría causar lesiones corporales serias. ADVERTENCIA: Nunca sujete...
Page 40 - MANTENIMIENTO; LUBRICACIÓN; ACCESORIOS
14 - Español Para pedir estos accesorios, llame al 1-800-525-2579. Juego de guía de bordes ................................................................................................................................. 202218001 Juego de boquilla para el polvo ....................................
Page 48 - ou en téléphonant au
990000960 4-7-14 (REV:01) OPERATOR’S MANUAL / 7-1/4 IN. CIRCULAR SAW W/LASER MANUEL D’UTILISATION / SCIE CIRCULAIRE DE 184 mm (7-1/4 po) AVEC LASERMANUAL DEL OPERADOR / SIERRA CIRCULAR DE 184 mm (7-1/4 pulg.) CON L Á SER CSB135L ONE WORLD TECHNOLOGIES, INC. 1428 Pearman Dairy Road, Anderson, SC 2962...