Page 2 - and an exhaust opening on the bottom of a least 200 cm
Warning and safety information Installing the built in oven This appliance is not intended for use by persons (including children) with reduced physical, sensory or mental capabilities, or lack of experience and knowledge, unless they have been given supervision or instruction concerning use of the ...
Page 3 - Installing the built in oven; Positioning the appliance
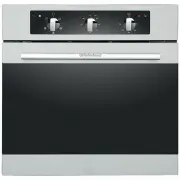
Installing the built in oven Positioning the appliance Ensure that the aperture that you will be fitting the oven into, is of the size given in the diagram. The oven must be fitted into an oven housing with the ventilation cut-outs shown in the “Ventilation requirements” section below Ensure that th...
Page 4 - continued; more than room temperature at any point
Installation- continued Electric connection Cookers with a three-pole power supply cable are designed to operate with alternated current at the supply frequency and voltage indicated on the data plate (at the bottom of the oven dashboard). The earthing conductor of the cable is the yellow-green cond...
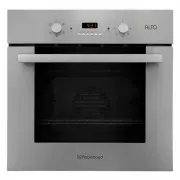
Page 6 - Selecting a cooking function and temperature
Instruction on use - OBAC605M57SS No 6 Selecting a cooking function and temperature 1.When your appliance is connected to your mains supply for the first time, the power indicator light will come on, after selecting the cooking function and setting a temperature, the operating light will come on and...
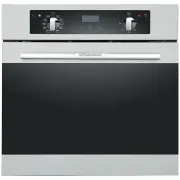
Page 8 - Instruction on use. Oven function - OBAC606D57SS
Instruction on use. Oven function - OBAC606D57SS No 8
Page 10 - Setting the duration function
Instruction on use - OBAC610D57SS & OBAC606D57SS 10 Setting the duration function This function will allow you to set a countdown time similar to the minute minder function. However the oven will no longer continue to heat, once the countdown period has elapsed. Use the thermostat control knob (...
Page 11 - Instruction on use - OBAC606D57SS; Setting the end cook function
Instruction on use - OBAC606D57SS 11 Setting the end cook function This function is similar to the duration function, however instead of selecting a period of time that you wish the oven to switch off after. You select the time of day that you wish the oven to switch off at. Use the thermostat contr...
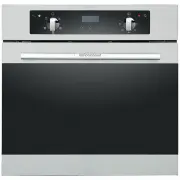
Page 12 - Instruction on use. Oven function - OBAC610D57SS
Instruction on use. Oven function - OBAC610D57SS 12 Selecting manual operation mode After your appliance is connected to your mains supply for the first time, the numbers on the timer display will flash. Before you can select a cooking function or set a temperature, you must set the appliance into “...
Page 14 - Maintenance and cleaning; The numbers 1 -4 indicate the different shelf positions that you; Voltage:; 00 degrees centigrade; WARNING; Ensure that the appliance is switched off before
Maintenance and cleaning Accessories: Your oven will come supplied with the following items: 1. Oven shelf (A) 2. Drip tray (B) The numbers 1 -4 indicate the different shelf positions that you can use. Replacing the light bulb Turn off the supply of power to the oven by turning off the circuit break...
Page 15 - Maintenance; •Do not use steam equipment to clean the appliance
Maintenance How to keep your oven in good condition Important: Before cleaning your oven, or performing maintenance, disconnect it from the power supply. To extend the life of your oven, it must be cleaned frequently, keeping in mind that: •Do not use steam equipment to clean the appliance •The enam...
Page 17 - Important information
The appliance may be built-in and connected to the power supply only by a qualified technician. Particular areas of the cooktop surface (adjacent to the hotplates) are hot during operation. Hot oil ignites readily, so be sure have the preparation of such food (fries) under constant control. Hotplate...