Page 2 - Contents; Disposal Information
Contents Congratulations! Thank you for choosing one of our appliances. Before you use the appliance, we strongly recommend that you read through the whole user manual which provides important safety instructions and description of the product and the proper use of its functions. To avoid the ever-p...
Page 3 - Important Safety Instructions; CAUTION; WARNING
1 Important Safety Instructions • This appliance is not intended for use by persons (including children) with reduced physical, sensory or mental capabilities, or lack of experience and knowledge, unless they have been given supervision or instruction concerning use of the appliance by a person resp...
Page 4 - Installation Warnings
2 Installation Warnings • The appliance must be installed by a qualified person in accordance with local and national building regulations. • Panels and furniture lining of the kitchen cabinet receiving the cooktop must be treated with temperature resistant adhesives 80°C (otherwise they may become ...
Page 5 - Installation; Built-in induction cooktop cutout dimensions
3 Installation Built-in induction cooktop cutout dimensions Cut out the work surface according to the sizes shown in the image below. Ensure that there is a minimum of 50mm of space around the cutout. The thickness of the bench should be at least 30mm. Please select heat-resistant and insulated benc...
Page 6 - Before locating the fixing brackets
4 Installation Note: There are ventilation holes around outside of the cooktop. Ensure that these holes are not blocked by the bench when you install the cooktop. Be aware that any glue used on the bench must be resistant to a minimum temperature of 150°C. The rear wall, adjacent and surrounding sur...
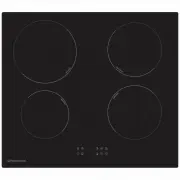
Page 7 - Appliance details; General Information
5 Appliance details General Information Before installing and operating the cooktop, carefully read the following important information regarding installation safety and maintenance. Keep this information booklet accessible for further consultations. Specifications Model HIC604TFG Cooking Zones 4 Zo...
Page 8 - Electrical connection; LOCAL AUTHORITY REQUIREMENTS; Connection mode
6 Electrical connection LOCAL AUTHORITY REQUIREMENTS Installation is only permitted by a licensed electrician and carried out according to instructions provided by the manufacturer. Incorrect installation might cause harm and damage, for which the manufacturer accepts no responsibility. Electrical I...
Page 9 - Operating Instructions; Touch Controls
7 Operating Instructions Touch Controls • The controls respond to touch, so you do not need to apply any pressure. • Use the pad of your finger, not the tip. • You will hear a beep each time a touch is registered. • Make sure the controls are always clean, dry, and that there are no objects (e.g., a...
Page 10 - Using the Cooktop; Note
8 Operating Instructions Using the Cooktop When the power is connected you will hear a beep and all the lights will come on for one second and then go out. This indicates that the cooktop has entered standby mode. Turn the cooktop on by touching the On / Off control. All indicators will show “ - “. ...
Page 11 - Safety Lock; Using the Timer; Adjust the timer with the “+” and “
9 Operating Instructions Safety Lock The controls can be locked to prevent accidental use and to protect children. When the controls are locked, all buttons except for the On/Off button are disabled. To lock the controls, press the lock button. The timer indicator will display “Lo”. To unlock the co...
Page 12 - Setting the Timer to turn one or more Cooking Zones Off; Multiple Timers; Power level
10 Operating Instructions Setting the Timer to turn one or more Cooking Zones Off Touch the “+” or “ - “ control of the cooking zone you wish to set the timer for. Set the timer as described on the previous page. A red dot next to the power level for the corresponding cooking zone will illuminate to...
Page 13 - Cleaning and Maintenance; Cleaning; Problem
11 Cleaning and Maintenance Cleaning Problem Resolution Important Everyday soiling on glass (fingerprints, marks, stains left by food or non-sugary spillovers on the glass) 1. Switch the power to the cooktop off. 2. Apply a cooktop cleaner while the glass is still warm (but not hot!) 3. Rinse and wi...
Page 14 - Troubleshooting
12 Cleaning and Maintenance Troubleshooting Problem Possible causes What to do The cooktop cannot be turned on. No power. Make sure the cooktop is connected to the power supply and that it is switched on. Check whether there is a power outage in your home or area. If you’ve checked everything and th...