Page 6 - Introduction; ENGLISH
6 Introduction Congratulations on your purchase and welcome to Philips! To fully benefit from the suppor t that Philips offers, register your product at www.philips.com/welcome. Light-based hair removal is one of the most effective methods to treat unwanted body hair with longer-lasting results. It ...
Page 8 - pleasant treatment of sensitive skin, such as the face.; Important
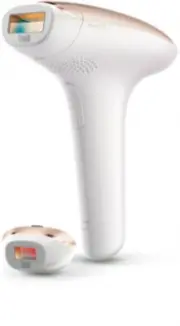
9 Body attachment (suitable for all body areas below the neck) - a Electronic contacts - b Metallic frame inside the body attachment - c Integrated safety system - d Skin tone sensor 10 Precision attachment (suitable for all body areas, including upper lip, chin and cheeks) - a Filter glass - b Inte...
Page 11 - appliance we advise you to consult a doctor.
Never use the appliance if you take any of the medications listed below, i.e.: - If your skin is currently being treated with or has recently been treated with Alpha-Hydroxy Acids (AHAs), Beta- Hydroxy Acids (BHAs), topical isotretinoin and azelaic acid. - If you have taken any form of isotretinoin ...
Page 14 - ‘Contraindications’.
1 Consult the table below to determine which light intensities are appropriate for your skin and the tone of your skin, the colour of your body hair and facial hair (if there is no suitable light intensity for your skin tone/hair colour combination, this is indicated with x in the table). Tip: You c...
Page 15 - effects and skin reactions’.; Using the appliance; If the treatment becomes painful at any point in time, reduce the
Tanning advice - Avoid sunbathing when you use Philips Lumea Essential regularly (every two weeks). Sunbathing can cause skin to darken (tan) or can cause sunburn (reddening of the skin). Using Philips Lumea Essential on darkened (tanned) and/or sunburned skin increases the risk of adverse side effe...
Page 16 - designed for faster treatment of larger areas like legs.; Precision attachment; such as the underarms and bikini area or hard-to-reach areas.; First use and skin test; advise you to perform a skin test on; each; area to be treated to check
Choosing the right attachment - Body attachment The body attachment can be used to treat unwanted body hair on all body areas below the neck (for exceptions, see chapter ‘Contraindications’). The body attachment can cover an area of 4cm² and has been specially designed for faster treatment of larger...
Page 18 - Subsequent use; for more information.; Treatment plan and effectiveness; to achieve permanent hair reduction.
11 After the skin test, wait for 24 hours and check your skin for any reaction. If your skin shows reactions, choose the highest setting that did not result in any skin reaction for subsequent use. Subsequent use 1 Before every treatment, clean the light exit window, the outside of the attachments, ...
Page 19 - Area; Using the appliance on the legs
How to achieve optimal results - It is normal that hairs are still visible after the first few treatments (see chapter ‘Introduction’, section ‘Working principle’ for more information). - To remove all hairs successfully and prevent the hair follicle from becoming active again, the treatments have t...
Page 20 - you do not flash on the lip.
Using the appliance in the bikini area Check the recommended light intensities table in chapter ‘Preparing for use’, section ‘Light intensity’ to see which settings are suitable for your bikini area. In principle, Philips Lumea Essential is safe and gentle enough for treatment of the entire bikini a...
Page 21 - unpleasant, close your eyes when you release a flash.; Cleaning and maintenance; exit window or the attachments.
Tip: To achieve optimal results on your upper lip, chin and cheeks, stand in front of a mirror to get a good view of the area to be treated and the ‘ready to flash’ light. Tip: Because of the contours of the jaw, it may be difficult to bring the integrated safety system into full contact with the sk...
Page 22 - Storage; Switch off the appliance, unplug it and let it cool down.; Ordering accessories
Note: Make sure you clean the appliance before and after each use and, if necessary, also during the treatment according to the instructions in this section. Storage 1 Switch off the appliance, unplug it and let it cool down. 2 Clean the appliance before you store it. 3 Store the appliance and the a...
Page 23 - Problem
Technical specifications Model SC1996 Rated voltage 100V-240V Rated frequency 50Hz-60Hz Rated input 36W Protection against electric shock Class II Q Protection rating IP 30 (EN 60529) Operating conditions Temperature: +15° to +35°CRelative humidity: 30% to 95% Storage conditions Temperature: -20°C t...
Page 27 - DEUTSCH
27 Einführung Herzlichen Glückwunsch zu Ihrem Kauf und willkommen bei Philips! Um das Kundendienstangebot von Philips vollständig nutzen zu können, sollten Sie Ihr Produkt unter www.philips.com/welcome registrieren. Haarentfernung mit Licht ist eine der wirksamsten Methoden für eine lang anhaltende ...
Page 29 - empfindlicher Haut, wie zum Beispiel im Gesicht.; Wichtig
Allgemeine Beschreibung (Abb. 5) 1 Lichtstärkeanzeigen (1 bis 5) 2 Ein-/Ausschalter 3 Bereitschaftsanzeige 4 Belüftungsschlitze 5 Buchse für Gerätestecker 6 Blitztaste 7 Öffnungen für elektronische Kontakte 8 Lichtaustrittsfenster mit integrier tem UV-Filter 9 Körper-Aufsatz (für die Körperpar tien ...
Page 31 - Wichtige Hinweise
- Vergewissern Sie sich, dass die Haut im zu behandelnden Bereich sauber und trocken ist und dass dor t keine Cremes, Körperlotionen oder andere Kosmetika aufgetragen wurden. Wenn die Haut nicht sauber und trocken ist, funktionier t das integrier te Sicherheitssystem möglicherweise nicht wie vorgese...
Page 34 - Rasieren Sie die zu behandelnden Hautpartien, solange die Haare
Seltene Nebenwirkungen - Verbrennungen, übermäßige Rötungen und Schwellungen treten nur selten auf und sind in der Regel die Folge davon, dass Sie eine für Ihren Hautton zu starke Lichtintensität verwendet haben. Wenn diese Reaktionen nicht innerhalb von drei Tagen abklingen, sollten Sie einen Arzt/...
Page 35 - Lichtintensität für die Verwendung auf Ihrer Haut festlegen.
Beachten Sie, dass eine Behandlung unrasierter oder schlecht rasierter Hautpartien zu einigen unerwünschten Folgen führen kann: - Das Lichtaustrittsfenster und die Aufsätze können durch lose Haare und Schmutz verunreinigt werden. Eine Verunreinigung von Lichtaustrittsfenster und Aufsätzen kann die L...
Page 37 - im Kapitel “Mögliche Nebenwirkungen und Hautreaktionen”.
Hinweise zum Bräunen - Vermeiden Sie Sonnenbaden, wenn Sie Philips Lumea Essential regelmäßig (alle zwei Wochen) verwenden. Sonnenbaden kann die Haut dunkler werden lassen (Bräunung) oder Sonnenbrand verursachen (Hautrötung). Die Verwendung von Philips Lumea Essential auf gebräunter Haut bzw. Sonnen...
Page 38 - Das Gerät benutzen; verschwindet. Wenn Sie Hautreaktionen beobachten, die über eine; Präzisionsaufsatzz; Verwenden Sie das Gerät niemals im Bereich der Augen und; Erster Gebrauch und Hauttest; Wählen Sie den für die zu behandelnde Körperpartie geeigneten
Das Gerät benutzen Prüfen Sie anhand der Tabelle mit Empfehlungen für die Lichtintensität im Abschnitt “Lichtintensität” im Kapitel “Für den Gebrauch vorbereiten”, welche Einstellungen sich am besten für Ihren Hautton und Ihre Körperhaarfarbe eignen. Verwenden Sie das Gerät in einem gut beleuchteten...
Page 40 - einen Lichtimpuls auf der gleichen Stelle.
- Wenn die Bereitschaftsanzeige zunächst orange aufleuchtet, und dann durchgehend orange leuchtet, ist Ihre Haut für die Behandlung mit dem Gerät nicht geeignet, und das Gerät wird abgeschaltet. Sie können Philips Lumea Essential eventuell auf weniger gebräunten oder natürlich helleren Körperpar tie...
Page 41 - Behandlungsplan und Wirksamkeit; von Person zu Person je nach Körperpar tie, Haarfarbe und Ar t der
2 Beginnen Sie jede Behandlung durch sorgfältige Auswahl der Lichtintensität. Achten Sie dabei auf die Empfindlichkeit Ihrer Haut und wie angenehm sich die Anwendung anfühlt. Beachten Sie den Abschnitt “Empfohlene Lichtintensitäten”, um die richtige Einstellung für Ihren Hauttyp und Ihre Haarfarbe a...
Page 42 - Bereich
Erzielen optimaler Ergebnisse - Es ist normal, dass nach den ersten Behandlungen noch Haare zu sehen sind. Weitere Informationen finden Sie im Kapitel “Einleitung” unter Abschnitt “Funktionsprinzip”. - Um alle Haare erfolgreich zu entfernen und um zu vermeiden, dass der Haarfollikel wieder aktiv wir...
Page 43 - Das Gerät am Bein verwenden; Auslösen eines Lichtimpulses die Augen.
Das Gerät am Bein verwenden Prüfen Sie anhand der Tabelle mit Empfehlungen für die Lichtintensität im Abschnitt “Lichtintensität” im Kapitel “Für den Gebrauch vorbereiten”, welche Einstellungen sich am besten für Ihre Beine eignen. - Sie können das Gerät nach oben und unten oder quer über das Bein b...
Page 44 - Verwenden Sie ausschließlich den; Präzisionsaufsatz; zur Behandlung von; Reinigung und Wartung; Um optimale Ergebnisse zu erzielen und die Gebrauchsdauer des
Das Gerät im Gesicht verwenden (Oberlippe, Kinn, Wangen) Prüfen Sie anhand der Tabelle mit Empfehlungen für die Lichtintensität in Kapitel “Für den Gebrauch vorbereiten” im Abschnitt “Die Lichtintensität einstellen”, welche Einstellungen sich am besten für Ihr Gesicht (Oberlippe, Kinn, Wangen) eigne...
Page 45 - Aufbewahrung; Tasche aufzubewahren.
1 Schalten Sie das Gerät aus, ziehen Sie den Stecker ab, und lassen Sie es abkühlen. Hinweis: Das Lichtaustrittsfenster wird während des Gebrauchs heiß. Lassen Sie es abkühlen, bevor Sie es reinigen. 2 Um den Aufsatz zu entfernen, greifen Sie die Vorsprünge oben und unten am Gerät, und ziehen Sie vo...
Page 47 - Fehlerbehebung
Fehlerbehebung In diesem Abschnitt sind die häufigsten Probleme zusammengestellt, die mit Ihrem Gerät auftreten können. Sollten Sie ein Problem mithilfe der nachstehenden Informationen nicht beheben können, besuchen Sie unsere Website unter www.philips.com/support für eine Liste mit häufig gestellte...
Page 52 - FRANÇAIS
52 Introduction Félicitations pour votre achat et bienvenue dans l’univers Philips ! Pour profiter pleinement de l’assistance Philips, enregistrez votre produit sur le site à l’adresse suivante : www.philips.com/welcome. L’épilation à lumière pulsée est l’une des méthodes les plus efficaces pour épi...
Page 54 - sûre et agréable sur peau sensible, comme le visage.
Description générale (fig. 5) 1 Voyants d’intensité (1- 5) 2 Bouton marche/arrêt 3 Voyant « prêt-à-flasher » 4 Fentes de ventilation 5 Prise de l’appareil 6 Bouton Flash 7 Ouver tures pour les contacts électroniques 8 Verre filtrant avec filtre UV intégré 9 Accessoire corps (pour toutes les par ties...
Page 58 - l’utilisation de l’appareil, veuillez consulter votre médecin.; Éventuels effets secondaires et réactions cutanées
N’utilisez jamais l’appareil sur les zones suivantes : - Autour des yeux et près des sourcils. - Sur les mamelons, les aréoles, les petites lèvres, le vagin, l’anus et l’intérieur des narines et des oreilles. Voir le chapitre « Utilisation de l’appareil », section « Utilisation de l’appareil pour l’...
Page 59 - Rasez les zones que vous souhaitez flasher tant que vous observez
Effets secondaires rares - Brûlures, rougeur excessive et enflure : ces réactions se produisent très rarement et sont généralement provoquées par l’utilisation d’une intensité lumineuse trop élevée pour votre teint de peau. Si ces réactions persistent plus de 3 jours, consultez votre médecin. Attend...
Page 60 - ou altérations de la pigmentation.; Intensité lumineuse; et; efficace; recommandées ci-dessous ainsi que le guide de mise en route.
Sachez que flasher des zones mal ou non rasées entraîne un certain nombre de réactions indésirables : - Des poils et des saletés peuvent être présents sur le verre filtrant et les accessoires, ce qui peut réduire la durée de vie et l’efficacité de l’appareil. Un verre filtrant non nettoyé peut en ou...
Page 62 - Utilisation de l’appareil; Si, à un moment, Lumea provoque une douleur, réduisez l’intensité
Conseils de bronzage - Évitez les bains de soleil lorsque vous utilisez régulièrement Philips Lumea Essential (toutes les deux semaines). Les bains de soleil peuvent rendre la peau plus foncée (bronzée) ou provoquer des coups de soleil (rougeurs). L’utilisation de Philips Lumea Essential sur une pea...
Page 63 - lumineuse appropriée.
Choix du bon accessoire - Accessoire corps L’accessoire corps peut être utilisé pour épiler les poils indésirables sur toutes les par ties du corps situées en-dessous du cou (pour connaître les exceptions, repor tez-vous au chapitre « Contre-indications »). L’accessoire corps peut couvrir une zone d...
Page 64 - pas plus d’un flash sur une même zone.
6 Placez l’appareil à un angle de 90° sur la peau afin que l’accessoire soit en contact avec la peau. Appuyez l’appareil fermement sur la peau pour garantir le contact avec la peau. Conseil : Pour faciliter l’utilisation, étirez la peau à flasher. , L’appareil effectue automatiquement une analyse de...
Page 65 - Utilisation ultérieure
11 Après ce test, attendez 24 heures et vérifiez si votre peau a réagi. Si elle présente des réactions, lors des utilisations ultérieures, choisissez l’intensité la plus élevée n’ayant pas provoqué de réaction cutanée. Utilisation ultérieure 1 Avant chaque utilisation, nettoyez le verre filtrant, l’...
Page 66 - Zone
Planning et efficacité des séances Le cycle de vie d’un poil est généralement de 18 à 24 mois. Pendant ce temps, plusieurs séances de Philips Lumea Essential peuvent être nécessaires pour obtenir une réduction permanente de la pilosité. L’efficacité de la réduction de la pilosité varie d’une personn...
Page 67 - la zone du maillot (style « Brésilien » ou « Hollywood », par exemple)
Zones d’épilation recommandées L’appareil a été conçu pour réduire les poils indésirables de la lèvre supérieure, du menton, des joues, des aisselles, des bras, du ventre, du maillot, du dos et des jambes. Utilisation de l’appareil sur les jambes Consultez le tableau du chapitre « Avant utilisation ...
Page 68 - Utilisation de l’appareil sur le visage (lèvre supérieure, menton; Utilisez uniquement l’; accessoire de précision; pour épiler la lèvre; Nettoyage et entretien; Pour garantir des résultats optimaux et une longue durée de
Utilisation de l’appareil sur le visage (lèvre supérieure, menton et joues) Consultez le tableau du chapitre « Avant utilisation », section « Réglage de l’intensité lumineuse » pour déterminer les intensités lumineuses recommandées pour votre visage (lèvre supérieure, menton et joues). Utilisez uniq...
Page 69 - Rangement; Nettoyez l’appareil avant de le ranger.; Commande d’accessoires
1 Éteignez l’appareil, débranchez-le et laissez-le refroidir. Remarque : Le verre filtrant chauffe pendant l’utilisation. Assurez-vous qu’il a refroidi avant de le nettoyer. 2 Pour retirer l’accessoire, saisissez les saillies supérieure et inférieure de l’accessoire, et tirez doucement. 3 Si nécessa...
Page 71 - Dépannage; Problème
Dépannage Cette rubrique présente les problèmes les plus courants que vous pouvez rencontrer avec votre appareil. Si vous ne par venez pas à résoudre le problème à l’aide des informations ci-dessous, rendez-vous sur www.philips.com/support pour consulter les questions fréquemment posées, ou contacte...
Page 76 - Introduzione; ITALIANO
76 Introduzione Congratulazioni per l’acquisto e benvenuti in Philips! Per trarre il massimo vantaggio dall’assistenza Philips, registrate il vostro prodotto su www.philips.com/welcome. La rimozione dei peli tramite la luce è uno dei metodi più efficaci per rimuovere la peluria superflua con risulta...
Page 82 - l’apparecchio, vi consigliamo di consultare un medico.; Possibili reazioni cutanee ed effetti collaterali
Non usate l’apparecchio sulle seguenti zone: - Intorno agli occhi e vicino alle sopracciglia. - Su capezzoli, areole, piccole labbra, vagina, ano e all’interno delle narici e delle orecchie. Consultate il capitolo “Modalità d’uso dell’apparecchio”, alla sezione “Utilizzo dell’apparecchio nell’area b...
Page 84 - Controllate l’apparecchio, in particolare che nella finestra di; Intensità luce; riportata di seguito e nella guida rapida.
Ricordate che effettuare il trattamento su aree non rasate o non rasate adeguatamente comporta una serie di effetti indesiderati: - La finestra di emissione della luce e gli accessori potrebbero contaminarsi con peli rimossi e sporcizia. Una finestra di emissione della luce e accessori contaminati p...
Page 85 - Importante
Consiglio: potete appoggiare la tabella della guida rapida sulla vostra pelle e verificare con essa il tono della vostra pelle. Consiglio: vi consigliamo di conservare la guida di avvio rapido nella custodia per riferimenti futuri. 2 Riducete l’intensità luminosa se avvertite dolore o disagio. le pe...
Page 86 - Modalità d’uso dell’apparecchio
Consigli per l’abbronzatura - Evitate di prendere il sole durante l’uso regolare di Philips Lumea Essential (ogni due settimane). L’esposizione al sole potrebbe scurire la pelle (abbronzatura) o causare scottature (arrossamento della pelle). L’utilizzo di Philips Lumea Essential sulla pelle scura (a...
Page 87 - se in qualsiasi momento il trattamento diventa troppo doloroso,; Accessorio corpo; le aree del corpo al di sotto del collo (per le eccezioni, consultate; Accessorio di precisione; aree più difficili da raggiungere.; Primo utilizzo e test cutaneo; vi consigliamo di effettuare un test su; ogni; area da trattare per verificare la
se in qualsiasi momento il trattamento diventa troppo doloroso, modificate l’impostazione della luce riducendo l’intensità luminosa finché il trattamento non comporta più disagi. Se notate reazioni cutanee più intense di un leggero rossore, interrompete immediatamente il trattamento e consultate la ...
Page 89 - cutanee ed effetti collaterali” di questo capitolo.
, La spia di luce pronta inizia a emettere una luce bianca lampeggiante per indicare che l’apparecchio si prepara a rilasciare un flash. , Quando l’apparecchio è pronto a emettere un flash, la spia di luce pronta emette una luce bianca fissa. 9 Fate scivolare l’apparecchio sulla pelle nella successi...
Page 90 - Piano di trattamento ed efficacia
5 Per evitare che vi siano aree non trattate, assicuratevi che i flash vengano prodotti a distanza ravvicinata. Si noti che la luce efficace esce solo dalla finestra di uscita relativa. Assicuratevi sempre di non applicare i flash di luce sulla stessa zona due volte. 6 Una volta terminato il trattam...
Page 91 - Utilizzo dell’apparecchio sulle gambe; questo modo si può bloccare l’apparecchio.
Indicazioni per il trattamento Tempo di trattamento medio Area Durata approssimativa del trattamento Accessorio consigliato Ascelle 1 minuto per ascella Accessorio corpo/di precisione Area bikini 1 minuto per lato Accessorio corpo/di precisione Intera area bikini 4 minuti Accessorio corpo/di precisi...
Page 92 - Usate sempre solo l’; accessorio di precisione; per trattare labbro
Nota: per motivi igienici, pulite sempre l’accessorio prima di iniziare il trattamento di un’altra area del corpo (consultate il capitolo “Pulizia e manutenzione”).Utilizzo dell’apparecchio sulle ascelle Consultate la tabella delle intensità luminose consigliate nel capitolo “Predisposizione dell’ap...
Page 93 - Pulizia e manutenzione; la finestra di emissione della luce o gli l’accessori.
Consiglio: per ottenere risultati ottimali su labbro superiore, mento e guance, posizionatevi davanti a uno specchio per avere una buona visione dell’area da trattare e della spia di luce pronta. Consiglio: a causa dei contorni delle mascelle, potrebbe essere difficile portare il sistema di sicurezz...
Page 94 - Conservazione; Spegnete l’apparecchio, scollegatelo dalla presa e lasciatelo; Ordinazione degli accessori; Per acquistare accessori o par ti di ricambio, visitate il sito; Ricambi; Sono disponibili le seguenti par ti di ricambio:; Tutela dell’ambiente; centro di raccolta ufficiale.
Nota: pulite l’apparecchio prima e dopo ogni uso e, se necessario, anche durante il trattamento come indicato nelle istruzioni di questa sezione. Conservazione 1 Spegnete l’apparecchio, scollegatelo dalla presa e lasciatelo raffreddare. 2 Pulite l’apparecchio prima di riporlo. 3 Riponete l’apparecch...
Page 95 - Problema
Garanzia e assistenza Per assistenza o informazioni, visitate il sito Web all’indirizzo www.philips.com/support oppure leggete l’opuscolo della garanzia internazionale. Specifiche tecniche Modello SC1996 Tensione caratteristica 100 V-240 V Frequenza caratteristica 50 Hz-60 Hz Alimentazione caratteri...
Page 100 - NEDERLANDS
100 Introductie Gefeliciteerd met uw aankoop en welkom bij Philips! Als u volledig wilt profiteren van de ondersteuning die Philips biedt, registreer uw product dan op www.philips.com/welcome. Ontharen met behulp van licht is een van de doeltreffendste methoden om ongewenst lichaamshaar met langduri...
Page 102 - behandeling van de gevoelige huid, zoals het gezicht.; Belangrijk
Algemene beschrijving (fig. 5) 1 Intensiteitslampjes (1-5) 2 Aan/uit-schakelaar 3 ’Klaar om te flitsen’-lampje 4 Ventilatieopeningen 5 Apparaataansluiting 6 Flitsknop 7 Openingen voor elektronische contactpunten 8 Lichtvenster met geïntegreerd UV-filter 9 Lichaamsopzetstuk (geschikt voor alle lichaa...
Page 106 - kunt gebruiken, raden wij u aan een arts te raadplegen.; Mogelijke bijwerkingen en huidreacties
- Mannen mogen het apparaat niet op het scrotum en het gezicht gebruiken. Het gezichtshaar van mannen is anders dan dat van vrouwen en het precisieopzetstuk is uitsluitend ontworpen voor het behandelen van gezichtshaar van vrouwen. - Op of nabij kunstmatige dingen zoals siliconenimplantaten, pacemak...
Page 107 - Maak uw huid schoon en zorg dat deze haarvrij, volledig droog en
- Huidverkleuring: dit komt zelden voor. Huidverkleuring is zichtbaar als een vlek die donkerder of lichter is dan de huid eromheen. Dit is het gevolg van het gebruik van een lichtintensiteit die te hoog is voor uw huidtint. Raadpleeg uw huisar ts als de verkleuring niet binnen 2 weken verdwijnt. Be...
Page 108 - Lichtintensiteit; een; handige; en; doeltreffende; behandeling verwachten met een
3 Controleer het apparaat en met name het lichtvenster en de opzetstukken op de aanwezigheid van haren, vuil of vezels. Maak het apparaat zo nodig schoon volgens de instructies in hoofdstuk ‘Schoonmaken en onderhoud’. Als scheren wondjes of schrammen veroorzaakt, is uw huid mogelijk gevoeliger dan n...
Page 110 - ‘Mogelijke bijwerkingen en huidreacties’.; Het apparaat gebruiken; waargenomen helderheid van de flitsen.; Lichaamsopzetstuk; grotere gebieden zoals de benen.; Precisiehulpstuk; worden gebruikt om ongewenst gezichtshaar op de bovenlip, kin en
Blootstelling van behandelde gebieden aan zonlicht zonder bescherming direct na de behandeling kan het risico op ongunstige bijwerkingen en huidreacties vergroten. Zie ‘Mogelijke bijwerkingen en huidreacties’. - Bruining met kunstlicht Volg de instructies in ‘Blootstelling aan de zon voorafgaand aan...
Page 111 - Eerste gebruik en huidtest; We adviseren u een huidtest uit te voeren op; alle; gebieden die u wilt
Eerste gebruik en huidtest We adviseren u een huidtest uit te voeren op alle gebieden die u wilt behandelen als u het apparaat voor het eerst gebruikt of na recent bruinen. Zo stelt u vast hoe uw huid reageer t op de behandeling en u raakt gewend aan de behandeling op basis van licht. 1 Kies het opz...
Page 112 - één flits op dezelfde plek af.
- Als het ‘klaar om te flitsen’-lampje op de achterzijde van het apparaat wit wordt, kunt u uw huid behandelen met het apparaat en kunt u de behandeling star ten. - Als het ‘klaar om te flitsen’-lampje eerst oranje knipper t en daarna onafgebroken oranje brandt, kunt u uw huid niet behandelen met he...
Page 113 - Verder gebruik; Uw huid kan om uiteenlopende redenen op verschillende dagen/; Behandelplan en doeltreffendheid; Essential voor een blijvend resultaat.
Verder gebruik 1 Reinig vóór iedere behandeling het lichtvenster, de buitenkant van de opzetstukken, de metalen lijsten aan de binnenkant van de opzetstukken en het roodachtige filterglas in het precisieopzetstuk. Zie ‘Schoonmaken en onderhoud’ voor meer informatie. 2 Begin iedere behandeling met he...
Page 114 - Gebied; Het apparaat op uw benen gebruiken
Optimale resultaten behalen - Het is normaal dat er na de eerste behandelingen nog haar tjes zichtbaar zijn. Zie ‘Werkingsprincipe’ in hoofdstuk ‘Belangrijk’ voor meer informatie. - Om alle haren te verwijderen en te voorkomen dat de haarzakjes weer actief worden, moeten de behandelingen gedurende t...
Page 115 - Het apparaat gebruiken op de bikinilijn; lampje. Houd uw arm omhoog en plaats uw hand in uw nek om de huid van; precisieopzetstuk; Let op: Geef geen flitsen af op uw bovenlip wanneer u het gebied
Het apparaat gebruiken op de bikinilijn Raadpleeg de tabel met aanbevolen lichtintensiteiten in ‘Lichtintensiteit’ in hoofdstuk ‘Klaarmaken voor gebruik’ om te zien welke standen geschikt zijn voor uw bikinilijn. In principe is de Philips Lumea Essential veilig en zacht genoeg voor behandeling van d...
Page 116 - Tip: Vanwege de contouren van de kaken kan het moeilijk zijn het; Reiniging en onderhoud; opzetstukken niet meer kunnen worden gereinigd.
Tip: Vanwege de contouren van de kaken kan het moeilijk zijn het geïntegreerde veiligheidssysteem in volledig contact met de huid te brengen en een flits af te geven. Plaats uw tong tussen uw tanden en bovenlip of blaas uw wangen op om dit gemakkelijker te maken.Tip: Het weerspiegelde licht veroorza...
Page 117 - Opbergen; het apparaat afkoelen.; Accessoires bestellen
Opbergen 1 Schakel het apparaat uit, haal de stekker uit het stopcontact en laat het apparaat afkoelen. 2 Maak het apparaat schoon voordat u het opbergt. 3 Bewaar het apparaat en de opzetstukken in het meegeleverde etui bij een temperatuur tussen de -20 °C en +70 °C. Tip: We raden u aan om de snelst...
Page 118 - Problemen oplossen; Probleem
Model SC1996 Voorwaarden voor een goede werking Temperatuur : +15 °C tot +35 °CRelatieve vochtigheid: 30% tot 95% Opbergomstandigheden Temperatuur : -20 °C tot +70 °CRelatieve vochtigheid: 5% tot 95% Spectrum van lichaamsopzetstuk > 500 nm Spectrum van precisieopzetstuk > 600 nm Problemen oplo...
Page 122 - Giriş; TÜRKÇE
122 Giriş Ürünümüzü satın aldığınız için teşekkür ederiz. Philips’e hoş geldiniz! Philips’in sunduğu destekten faydalanabilmek için lütfen ürününüzü şu adresten kaydedin: www.philips.com/welcome. Işık bazlı epilasyon yöntemi, vücudunuzdaki istenmeyen tüyleri daha uzun süreli olarak gidermek için en ...
Page 126 - Kullanılmaması gereken durumlar
Kullanılmaması gereken durumlar Philips Lumea Essential kimler için uygun DEĞİLDİR? Philips Lumea Essential herkesin kullanımına uygun değildir. Aşağıdaki durumlardan biri sizin için geçerliyse bu cihazı kullanmamalısınız ! Hamileyseniz veya emziriyorsanız bu cihazı kullanmayın. Philips Lumea Essent...
Page 129 - Cihazın kullanıma hazırlanması; olduğundan emin olun.
Cihazın kullanıma hazırlanması Optimum sonuçlar için cihazı kullanmak istediğiniz bölgeleri aşağıda belir tilen şekilde hazırlayın. Uygulama bölgelerinin hazırlanması 1 Uygulama yapmak istediğiniz bölgeleri bu bölgelerdeki tüyler uzadığı sürece tıraş edin. Dikkat: Tıraş etmek yerine tüy dökücü kreml...
Page 130 - Önemli
1 Cildinize, cilt renginize ve vücudunuzdaki ve yüzünüzdeki tüylerin rengine en uygun ışık yoğunluklarını belirlemek için aşağıdaki tabloya danışın. Cilt/tüy rengi kombinasyonunuza uygun olmayan durumlar tabloda x ile gösterilmiştir. İpucu: Hızlı başlangıç kılavuzundaki tabloyu cildinizin üzerine ye...
Page 131 - Cihazın kullanımı; reaksiyonları’ başlığını okuyun.
Bronzlaşma önerisi - Philips Lumea Essential’ı düzenli olarak kullanırken (iki haftada bir) güneşlenmekten kaçının. Güneşlenme cildin koyulaşmasına (bronzlaşma) ya da güneş yanıklarına (cilt kızarıklıkları) sebep olabilir. Philips Lumea Essential’ın koyulaşmış (bronzlaşmış) ve/veya güneşte yanmış ci...
Page 132 - özel olarak tasarlanmıştır.; Hassas bölge ataçmanı; uygulamaya alışmanız için; tüm; uygulama bölgelerine cilt testi yapmanızı
Doğru ataçmanın seçilmesi - Vücut ataçmanı Vücut ataçmanı boynun aşağısında kalan tüm bölgelerdeki istenmeyen tüyleri gidermek için kullanılabilir (istisnalar için bkz. ‘Kullanılmaması gereken durumlar’ bölümü). Vücut ataçmanı 4 cm² boyutundaki bir alanı kaplayabilir ve bacaklar gibi daha geniş bölg...
Page 133 - bir kez ışık artımı uygulayın. Aynı noktaya birden fazla kez ışık
6 Cihazı, ataçman cildinize temas edecek şekilde 90° açıyla cildinize yerleştirin. Cilt temasını sağlamak için cihazı sıkıca cildinize bastırın. İpucu: Daha kolay kullanım için cildinizin uygulama yapmak istediğiniz bölgesini gerin. , Cihaz otomatik olarak cilt rengi analizi yapar. - Cihazın arka kı...
Page 134 - Sonraki kullanımlar; cilt reaksiyonları’ başlığına bakın.
10 Uygulama bittikten sonra açma/kapama düğmesini 2 saniye boyunca basılı tutarak cihazı kapatın. 11 Cilt testinden 24 saat sonra cildinizin reaksiyon gösterip göstermediğini kontrol edin. Cildinizde reaksiyon görülüyorsa bir sonraki kullanımda ciltte reaksiyona neden olmayan en yüksek ayarı seçin. ...
Page 136 - yapmadan önce ataçmanı mutlaka temizleyin (bkz. ‘Temizlik ve bakım’; hassas bölge
- Kullanım rahatlığınıza bağlı olarak cihazı bacağınızda aşağı-yukarı ya da enine doğru hareket ettirebilirsiniz. Cildinize tam olarak temas etmesini sağlamak için cihazı cildinize yanlamasına yerleştirin ve tutun. Dikkat: Kaval kemiği ve ayak bilekleri gibi kemikli bölgeler vücudun diğer bölgelerin...
Page 137 - gönderirken gözlerinizi kapatın.; Temizlik ve bakım; cihazı kullanmayı bırakın.
Dikkat: Dudak üzerindeki bölgede uygulama yapacağınız zaman dudağınıza ışık göndermemeye dikkat edin. İpucu: Dudağınıza ve dudak çizginize kalın bir tabaka halinde beyaz göz kalemi uygulayın. Bu beyaz tabaka, ışık enerjisinin yansımasını ve yanlışlıkla dudağınıza ışık göndermeniz durumunda ışığın du...
Page 138 - başlık altındaki talimatlara uygun şekilde temizleyin.; Saklama; Cihazı kapatın, prizden çekin ve soğumaya bırakın.; Aksesuarların sipariş edilmesi
Dikkat: Cihazı her kullanımdan önce, sonra ve gerekirse seans sırasında bu başlık altındaki talimatlara uygun şekilde temizleyin. Saklama 1 Cihazı kapatın, prizden çekin ve soğumaya bırakın. 2 Saklamadan önce, cihazı temizleyin. 3 Cihazı ve ataçmanları birlikte verilen çantada, -20°C - +70°C arasınd...
Page 139 - Sorun
Teknik spesifikasyonlar Model SC1996 Gerilim 100V-240V Frekans 50Hz-60Hz Ölçülen giriş 36 W Elektrik şokuna karşı koruma Sınıf II Q Koruma oranı IP 30 (EN 60529) Çalışma koşulları Sıcaklık: +15° - +35°CBağıl nem: %30 - %95 Depolama koşulları Sıcaklık: -20°C - +70°CBağıl nem: %5 - %95 Vücut ataçmanı ...


 Philips 50PFL5907/F7
User Manual
Philips 50PFL5907/F7
User Manual
 Philips 32PFL4508/F7
User Manual
Philips 32PFL4508/F7
User Manual
 Philips 39PFL2908/F7
User Manual
Philips 39PFL2908/F7
User Manual
 Philips 32PFL5708/F7
User Manual
Philips 32PFL5708/F7
User Manual