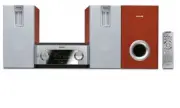
Page 3 - Return your Product Registration Card or register online at; or register online at; Dear PHILIPS product owner:; Notification; For Customer Use; Know these; safety; symbols; To reduce the risk of fire or; ATTENTION
3 Return your Product Registration Card or register online at www.philips.com/usasupport today to get the very most from your purchase. Registering your model with PHILIPS makes you eligible for all of the valuable benefits listed below, sodon't miss out. Complete and return your Product Registratio...
Page 4 - IMPORTANT SAFETY INSTRUCTIONS; Class II equipment symbol; This symbol indicates that the unit has; Clean only with dry cloth.; materials
4 IMPORTANT SAFETY INSTRUCTIONS Class II equipment symbol This symbol indicates that the unit has a double insulation system Clean only with dry cloth. materials pg001-pg039-MCD139_37_Eng 21/6/06, 13:54 4
Page 5 - Index; Canada; CAUTION; El uso de mando o ajustes o la
5 English Español Index English ------------------------------------------------ 4 Español --------------------------------------------- 42 Canada English: This digital apparatus does not exceedthe Class B limits for radio noiseemissions from digital apparatus as setout in the Radio InterferenceRegu...
Page 6 - English; Contents
6 English Contents General Information Features .................................................................. 8Supplied accessories ............................................ 8Environment information ................................... 8Safety information ........................................
Page 7 - Tuner
7 English Tuner Tuning to radio stations...................................... 32Storing preset radio stations.............................32 Manual programming.......................................32 Automatic programming.................................32Listening to preset radio stations...........
Page 8 - – This device may not cause harmful; Features; Additional Component Connections; General Information; Supplied accessories
8 English This set complies with the FCC rules,Part 15 and with 21 CFR 1040.10.Operation is subject to the following twoconditions: – This device may not cause harmful interference, and – This device must accept any interference received, including interference that maycause undesired operation. Fea...
Page 9 - Safety information
9 English General Information Safety information ● Before operating the system, check that theoperating voltage indicated on the typeplate (orthe voltage indication beside the voltageselector) of your system is identical with thevoltage of your local power supply. If not, pleaseconsult your dealer. ...
Page 10 - For best possible surround sound, locate your; Connections
10 English Step 2: Connecting speakersand subwoofer ANTENNA FM (75 Ω ) ● Connect the supplied DIN cable to DVD player’sDIN jack and the left speaker’s DIN jack. ● Connect the supplied speaker wires of the rightspeaker to SPEAKER RIGHT on the left speaker,red wire to red jack ( “+” ), black wire to b...
Page 11 - Connecting TV set; COMPOSITE
11 English Using component Video In jack (Pr Pb Y) ● Use the component video cables (red/blue/green, not supplied) to connect the system’s PR/ PB/ Y jacks to the corresponding Component video input jacks (or labeled as Pr/Cr Pb/Cb Y orYUV) on the TV set. ● To listen to TV channels through this syste...
Page 12 - jack to the video input jack on the RF modulator.; Using S-Video In jack; jacks to the
12 English Using an accessory RF modulator IMPORTANT!– If your TV set only has a singleAntenna In jack (or labeled as 75 ohm orRF In), you will need a RF modulator inorder to view the DVD playback via TV.See your electronics retailer or contactPhilips for details on RF modulatoravailability and oper...
Page 13 - Step 6: Connecting a VCR or; Viewing and listening to playback; Step 5: Connecting the power
13 English Step 6: Connecting a VCR or cable/satellite box Viewing and listening to playback 1 Connect the VCR or Cable/Satellite Box to theTV system as shown. 2 Using the audio cables (red/white, not supplied)Connect the system’s AUX IN (L/R) jacks to the AUDIO OUT jacks on the VCR or Cable/Satelli...
Page 14 - Step 7: Connecting digital audio; Connect the system’s COAXIAL OUT (digital
14 English Connections Step 7: Connecting digital audio equipment Recording (digital) Connect the system’s COAXIAL OUT (digital out) jack to the DIGITAL IN jack on a digitalrecording device (DTS-Digital Theater Systemcompatible , with a Dolby Digital decoder, forexample). Before operation, set COAXI...
Page 15 - Functional Overview; Controls on the system; ÉÅ
15 English Functional Overview Controls on the system 1 DBB – enables or disables bass enhancement. 2 DSC – selects different types of preset sound equalizersettings (CLASSIC, ROCK, JAZZ or POP). 3 TUNING à / á Tuner...............tunes to a radio stationDisc................ fast searches backward/f...
Page 16 - Remote control; for VCD
16 English Functional Overview Remote control 1 B – switches the system to Eco-power standby /standby mode. 2 SOURCE (DISC/AUX/TUNER) – switches on the system – selects the respective sound source for disc/FM/AUX 3 A-B – repeats playback of a specific section within achapter of DVD or a track of VCD...
Page 17 - disables or enables sound output.
17 English Functional Overview & MUTE – disables or enables sound output. * VOL +/- – adjusts the volume upward/downward. ( GOTO – fast searches in a disc by entering a time, title orchapter (For VCD with PBC feature, PBC mustbe turned off.) ) ZOOM – DVD/VCD/JPEG: enlarges a picture or activeima...
Page 18 - Using Remote Control; Remove the battery if it is exhausted; Getting Started; Setting up the TV; Switching the system
18 English Step 1: Using Remote Control IMPORTANT!– Before using the remote control,remove the insulation plastic tab asshown in the picture below.– If the remote control does notfunction correctly or the operating rangeis reduced, replace the battery with anew (CR2025) battery. 1 Push to open the b...
Page 21 - Basic Operations; Switching the system on/off; – Pressing; Power saving automatic standby; VOL; Sound Control; – Some discs might be recorded in high
21 English Basic Operations IMPORTANT! – Before you operate the system,complete the connection procedures.– When the system is switched to Standbymode, it is still consuming power.Todisconnect the system from the powersupply completely, reomve the AC powerplug from the wall socket. Switching the sys...
Page 22 - Playable Discs; – Digital Versatile Discs + Rewritable; Region Codes; DVDs must be labeled for ALL regions or Region; Disc Operations
22 English IMPORTANT!– Depending on the DVD or VIDEO CD,some operations may be different orrestricted.– Do not push on the disc tray or putany objects other than disc on the disctray. Doing so may cause the disc playermalfunction.– If the inhibit icon appears on the TVscreen when a button is pressed...
Page 23 - Playing discs; Using the Disc Menu; Resuming playback; Selecting and searching; Selecting a different track/chapter; – Some
23 English Playing discs 1 For DVDs and VCDs, make sure that the systemis properly connected to your TV (See Connecting a TV ), and your TV is turned on and set to video-in channel (See Setting up the TV ). 2 Press SOURCE on the system once or more to select DVD mode ( or DISC on the remote control)...
Page 24 - SHUFFLE; Fast forwarding/reversing; GOTO; – An invalid input value for the current disc will; REPEAT
24 English Disc Operations ● During playback, press repeatedly MODE on the system to choose desired repeat play modes. ➜ For VCD with PBC feature, PBC must be turned off first. ➜ TV screen shows the play modes in the sequence as follows: For DVDsCHAPTER REPEAT ON: Repeats the current chapter TITLE R...
Page 25 - Display information; FULL
25 English Disc Operations Display information During playback, press DISPLAY on the remote control repeatedly to display various discplayback time on the TV screen ( and thesystem’s display). For DVDs : TITLE ELAPSED - elapsed playback time of current title TITLE REMAIN - remaining time of current ...
Page 26 - ZOOM; – When zooming in, you may use; AUDIO
26 English ZOOM For DVDs/VCDs/JPEG Zooming allows you to enlarge the video/ JPEG image during playback. ● Press ZOOM repeatedly to zoom in on the playback video image. ➜ For JPEP picture disc, press ZOOM to display “ZOOM ON”, then press ¡ / ™ to select different enlarging rates. ➜ Image size enlarge...
Page 27 - Playing Kodak picture disc
27 English 3 In the stop position, press à / á / 3 / 4 to select a desired album, then select a desired titlein the album. 4 Press OK or 2; to star t playback. ● You can also use the numeric keys (0-9) to enter your choice. ● During playback, you may press ¡ / ™ to select the previous/next title. 5 ...
Page 28 - Using the menu bar; SYSTEM MENU; DVD Menu Operations
28 English Using the menu bar You can continue some operations directly via the multiple menu bar s on the TV screenwithout interrupting the disc playback. But whenyou enter (SETUP MENU), the playback willpause. AUDIO MUTE OK SYSTEM MENU A-B DISC MENU 12 3 MODE CLOCK SLEEP/TIMER 1 In disc mode, pres...
Page 30 - to exit test tone mode at any
30 English Changing the password You can change the four-digit code used as Password. 1 In disc mode, press SYSTEM MENU . 2 Select icon and press 4 . ➜ Playback will pause. 3 Press à / á / 4 / 3 on the remote control to navigate in the menu. ➜ Move to , and press á . ➜ Move to “PASSWORD” and press á...
Page 32 - Tuning to radio stations; Manual programming; Autostore: automatic programming; Listening to preset radio stations; DELETED
32 English Tuning to radio stations 1 Press STANDBY-ON y on the set to switch on the last selected source. 2 Press repeatedly SOURCE (or TUNER on the remote) until FM is displayed. 3 Press and hold TUNING à / á on the set until the frequency in the display star ts changing. ➜ Display shows SEARCH du...
Page 33 - Viewing clock; if activated, and disappears if; Setting sleep timer
33 English Clock/Timer Viewing clock The clock (if it is set) will be shown in standbymode. To view the clock in any source mode(DISC or TUNER for example), or Eco-power standby mode ● Press briefly CLOCK on the remote. ● You may press MODE to toggle between 12- hour and 24-hour display. ➜ The clock...
Page 34 - Outpur t power; Specifications
34 English AMPLIFIER Total output power FTC .......................................75W Main speakers L/R...................20W x 2 RMS 1 Subwoofer ......................................... 35W RMS 2 Outpur t power L/R speakers ..................... 25 W /channel RMS Subwoofer ..........................
Page 35 - Troubleshooting; Problem; Press STANDBY ON
35 English WARNINGUnder no circumstances should you try to repair the system yourself, as this will invalidate thewarranty. Do not open the system as there is a risk of electric shock. If a fault occurs, first check the points listed below before taking the system for repair. If youare unable to rem...
Page 36 - The aspect ratio is fixed on the DVD disc.
36 English The aspect ratio of the screen cannot bechanged even though you have set the TVshape. No sound or distorted sound. The micro DVD player does not startplayback. The DVD micro system does notrespond when the buttons are pressed. Cannot activate some features, such asSubtitles, or multi-lang...
Page 38 - Glossary; Component Video Out Jacks:
38 English Glossary Analog: Sound that has not been turned into numbers. Analog sound varies, while digital soundhas specific numerical values. These jacks sendaudio through two channels, the left and r ight. Aspect ratio: The ratio of ver tical and horizontal sizes of a displayed image. Thehorizont...
Page 39 - PHILIPS LIMITED WARRANTY
39 Philips, P.O. Box 671539, Marietta, GA. 30006-0026 PHILIPS LIMITED WARRANTY ONE (1) YEAR WARRANTY COVERAGE: PHILIPS warranty obligation is limited to the terms set forthbelow. WHO IS COVERED: Philips warrants the product to the original purchaser or theperson receiving the product as a gift again...