Page 2 - Contents
1 EN Contents 1 Important 2 Safety 2 2 Your Micro Hi-Fi System 4 Introduction 4 What's in the box 4 Over view of the main unit 5 Over view of the remote control 6 3 Get started 8 Connect speakers 8 Connect power 8 Prepare the remote control 8 Set clock 9 Turn on 9 4 Play 10 Play a disc 10 Play a tap...
Page 3 - Important; Safety; Important Safety Instructions
2 EN 1 Important Safety This 'bolt of lightning' indicates uninsulated material within the device may cause an electrical shock. For the safety of ever yone in your household, please do not remove the covering. The 'exclamation mark' calls attention to features for which you should read the enclosed...
Page 4 - Mains fuse; Hearing safety
3 EN • Where the MAINS plug or an appliance coupler is used as the disconnect device, the disconnect device shall remain readily operable. Warning • Never remove the casing of this apparatus. • Never lubricate any par t of this apparatus. • Never place this apparatus on other electrical equipment. •...
Page 5 - Fi System; Introduction
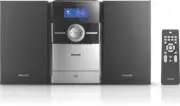
4 EN 2 Your Micro Hi- Fi System Congratulations on your purchase, and welcome to Philips! To fully benefit from the suppor t that Philips offers, register your product at www.Philips.com/welcome. Introduction With this micro system, you can: • play audio from discs, tapes, and external audio devices...
Page 6 - Overview of the main unit
5 EN Overview of the main unit c h ijkl m d e f g a b
Page 9 - Get started; Connect speakers; Connect power; Prepare the remote control
8 EN 3 Get started Always follow the instructions in this chapter in sequence. Connect speakers Note • Inser t the stripped por tion of each speaker wire into the socket completely. • For better sound quality, use the supplied speakers only. • Connect only speakers with impedance that is the same or...
Page 10 - Set clock; Turn on; Switch to standby mode
9 EN 3 Close the batter y compar tment. Note • Batteries contain chemical substances, so they should be disposed of properly. Set clock 1 Press POWER to switch the system to standby mode. » --:-- (or clock) is displayed. 2 Press and hold CLOCK/DISPLAY for 2 seconds to activate the clock setting mode...
Page 11 - Play a disc; Control play; Repeat play; Program tracks
10 EN 4 Play Play a disc Note • Make sure that the disc contains playable audio content. 1 On the top panel, pull up to open the disc compar tment. 2 Inser t a disc with the printed side facing up, then close the disc compar tment. 3 Press DISC to select the disc source. 4 Press to star t play. Cont...
Page 12 - Adjust volume level and
11 EN Play a tape 1 Press TAPE to select the tape source. 2 On the front panel, pull at the PULL TO OPEN position to open the tape button cover. 3 Press to open the tape door. 4 Load a tape with the open side downward, and then close the tape door. 5 Press to star t play. • To pause or resume tape p...
Page 13 - Listen to radio
12 EN 5 Listen to radio Tune to an FM/AM radio station Tip • For better reception, fully extend and adjust the position of the antenna. 1 Press TUN to select radio source. 2 Press and hold / until the frequency star ts to change. » [SEARCH] (search) is displayed. » The radio tunes to a station with ...
Page 14 - Other features; Set the alarm timer; Activate and deactivate alarm timer; Set the sleep timer
13 EN 6 Other features Set the alarm timer This micro system can be used as an alarm clock. You can select the disc or tuner as alarm source. Note • Make sure that you have set the clock correctly. 1 Press POWER to switch the system to standby mode. » The clock is displayed. 2 Press and hold TIMER f...
Page 15 - Amplifier; Disc; Tuner; Maintenance
14 EN 7 Product information Note • Product information is subject to change without prior notice. Specifications Amplifier Output Power 2 x 2 W RMS Frequency Response 125 - 16000 Hz Signal to Noise Ratio 60 dBA Disc Laser Type Semiconductor Disc Diameter 12cm/8cm Suppor t Disc CD-DA, CD-R, CD- RW Fr...
Page 17 - Troubleshooting
16 EN 8 Troubleshooting Warning • Never remove the casing of this product. To keep the warranty valid, never tr y to repair the product yourself. If you encounter problems when using this device, check the following points before requesting ser vice. If the problem remains unsolved, go to the Philip...
Page 18 - Notice; Compliance; Care of the environment; Copyright
17 EN 9 Notice Any changes or modifications made to this device that are not expressly approved by WOOX Innovations may void the user’s authority to operate the equipment. Compliance This product complies with the radio interference requirements of the European Community. This apparatus includes thi...