Philips HTS3115/05 - Manuals
Philips HTS3115/05 – User Manual, Quick Guide in PDF format online.
Manuals:
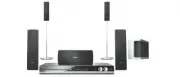
User Manual Philips HTS3115/05


Summary
2 Important notes for users in the U.K.Mains plug This apparatus is fi tted with an approved 13 Amp plug. To change a fuse in this type of plug proceed as follows: 1 Remove fuse cover and fuse. 2 Fix new fuse which should be a BS1362 5 Amp, A.S.T.A. or BSI approved type. 3 Refi t the fuse cover. If ...
English F rançais Español Deutsch Nederlands 5 Index English ------------------------------------ 6 Français ---------------------------------- 52 Español ---------------------------------- 98 Deutsch -------------------------------- 144 Nederlands ---------------------------- 190
6 English Table of contents General General Information ........................................................................................................ 8 Setup precautions ..........................................................................................................................
Quick Guide Philips HTS3115/05


Philips Manuals
-
 Philips 50PFL5907/F7
User Manual
Philips 50PFL5907/F7
User Manual
-
Philips 50PFL5907/F7
Quick Guide
-
 Philips 32PFL4508/F7
User Manual
Philips 32PFL4508/F7
User Manual
-
Philips 32PFL4508/F7
Quick Guide
-
 Philips 39PFL2908/F7
User Manual
Philips 39PFL2908/F7
User Manual
-
Philips 39PFL2908/F7
Quick Guide
-
Philips 55PFL5907/F7
User Manual
-
Philips 55PFL5907/F7
Quick Guide
-
Philips 46PFL5907/F7
User Manual
-
Philips 46PFL5907/F7
Quick Guide
-
Philips 40PFL4908/F7
User Manual
-
Philips 40PFL4908/F7
Quick Guide
-
Philips 40PFL4708/F7
User Manual
-
Philips 40PFL4708/F7
Quick Guide
-
Philips 40PFL1708/F7
User Manual
-
Philips 29PFL4908/F7
User Manual
-
Philips 29PFL4908/F7
Quick Guide
-
Philips 42PFL5907/F7
User Manual
-
Philips 42PFL5907/F7
Quick Guide
-
 Philips 32PFL5708/F7
User Manual
Philips 32PFL5708/F7
User Manual