Page 2 - Contents
EN 1 English Contents 1 Important 2 Safety 2 Notice 3 2 Your Mini Hi-Fi System 5 Introduction 5 What’s in the box 5 Over view of the main unit 6 Over view of the remote control 8 3 Get started 10 Connect speakers 10 Connect FM antenna 10 Connect MW antenna 10 Connect power 11 Prepare the remote cont...
Page 3 - Important; Safety
2 EN 1 Important Safety a Read these instructions. b Keep these instructions. c Heed all warnings. d Follow all instructions. e Do not use this apparatus near water. f Clean only with dry cloth. g Do not block any ventilation openings. Install in accordance with the manufacturer’s instructions. h Do...
Page 4 - Notice; Recycling
EN 3 English Warning Never remove the casing of this apparatus. • Never lubricate any par t of this apparatus. • Never place this apparatus on other electrical • equipment. Keep this apparatus away from direct sunlight, naked • fl ames or heat. Never look into the laser beam inside this apparatus. •...
Page 5 - Norge
4 EN disposal of batteries helps prevent potentially negative consequences on the environment and human health. Environmental information All unnecessar y packaging has been omitted. We have tried to make the packaging easy to separate into three materials: cardboard (box), polystyrene foam (buffer)...
Page 6 - Your Mini Hi-Fi; Introduction
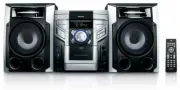
EN 5 English 2 Your Mini Hi-Fi System Congratulations on your purchase, and welcome to Philips! To fully bene fi t from the suppor t that Philips offers, register your product at www.Philips.com/welcome. Introduction With this unit, you can enjoy audio from discs, tapes, USB devices, external device...
Page 7 - Overview of the main unit
6 EN Overview of the main unit a Disc compartment door b DISPLAY Select display information. • c ALBUM/PRESET+/- Skip to the previous/nex t album. • Select a preset radio station. • Adjust time. • Select 12 hour or 24 hour format. • d Stop play or erase a program. • e MODE Select repeat play or rand...
Page 11 - Get started; Connect speakers; Connect FM antenna; Connect MW antenna
10 EN 3 Get started Caution Use of controls or adjustments or per formance of • procedures other than herein may result in hazardous radiation exposure or other unsafe operation. Always follow the instructions in this chapter in sequence. If you contact Philips, you will be asked for the model and s...
Page 12 - Connect power; Prepare the remote control; Auto install radio stations
EN 11 English Connect power Caution Risk of product damage! Ensure that the power supply • voltage corresponds to the voltage set on the voltage selector on the back of the unit. Before connecting the AC power cord, ensure you • have completed all other connections. Note The type plate is located on...
Page 13 - Set clock; Turn on; Switch to standby
12 EN Set clock 1 In the standby mode, press DISPLAY/ CLOCK to activate the clock setting mode. The 12 hour or 24 hour format is » displayed. 2 Press ALB/PRESET+/- repeatedly to select 12 hour or 24 hour format. 3 Press DISPLAY/CLOCK to con fi rm. The clock digits are displayed and » begin to blink....
Page 14 - Play; Play disc; Play from USB; Play tape
EN 13 English 4 Play Play disc 1 Press DISC 1/2/3 to select the disc source. 2 Press OPEN/CLOSE on the main unit to open the disc compar tment. 3 Load up to two discs on the disc trays, with the printed side facing up To load the third disc, press • DISC CHANGE on the main unit to rotate to the disc...
Page 15 - Play from an external device
14 EN 2 Pull at OPEN on the front panel to open the tape button cover. 3 Press to open the tape door. 4 Load the tape with the open side downward and the full spool to the left. 5 Press to star t play. To pause/resume play, press • . To fast rewind or wind the tape, • press / . To stop play, press •...
Page 16 - Play options; Repeat and random play; Program tracks; Display play information
EN 15 English 5 Play options Repeat and random play 1 Press MODE repeatedly to select: • : the current track is played repeatedly. • : all tracks are played repeatedly. • : all tracks are played randomly and repeatedly. • : all tracks are played randomly. 2 To return to normal play, press MODE repea...
Page 18 - Listen to radio; Display RDS information
EN 17 English 7 Listen to radio Tune to a radio station 1 Press TUN repeatedly to select FM or MW. 2 Press and hold / for more than 2 seconds. [SEARCH] (search) is displayed. » The radio tunes to a station with » strong reception automatically. 3 Repeat step 2 to tune to more stations. To tune to a ...
Page 19 - Record; Auto record from CD to; Record a section of a disc to tape; Record from radio to tape
18 EN 8 Record Note To record, use only “Normal” (IEC type I) tapes on • which the write-protect notches (tabs) are not broken. When you play or record a tape, the sound source • cannot be changed. Auto record from CD to tape 1 Select the disc source. 2 Load a disc. 3 Pull at OPEN on the front panel...
Page 20 - Other features; Set the alarm timer; Set the sleep timer
EN 19 English 9 Other features Set the alarm timer This unit can be used as an alarm clock. The disc, radio or USB is activated to play at a preset time. 1 Ensure that you have set the clock correctly. (see ‘Set clock ’ on page 12 ) 2 Press POWER to switch to standby mode. 3 Press and hold TIMER for...
Page 21 - Speci
20 EN 10 Product information Note Product information is subject to change without prior • notice. Speci fi cations Ampli fi er Total output power 240W RMS Frequency response 60 - 16kHz Signal-to- noise ratio >67dB A (IEC) Aux input 500mV/1000mV Disc Laser type Semiconductor Disc diameter 12cm/8c...
Page 22 - Supported MP3 disc formats
EN 21 English Supported formats: USB or memor y fi le format FAT12, • FAT16, FAT32 (sector size: 512 by tes) MP3 bit rate (data rate): 32-320 Kbps and • variable bit rate WMA v9 or earlier • Director y nesting up to a maximum of 8 • levels Number of albums/ folders: maximum 99 • Number of tracks/tit...
Page 23 - 1 Troubleshooting
22 EN 11 Troubleshooting Warning Never remove the casing of this apparatus. • To keep the warranty valid, never tr y to repair the system yourself. If you encounter problems when using this apparatus, check the following points before requesting ser vice. If the problem remains unsolved, go to the P...