Page 2 - Table of Contents
- 1 - Table of Contents 1. General information .................................................................................................................... - 4 - 1.1 Notice ..........................................................................................................................
Page 5 - General information; Notice
- 4 - 1. General information In this document you can find information on how to install the Philips hospitality TV’s from the xxHFL5011 and xxHFL7011 range. This document is intended for the System Integrator or the technical responsible of the hotel. You will find descriptions on what functions ar...
Page 6 - Definitions, Acronyms and Abbreviations; How to navigate, open menu’s and make selections
- 5 - 1.3 Definitions, Acronyms and Abbreviations [ ] : The values between brackets are referring to a TV menu item or a button on screen “ “ : The values between quotation marks are referring to a remote button BT : Bluetooth DVB-T : Digital Video Broadcasting - Terrestrial DVB-C : Digital Video Br...
Page 7 - Requirements before starting the installation of a TV; You need a USB device and a remote control.; Remote control
- 6 - 2. Requirements before starting the installation of a TV Before starting the installation, make sure that you have everything you need at hand. You need a USB device and a remote control. 2.1 Remote control 2.1.1 Master remote control 22AV8573 or 22AV9573A 2.1.2 Guest remote control 22AV1505B ...
Page 9 - How to setup the Easy RC
- 8 - You can also use this RC for multi RC. More details can be found in the ‘Professional settings’ chapter. You can program this RC in the same way as the guest RC. 2.1.6 How to setup the Easy RC The RC can be used in both RC5 and RC6 mode, meaning that it can be used for all TV’s. By default the...
Page 10 - Professional Settings menu; Professional Settings; Software upgrade
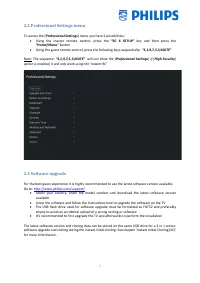
- 9 - 2.2 Professional Settings menu To access the [ Professional Settings ] menu you have 2 possibilities: Using the master remote control, press the “RC 6 SETUP” key and then press the “Home/Menu” button Using the guest remote control, press the following keys sequentially: “3,1,9,7,5,3,MUTE” ...
Page 11 - Clone folder structure; In the folder ‘TPM153
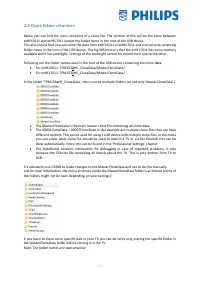
- 10 - 2.4 Clone folder structure Below you can find the menu structure of a clone file. The content of this will be the same between xxHFL5011 and xxHFL7011 except the folder name in the root of the USB device. This also means that you can clone the data from xxHFL5011 in xxHFL7011 and vice versa b...
Page 12 - Find out the state of the TV; Virgin mode; done by pressing the “
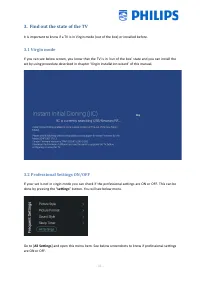
- 11 - 3. Find out the state of the TV It is important to know if a TV is in Virgin mode (out of the box) or installed before. 3.1 Virgin mode If you can see below screen, you know that the TV is in ‘out of the box’ state and you can install the set by using procedure described in chapter ‘Virgin in...
Page 14 - Reinstall TV
- 13 - 4. Reinstall TV If you want to start an installation from scratch you can always reinstall the TV. All settings will be reset to the default values and no channels will be installed. Open the [ Professional Settings ] menu. Navigate to the [ Reset ] menu. Navigate to the [ Reinstall TV ] menu...
Page 15 - Reinstall via a script in the clone file; This xml file has as content below:; will be upgraded, after this the new clone file will be loaded in TV.
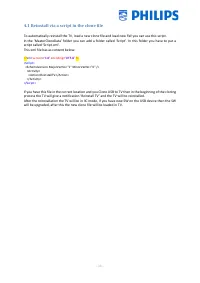
- 14 - 4.1 Reinstall via a script in the clone file To automatically reinstall the TV, load a new clone file and load new SW you can use this script. In the ‘MasterCloneData’ folder you can add a folder called ‘Script’. In this folder you have to put a script called ‘Script.xml’. This xml file has a...
Page 16 - Virgin installation wizard; Virgin installation
- 15 - 5. Virgin installation wizard When you have a new TV it will, out of the box, be in virgin mode. This means that you will have to go through the virgin installation wizard to do the first settings of the TV. 5.1 Instant Initial Cloning (IIC) 5.1.1 Virgin installation When starting up the TV i...
Page 18 - Settings during virgin installation; When you skip the IIC screen you will have to set several settings:
- 17 - o The Cloning upgrade from USB will start and you can see the progress until successful o If you don’t press “ OK ”, the TV will go to standby after 30 minutes. You can press “ OK ” to close the overview screen, the installation is done and you can start using the TV. If a clone file and/or s...
Page 20 - Store settings in the Professional Settings menu; Back; Overview
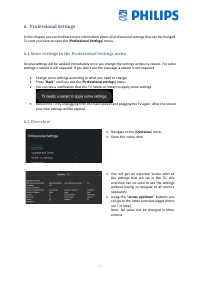
- 19 - 6. Professional Settings In this chapter you can find back more information about all professional settings that can be changed. To start you have to open the [ Professional Settings ] menu. 6.1 Store settings in the Professional Settings menu Several settings will be applied immediately once...
Page 21 - Upgrade and Clone; Note: Cloning and upgrading over IP or RF
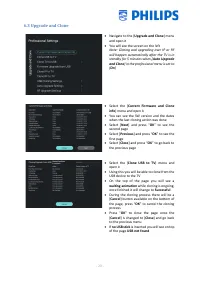
- 20 - 6.3 Upgrade and Clone Navigate to the [ Upgrade and Clone ] menu and open it You will see the screen on the left Note: Cloning and upgrading over IP or RF will happen automatically after the TV is in standby for 5 minutes when [ Auto Upgrade and Clone ] in the professional menu is set to ...
Page 22 - upgrades’
- 21 - Select the [ Clone TV to USB ] menu and open it Using this you will be able to clone from the TV to the USB device There are 2 submenus [ Clone All except Apps ] and [ Clone All ] When opening these menu’s you will have the same screen as shown when selecting the [ Clone USB to TV ] m...
Page 23 - Note: This menu is only accessible when
- 22 - Select the [ Clone IP to TV ] menu and open it Using this you will be able to clone to the TV over IP, this happens automatically when a clone has been assigned to the TV in CMND. Via this menu you can manually force an upgrade to happen On the top of the page you will see a waiting ani...
Page 25 - Switch on settings; Channel Settings
- 24 - Navigate to the [ RF Upgrade Settings ] menu and open it You will see below items: o [ Frequency ]: The frequency for CMND playout can be modified in this menu Note: Default this should be set to 498 MHz. If for some reason you need to change this frequency, it’s recommended to use a freq...
Page 28 - Picture Settings
- 27 - Navigate to the [ Sound Settings ] [ Bass ] menu Change the low tones by changing the slider value When changing the value you should directly hear the changes (if audio is playing in the background) Navigate to the [ Sound Settings ] [ Treble ] menu Change the high tones by changin...
Page 32 - Dashboard
- 31 - 6.5 Dashboard Navigate to the [ Dashboard ] menu and open it You will see the screen on the left More details on how to create the Custom Dashboard can be found in the Custom Dashboard Do It Yourself Manual that you can get after signing an NDA This menu allows SI to create custom int...
Page 33 - Features
- 32 - Navigate to the [ Custom Settings ] menu Note: This menu is only accessible when [ Custom ] is selected in the [ Mode ] menu You will see below items: o [ Source ]: You can select [ Server ] or [ Local ] as source for the custom dashboard o [ Server Settings ]: [ Server URL ]: Give in t...
Page 38 - Note: The TV will still respond to the master RC
- 37 - Navigate to the [ USB Auto Play ] menu You will see below items: o [ Off ]: From the moment a USB device is connected to the TV, no files will be played automatically o [ On ]: From the moment a USB device is connected to the TV, all playable files in the root from your USB device will au...
Page 39 - Channels; Note: Media channels are media files that
- 38 - o You will see the battery status of the RC, the setting programmed in the RC (default = blue) and the setting in TV 6.7 Channels Navigate to the [ Channels ] menu and open it You will see the screen on the left Navigate to the [ Show Channels ] menu You will see below items: o [ No ]...
Page 41 - Sources
- 40 - update, you can put this option [ Off ] or [ On ] Navigate to the [ Channel Settings ] menu You will see below items: o [ EPG ]: [ Enable ]: You can enable EPG via [ Yes ] or disable it via [ No ] [ Source ]: The EPG data can come [ From the Internet ] or [ From the Broadcaster ] Note...
Page 43 - Date and Time
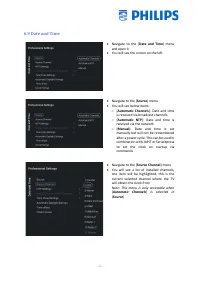
- 42 - 6.9 Date and Time Navigate to the [ Date and Time ] menu and open it You will see the screen on the left Navigate to the [ Source ] menu You will see below items: o [ Automatic Channels ]: Date and time is received via broadcast channels o [ Automatic NTP ]: Date and time is received ...
Page 46 - Wireless and Networks; Network wizard
- 45 - 6.10 Wireless and Networks 6.10.1 Network wizard Navigate to the [ Wireless and Networks ] [ Connect to Network ] menu and open it You will get the network wizard to connect to the network See chapter ‘Network installation wizard’ for more details about connecting to the network 6.10.2 Ne...
Page 48 - Network Features
- 47 - Navigate to the [ Wake on LAN (WoL) ] menu and open it You will see below items: o [ Off ]: Wake up over LAN is disabled o [ On ]: Wake up over LAN enables an external Server to wake up the TV from complete Standby (green) only over a wired network connection Navigate to the [ Wake on W...
Page 49 - Note: Hotspot is originally designed to
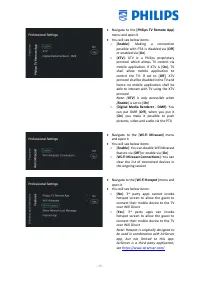
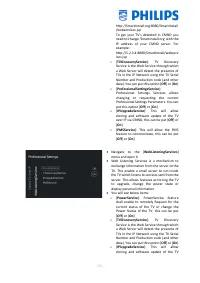
- 48 - Navigate to the [ Philips TV Remote App ] menu and open it You will see below items: o [ Enable ]: Making a connection possible with PTA is disabled via [ Off ] or enabled via [ On ] o [ XTV ]: XTV is a Philips proprietary protocol which allows TV control via mobile application. If XTV is...
Page 50 - Network Control TV Over IP
- 49 - Navigate to the [ Show Network Lost Message ] menu and open it You will see below items: o [ No ]: When the network connection is lost no messages will be shown to the user o [ Yes ]: When the network connection is lost a message will be shown to the user Navigate to the [ Internet App ...
Page 52 - Advanced; Note: this option should always be set to
- 51 - over IP via CMND, this can be put [ Off ] or [ On ] o [ PMSService ]: This will allow the PMS feature to communicate, this can be put [ Off ] or [ On ] 6.11 Advanced Navigate to the [ Advanced ] menu and open it You will see the screen on the left Navigate to the [ Professional Mode ] m...
Page 53 - On
- 52 - unlock 3rd party apps. You can find the ID on www.geonames.org , search for your location, open it and check the location ID as marked in the screenshot on the left o [ Premises Name ]: This is the name that is seen in the top of the home menu Navigate to the [ Power ] menu and open it Yo...
Page 57 - Picture; Note: This menu will only be accessible
- 56 - 6.12 Picture Navigate to the [ Picture ] [ Advanced ] [ Game or Computer ] menu and open it Note: This menu will only be accessible when you are on a Source You will see below items: o [ Off ]: For ideal picture settings if you don’t use the TV as a computer screen or game screen o [ Game...
Page 59 - Sound
- 58 - 6.13 Sound Navigate to the [ Sound ] menu and open it You will see the screen on the left Navigate to the[ Maximum Volume ] menu Set the Maximum Volume by changing the slider value, this will be the maximum volume that a guest can set on the TV Navigate to the [ Sound Management ] [...
Page 62 - Ambilight; Note: This menu will only be available in
- 61 - 6.14 Ambilight Navigate to the [ Ambilight ] [ Advanced ] menu and open it You will see the screen on the left Note: This menu will only be available in xxHFL7011 models Navigate to the [ Ambilight ] [ Advanced ] [ Wall Colour ] menu You will be able to select a wall colour that match...
Page 63 - Region and Language; Note: For all the above items, make your; Accessibility
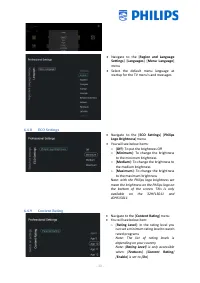
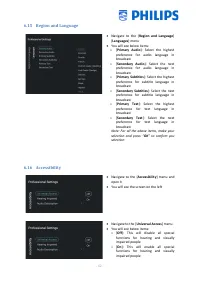
- 62 - 6.15 Region and Language Navigate to the [ Region and Language ] [ Languages ] menu You will see below items: o [ Primary Audio ]: Select the highest preference for audio language in broadcast o [ Secondary Audio ]: Select the next preference for audio language in broadcast o [ Primary Su...
Page 64 - Android Settings; Note: It is not recommended to make
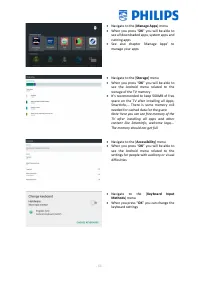
- 63 - Navigate to the [ Hearing Impaired ] menu You will see below items: o [ Off ]: This will disable hearing impaired for adapted audio and subtitles if available o [ On ]: This will enable hearing impaired for adapted audio and subtitles if available Navigate to the [ Audio Description ] m...
Page 66 - Reset; Note: You will see an erasing message for
- 65 - 6.18 Reset Navigate to the [ Reset ] menu and open it You will see the screen on the left Navigate to the [ Reset Settings ] menu When you press “ OK ” you will reset all settings to the factory settings except for some set specific settings like RoomID, Professional mode, web service...
Page 67 - Channel installation wizard
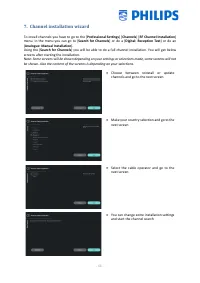
- 66 - 7. Channel installation wizard To install channels you have to go to the [ Professional Settings ] [ Channels ] [ RF Channel Installation ] menu. In the menu you can go to [ Search for Channels ] or do a [ Digital: Reception Test ] or do an [ Analogue: Manual Installation ]. Using the [ Searc...
Page 69 - Network installation wizard; be shown
- 68 - 8. Network installation wizard To connect to a network you have to go to the [ Professional Settings ] [ Wireless and Networks ] [ Connect to Network ] menu. Note: Some screens will be shown depending on your settings or selections made, some screens will not be shown Wired, Wireless, WPS, ...
Page 71 - Manage ThemeTV; To manage ThemeTV you have to go to the [
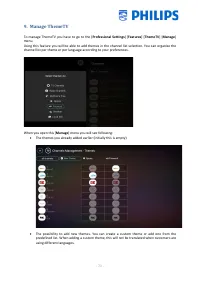
- 70 - 9. Manage ThemeTV To manage ThemeTV you have to go to the [ Professional Settings ] [ Features ] [ ThemeTV ] [ Manage ] menu. Using this feature you will be able to add themes in the channel list selection. You can organize the channel list per theme or per language according to your preferen...
Page 73 - Manage Channels; channels. This can also be done using CMND.; Rename channels
- 72 - 10. Manage Channels You can manage your channels, this means you can rename, reorder, hide/show, blank/non-blank the channels. This can also be done using CMND. To manage your channels you have to go to the [ Professional Settings ] [ Channels ] [ Manage ] menu. When you open this menu you wi...
Page 74 - Reorder channels
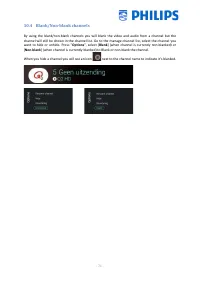
- 73 - 10.2 Hide/Show channels By using the hide/show channels you will hide or show a channel in the channel list. Go to the manage channel list, select the channel you want to hide or unhide. Press ” Options ”, select [ Hide ] (when channel is currently visible) or [ Show ] (when channel is curren...
Page 76 - Manage Apps; by disconnecting the TV from the mains power.
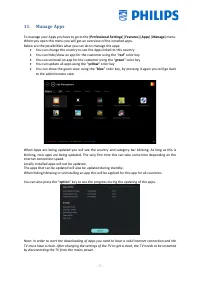
- 75 - 11. Manage Apps To manage your Apps you have to go to the [ Professional Settings ] [ Features ] [ Apps ] [ Manage ] menu. When you open this menu you will get an overview of the installed apps. Below are the possibilities what you can do to manage the apps: You can change the country to se...
Page 77 - Manage MyChoice; How does it work
- 76 - 12. Manage MyChoice To manage MyChoice you have to go to the [ Professional Settings ] [ Features ] [ MyChoice ] [ Manage ] menu. When you open this menu you will get an overview of the MyChoice channels, externals and features and the 3 category where they can be linked to. 12.1 How does it ...
Page 79 - Guest Menu; Home menu / Default dashboard; Home; Settings menu; Settings
- 78 - 13. Guest Menu In this chapter you can find back the menus that are visible for the guest and what they can do with it. 13.1 Home menu / Default dashboard Press “ Home ” on the guest RC You will see below menu You will be able to navigate to your channels and sources, the apps, the feat...
Page 80 - Alarm; Clock
- 79 - The settings can also be accessed via the Home menu, you can navigate to [ Features ] [ Settings ] 13.3 Alarm Press “ Clock ” on the guest RC when your TV is on You will see the clock appear in the right bottom Press “ Clock ” again on the guest RC You will be able to set the alarm ...
Page 81 - SmartInfo; SmartInfo Show
- 80 - 14. SmartInfo The SmartInfo feature can be used in two ways, as a picture slide show (SlideShow) or as interactive pages (Browser). The two ways of using SmartInfo are exclusive, only one of the two features can be enabled in a specific TV. SmartInfo can display the pictures or the webpages b...
Page 83 - SmartInfo Browser
- 82 - 14.3 SmartInfo Browser SmartInfo used as Browser will display the content you created (preferably with CMND). This content can be stored on the TV locally or on a dedicated server. How to upload content for SmartInfo Browser locally: Create the content with CMND Save the files into to fol...
Page 85 - Examples; ChannelList.xml in the clone file; be edited via CMND or you can do this using an xml editor tool.
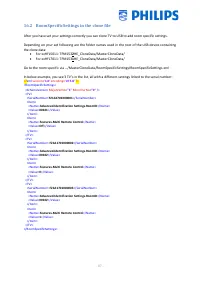
- 84 - 16. Examples 16.1 ChannelList.xml in the clone file After you have set your settings correctly you can clone TV to USB to change the channel list. This can be edited via CMND or you can do this using an xml editor tool. Depending on your set following are the folder names used in the root of ...
Page 86 - Add an RF channel in the ChannelList.xml
- 85 - </Application> <Application> <App Type = "Native" AppName = "InternetBrowser" /> <Setup name = "InternetBrowser" FreePKG = "1" PayPKG1 = "0" PayPKG2 = "0" /> </Application> <Application> <App Type = "Na...
Page 88 - RoomSpecificSettings in the clone file
- 87 - 16.2 RoomSpecificSettings in the clone file After you have set your settings correctly you can clone TV to USB to add room specific settings. Depending on your set following are the folder names used in the root of the USB device containing the clone data: For xxHFL5011: TPM153 2 HE_CloneDa...
Page 89 - LocalCustomDashboard in the clone file; ]. In this case the TV shall load the custom dashboard from the
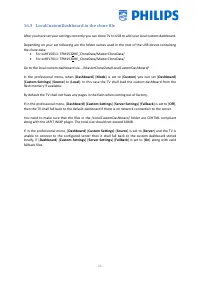
- 88 - 16.3 LocalCustomDashboard in the clone file After you have set your settings correctly you can clone TV to USB to add your local custom dashboard. Depending on your set following are the folder names used in the root of the USB device containing the clone data: For xxHFL5011: TPM153 2 HE_Cl...
Page 90 - Add a local app in the app list; How to install your own apk if no other apps are installed yet
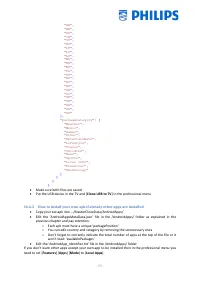
- 89 - 16.4 Add a local app in the app list After you have set your settings correctly you can clone TV to USB to change add your own app. This can be done via CMND or you can do this manually. Depending on your set following are the folder names used in the root of the USB device containing the clo...
Page 92 - IP TV installation; Setup; Note: Below settings are to be able to control the TV’s using CMND
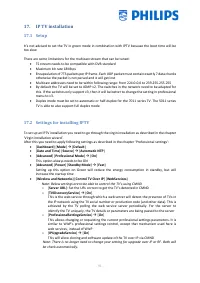
- 91 - 17. IP TV installation 17.1 Setup It’s not advised to set the TV in green mode in combination with IPTV because the boot time will be too slow. There are some limitations for the multicast stream that can be tuned: TS stream needs to be compatible with DVB standard Maximum bit rate 18Mbps...
Page 93 - Installing IP Channels; brackets with the following format: (The; numbers; As an end result you have for example:; Installing IP Channels without a CMND server
- 92 - 17.3 Installing IP Channels Open the ChannelList.xml file as described in the chapter ‘ChannelList.xml in the clone file’. For each IP channel in your network, an xml element needs to be inserted within the <ChannelMap></ChannelMap> brackets with the following format: (The green e...