Panasonic NNSF550W - Manuals
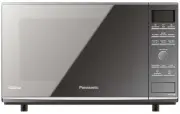
User Manual Panasonic NNSF550W


Summary
Safety Instructions – 1 – Precautions to be taken when usingMicrowave Ovens for Heatingfoodstuffs INSPECTION FOR DAMAGE. A microwave oven should only be used if an inspection confirms all of the following conditions:1. The door fits squarely and securely and opens and closes smoothly. 2. The door hi...
Installation and General Instructions – 2 – General Use 1. In order to maintain high quality, do not operate the oven when empty. The microwave energy willreflect continuously throughout the oven if no foodor water is present to absorb energy. 2. If smoke is observed, press the STOP/RESET Pad and le...
Microwaves and How They Work – 3 – Microwaves are a form of high frequency radio wavessimilar to those used by a radio, including AM, FMand CB. They are similar to a television where theradio waves are converted to a picture on the screen.However, microwaves are much shorter than radiowaves; approxi...
Panasonic Microwaves Manuals
-
 Panasonic NE-1054F
User Manual
Panasonic NE-1054F
User Manual
-
Panasonic NE-1054F
Manual
-
 Panasonic NN-CD58JSQPQ
User Manual
Panasonic NN-CD58JSQPQ
User Manual
-
 Panasonic NN-CD87KS
User Manual
Panasonic NN-CD87KS
User Manual
-
Panasonic NN-CD87KS
Manual
-
 Panasonic NN-CD87KSQPQ
User Manual
Panasonic NN-CD87KSQPQ
User Manual
-
 Panasonic NNCD997S
User Manual
Panasonic NNCD997S
User Manual
-
 Panasonic NNCF770M
User Manual
Panasonic NNCF770M
User Manual
-
 Panasonic NN-CF770M
User Manual
Panasonic NN-CF770M
User Manual
-
 Panasonic NN-CF874BQPQ
User Manual
Panasonic NN-CF874BQPQ
User Manual
-
 Panasonic NN-CS894SQPQ
User Manual
Panasonic NN-CS894SQPQ
User Manual
-
 Panasonic NN-CS89LBQPQ
User Manual
Panasonic NN-CS89LBQPQ
User Manual
-
 Panasonic NN-CT56MBQPQ
User Manual
Panasonic NN-CT56MBQPQ
User Manual
-
 Panasonic NNDS592B
User Manual
Panasonic NNDS592B
User Manual
-
 Panasonic NN-DS596BQPQ
User Manual
Panasonic NN-DS596BQPQ
User Manual
-
 Panasonic NN-DS59NBQPQ
User Manual
Panasonic NN-DS59NBQPQ
User Manual
-
 Panasonic NNGD682S
User Manual
Panasonic NNGD682S
User Manual
-
 Panasonic NN-GM230
User Manual
Panasonic NN-GM230
User Manual
-
 Panasonic NN-GM231W
User Manual
Panasonic NN-GM231W
User Manual
-
 Panasonic NN-GM342W
User Manual
Panasonic NN-GM342W
User Manual