Page 2 - Table of Contents; Introduction
2 Table of Contents Introduction Accessory information ......................................... 6 Graphical symbols for use on equipment and their descriptions ...................................................... 13 Important Information For your safety ..............................................
Page 6 - Accessory information; Supplied accessories; Wall mounting
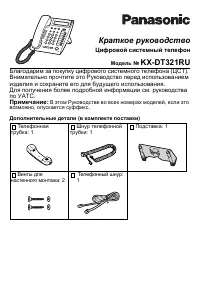
6 Introduction Accessory information Supplied accessories No. Accessory item/Part number Quantity 1 AC adaptor*1 /PNLV226X 1 2 Telephone line cord*1, *2 1 3 Wall mounting adaptor/PNKL1001X1 1 4 Rechargeable batteries*3, *4 4 5 Handset cover*5/PNYNTGMA44BR 1 6 Belt clip*6/PNKE2076Z2 1 *1 The AC adapt...
Page 8 - Headset
8 5 6 Additional/replacement accessories Please contact your nearest Panasonic dealer for sales information (page 107). Accessory item Model number/Specifications Rechargeable batteries HHR-4DPA*1 • To order, please visit http://shop.panasonic.com/support Battery type: – Nickel metal hydride (Ni-MH)...
Page 10 - Expanding your phone system; *1 Maximum receiver volume is 40 dB (when the
10 Expanding your phone system Handset (optional): KX-TGMA44*1/ KX-TGMA45*2 You can expand your phone system by registering optional handsets (6 max.) to a single base unit. • Optional handsets may be a different color from that of the supplied handsets. *1 Maximum receiver volume is 40 dB (when the...
Page 11 - Bluetooth® devices; *1 Your cellular phone and headset must be Bluetooth
11 Bluetooth® devices You can expand your phone system by pairing the following units to a single base unit. Your Bluetooth cellular phone*1: 2 max. (for cellular calls: page 74) Your Bluetooth headset*1 : 1 max. (for a wireless hands-free conversation: page 189) *1 Your cellular phone and headset m...
Page 12 - Trademarks; • The Bluetooth® word mark and logos are registered
12 Trademarks • The Bluetooth® word mark and logos are registered trademarks owned by Bluetooth SIG, Inc., and any use of such marks by Panasonic Corporation is under license. • iPhone is a registered trademark of Apple Inc. • Android is a trademark of Google Inc. • Gmail, Google Calendar are tradem...
Page 13 - Protective earth
13 Graphical symbols for use on equipment and their descriptions Symbol Explanation Alternating current (A.C.) Direct current (D.C.) Protective earth Protective bonding earth
Page 14 - Functional earth
14 Symbol Explanation Functional earth For indoor use only Class II equipment (equipment in which protection against electric shock relies on Double Insulation or Reinforced Insulation) “ON” (power)
Page 15 - Caution, risk of electric shock
15 Symbol Explanation “OFF” (power) Stand-by (power) “ON”/“OFF” (power; push-push) Caution, risk of electric shock
Page 16 - Important Information; For your safety; WARNING; Use only the power source marked on the product.
16 Important Information For your safety To prevent severe injury and loss of life/property, read this section carefully before using the product to ensure proper and safe operation of your product. WARNING Power connection • Use only the power source marked on the product. • Do not overload power o...
Page 18 - Do not disassemble the product.; Medical
18 • Do not disassemble the product. • Do not spill liquids (detergents, cleansers, etc.) onto the telephone line cord plug, or allow it to become wet at all. This may cause a fire. If the telephone line cord plug becomes wet, immediately pull it from the telephone wall jack, and do not use. • To pr...
Page 19 - The AC adaptor is used as the main disconnect
19 determine if they are adequately shielded from external RF (radio frequency) energy. (The product operates in the frequency range of 1.92 GHz to 1.93 GHz, and the RF transmission power is 115 mW (max.).) • Do not use the product in health care facilities if any regulations posted in the area inst...
Page 22 - Important safety instructions; SAVE THESE INSTRUCTIONS
22 • It is recommended that batteries are replaced after a power outage. Important safety instructions When using your product, basic safety precautions should always be followed to reduce the risk of fire, electric shock, and injury to persons, including the following: 1. Do not use this product ne...
Page 23 - For best performance; Base unit location/avoiding noise; • Coverage and voice quality depends on the local
23 For best performance Base unit location/avoiding noise The base unit and other compatible Panasonic units use radio waves to communicate with each other. • For maximum coverage and noise-free communications, place your base unit: – at a convenient, high, and central location with no obstructions ...
Page 24 - Environment
24 Environment • Keep the product away from electrical noise generating devices, such as fluorescent lamps and motors. • The product should be kept free from excessive smoke, dust, high temperature, and vibration. • The product should not be exposed to direct sunlight. • Do not place heavy objects o...
Page 25 - Routine care; • Do not use benzine, thinner, or any abrasive; Other information; Risk of explosion if battery is replaced by an; Notice for product disposal, transfer, or return; • This product can store your private/confidential
25 appliances. Routine care • Wipe the outer surface of the product with a soft moist cloth. • Do not use benzine, thinner, or any abrasive powder. Other information Caution: Risk of explosion if battery is replaced by an incorrect type. Dispose of used batteries according to the instructions. Notic...
Page 26 - Notice; • This product is designed for use in the United States
26 Notice • This product is designed for use in the United States of America. Sale or use of this product in other countries may violate local laws. • Cet appareil est conçu pour être utilisé aux États- Unis d'Amérique. La vente ou l'emploi de cet appareil dans certains autres pays peut consituer un...
Page 27 - Specifications; RF transmission power:
27 Specifications • Standard: DECT 6.0 (Digital Enhanced Cordless Telecommunications 6.0) Bluetooth wireless technology 2.1 • Frequency range: 1.92 GHz to 1.93 GHz (DECT) 2.402 GHz to 2.48 GHz (Bluetooth) • RF transmission power: 115 mW (max.) • Power source: 120 V AC, 60 Hz • Power consumption: Bas...
Page 28 - Getting Started; Setting up; Connections; • If you do not connect the telephone line cord and
28 Getting Started Setting up Connections • If you do not connect the telephone line cord and use only cellular lines, set the cellular line only mode to use this unit more conveniently (page 36). 1 Connect the AC adaptor to the unit by pressing the plug firmly. 2 Fasten the cord by hooking it. 3 Co...
Page 29 - Handset battery charging; Remove the yellow insulation
29 Note: • The AC adaptor and telephone line cord come connected to the base unit at the time of shipment. • Use only the supplied Panasonic AC adaptor PNLV226. Handset battery charging 2 rechargeable Ni-MH batteries are installed in the handset at the time of shipment. Before initial use: Remove th...
Page 30 - Charging; • When the batteries are fully charged, “; Fully; • Follow the directions on the display to set up the
30 Charge for about 7 hours. • Confirm “ Charging ” is displayed ( A ). • When the batteries are fully charged, “ Fully charged ” is displayed. • Follow the directions on the display to set up the unit.
Page 31 - High
31 Handset battery level Icon Battery level High Medium Low Needs charging. Empty
Page 32 - In continuous use; Handset battery installation (for replacement)
32 Panasonic Ni-MH battery performance Operation Operating time In continuous use 13 hours max.*1 Not in use (standby) 9 days max.*1 *1 If eco mode is on and booster is off. Note: • Actual battery performance depends on usage and ambient environment. Handset battery installation (for replacement) • ...
Page 34 - Base unit backup batteries; Item; *1 When the base unit is running on battery power,
34 Base unit backup batteries 2 rechargeable Ni-MH batteries are installed in the base unit at the time of shipment. These batteries can be used to supply power to the base unit in the event of a power failure. Before initial use: Remove the yellow insulation sheet before using the base unit. Base u...
Page 35 - Operation
35 *2 When the base unit is running on battery power and the remaining battery power is too low, “ ” flashes and the base unit beeps. Additionally, the base unit’s message indicator flashes. Panasonic Ni-MH battery performance when operating on backup battery power Operation Operating time In contin...
Page 36 - Base unit battery installation (for replacement); Do NOT use manganese batteries.
36 • If your phone service provider requires additional devices in order to make and receive calls, such as a modem, you may still not be able to make and receive calls even if the base unit’s backup power feature is functioning. Base unit battery installation (for replacement) Important: • The foll...
Page 38 - When this feature is activated,
38 Note for battery installation • Use the supplied rechargeable batteries. For replacement, we recommend using the Panasonic rechargeable batteries noted on page 6, 20. Note for battery charging • It is normal for the handset to feel warm during charging. • Clean the charge contacts of the handset,...
Page 39 - Controls; Handset; • The belt clip comes attached to the handset at; Speaker
39 Controls Handset 1 Belt clip holes • The belt clip comes attached to the handset at the time of shipment. 2 Speaker
Page 40 - Dial keypad; : Temporary tone dialing; Headset jack; • This jack is used to connect an optional headset; Headset type; ” setting to match
40 3 [TONE] (Tone control) 4 [+]/[-] (VOL.: Volume up/down) 5 [FLASH] [TALK] 6 Dial keypad [*] : Temporary tone dialing [0] : ( ) Ringer off 7 Headset jack • This jack is used to connect an optional headset or a user-supplied neckloop to the handset. You must set the “ Headset type ” setting to matc...
Page 41 - • Light off: Volume booster is turned off.; 6 Charge contacts; By pressing a soft key, you can select the feature
41 14 [SLOW] (SLOW TALK) SLOW TALK indicator 15 [BOOST] BOOST indicator • Light off: Volume booster is turned off. Light in red: Volume booster is turned on. Note that when the BOOST indicator is lit in red, the volume booster feature is enabled and the product may emit sounds at very high volume. 1...
Page 43 - • You can locate a misplaced handset by pressing
43 4 [RINGER OFF] RINGER OFF indicator [FLASH/CALL WAIT] 5 [LOCATOR/INTERCOM] • You can locate a misplaced handset by pressing [LOCATOR/INTERCOM] . 6 [CELL 1] [ ](Repeat) 7 [CELL 2] [ ] (Skip) 8 Message counter 9 [SLOW TALK] SLOW TALK indicator [TONE] (Tone control) 10 [ERASE/MUTE] 11 [+]/[-] (V...
Page 44 - Display icons/Indicators; Handset display items; Within base unit range
44 13 [ ] (SP-PHONE: Speakerphone) [SP-PHONE] indicator ( ) 14 Message indicator 15 Microphone 16 [ ] (PLAY/STOP) New Message/Play indicator ( ) 17 [ANSWER ON/OFF] ANSWER ON/OFF indicator ( ) Display icons/Indicators Handset display items Item Meaning Within base unit range Out of base unit ra...
Page 45 - The landline is in use.
45 Item Meaning The landline is in use. • When flashing: The call is put on hold. • When flashing rapidly: An incoming call is now being received. A cellular line is in use.*1 • When flashing: The cellular call is put on hold. • When flashing rapidly: A cellular call is being received. Speech booste...
Page 46 - Noise reduction is set.
46 Item Meaning A cellular phone (1, 2) or Bluetooth headset (H) is not connected to the base unit. – A cellular call is in progress on that line. – The cellular line is selected for the setting. Noise reduction is set. – Tone control level (Tone 1-6 or Custom tone) Speakerphone is on. Ringer volume...
Page 50 - A landline call is being received.
50 Status Meaning – The base unit is pairing a Bluetooth headset. Flashing rapidly A landline call is being received. Light off – A Bluetooth headset is not paired to the base unit. – The Bluetooth headset is not connected to the base unit. Note: • The CELL 2/HEADSET indicator (page 48) also indicat...
Page 51 - Language settings; Display language; • The setting will be applied in about 5 seconds.
51 Language settings Display language 1 [MENU] [#] [1] [1] [0] 2 [ ]: Select the desired setting. [SAVE] [OFF] Voice announcement language You can select the language used for the following features. – Answering system guidance – Talking Caller ID – Talking keypad and phonebook – Application (Ap...
Page 52 - Date and time; Enter the current month, date, and year by selecting; AM; ” or “; PM; • When English is selected as the display language,
52 Date and time 1 [MENU] [#] [1] [0] [1] 2 Enter the current month, date, and year by selecting 2 digits for each. Example: July 12, 2016 [0] [7] [1] [2] [1][6] 3 [OK] 4 Enter the current hour and minute (12-hour clock format) by selecting 2 digits for each. Example: 9:30 [0] [9] [3] [0] 5 [*] : Se...
Page 53 - Recording your greeting message; Yes; Record a greeting message.; Other settings; Dialing mode
53 Recording your greeting message You can record your own greeting message instead of using a pre-recorded greeting message. 1 [MENU] [#] [3] [0] [2] 2 [ ]: “ Yes ” [SELECT] 3 Record a greeting message. [STOP] [OFF] Other settings Dialing mode If you cannot make calls, change this setting acc...
Page 54 - Accessibility; ” and “
54 Accessibility Accessibility This product is designed to provide not only optimal volume, but optimal sound quality as well, ensuring that every call is heard loud and clear. Tone control This feature clarifies the voice of the person you are talking to, producing a more natural-sounding voice tha...
Page 57 - Volume booster; • This feature is designed for users who are hard of
57 Volume booster This feature allows you to drastically increase the volume of the other party’s voice. This feature can be set for each unit. WARNING • This feature is designed for users who are hard of hearing. If other users use the phone, be sure to turn this feature off. • Do not use this feat...
Page 58 - Turning on the volume booster
58 Turning on the volume booster 1 Press [BOOST] while on a call. • The BOOST indicator lights in red. 2 Press [+] or [-] on the side repeatedly to select the desired volume. • The selected volume setting is shown on the handset display while talking. • The selected volume setting is used for future...
Page 60 - • The selected volume setting is applied immediately; Available volume settings; Light off
60 • The selected volume setting is applied immediately and is also used for future calls. A separate setting is used for when volume booster is on and when it is off. Available volume settings The available settings vary whether volume booster is turned on or off. BOOST indicator Volume booster Ava...
Page 61 - Speech booster (making your voice louder)
61 Speech booster (making your voice louder) This feature allows you to increase the volume of your voice heard by the other party. This feature can be set for each handset. WARNING • The speech booster feature can be used to increase the volume of your voice heard by the other party. If this featur...
Page 63 - • If you dial a phone number quickly, the handset may
63 1 For handset: [MENU] [#] [7] [5] [0] For base unit (using a handset): [MENU] [#] [*] [7] [5] [0] 2 [ ] : Select the desired setting. [SAVE] [OFF] Note: • If you dial a phone number quickly, the handset may not announce the dialed phone number correctly. For best results, dial slowly, and wai...
Page 64 - Key tones; Low; ”. Includes confirmation tones and error tones,; Message indicator; Indicator; The handset alarm is sounding.
64 Key tones Use this procedure to change the volume of the tones that sound when you press keys on the handset and base unit, or to turn them off. The default setting is “ Low ”. Includes confirmation tones and error tones, etc. This feature can be set for each unit. 1 For handset: [MENU] [#] [1] [...
Page 66 - Slow talk; – When talking on outside calls (including
66 2 [ ] : Select the desired setting and press [SELECT] . • “ ✓ ” is displayed next to enabled items. • To disable an item, select it and press [SELECT] again. “ ✓ ” disappears. 3 [SAVE] [OFF] Note: • If the message indicator flashes when the handset is not placed on the base unit, the handset co...
Page 68 - Using assistive listening devices; – Hearing aids that are equipped with a telecoil; To use with a T-coil-equipped hearing aid; • Refer to your hearing aid’s operating instructions
68 Using assistive listening devices If you use hearing aids that are compatible with a neckloop, you can connect your neckloop to a handset and enjoy hands-free conversations. When talking on the phone, you can speak using the neckloop’s microphone or the handset’s microphone depending on the neckl...
Page 69 - To use a neckloop
69 To use a neckloop When using a neckloop with the handset, you can speak using the neckloop’s microphone or using the handset’s microphone. Important: • You must set the headset type before use (page 70). 1 Connect the neckloop to the headset jack on the side of the handset. 2 Use the handset as n...
Page 70 - ”: Disables the handset’s
70 Setting the headset type Set this setting to match the type of device connected. This feature can be set for each unit. “ Headset ” (default): Disables the handset’s microphone. The connected headset is used for talking and listening. “ Neckloop with Mic ”: Disables the handset’s microphone. The ...
Page 71 - Link to Cell; Link to cell feature
71 Link to Cell Link to cell feature You can connect your base unit and cellular phone using Bluetooth wireless technology, so that you can make or answer cellular calls using your phone system. This allows you to: – use the unit to talk on cellular calls even if some areas of your home have poor ce...
Page 72 - Pairing a cellular phone; • For more details and the list of compatible cellular
72 • The unit can be used to talk on 2 lines at the same time (for example, 2 cellular lines, or the landline and 1 cellular line). • Only 2 Bluetooth devices can be used with the unit at the same time (for example, 2 cellular lines, or the Bluetooth headset and 1 cellular line *1). • Locate your ce...
Page 75 - Link to cell settings; Selecting which unit receives cellular calls; Select the desired handset or “All”.
75 1 For CELL 1: [MENU] [#] [6] [1] [1] [1] For CELL 2: [MENU] [#] [6] [1] [1] [2] 2 [ ]: “Yes” [SELECT] • When the cellular phone is unpaired, the CELL indicator is turned off. 3 [OFF] Link to cell settings Selecting which unit receives cellular calls You can select which unit rings and receives ...
Page 77 - On
77 base unit use your cellular phone’s ringer tone. Caller information is not announced even if the Talking Caller ID is turned on. Important: • To use this feature, your cellular phone must support Bluetooth in-band ringtone. Refer to your cellular phone’s operating instructions. 1 For CELL 1: [MEN...
Page 78 - Select “; Off; • When 3 Bluetooth devices (2 cellular phones and 1
78 information even when Talking Caller ID is turned off. To use the handset ringer tone instead of your cellular phone’s ringer tone Select “ Off ” in step 2, “Ring as cell mode”, page 70. To change the handset ringer tone for a cellular line, see page 135. Auto connection to the Bluetooth devices ...
Page 79 - ” in step 2. Check the specifications
79 same time, and the base unit loses its connection from other Bluetooth devices. To automatically resume the connection to Bluetooth devices, leave the auto connection on. • Some cellular phones lose connection after usage, please check the specifications of your cellular phone for more details. 1...
Page 85 - • If the unit prompts you to enter the old PIN (when
85 1 [MENU] [#] [6] [1] [9] • If the unit prompts you to enter the old PIN (when the default has been changed), enter the current 4-digit PIN. 2 Enter the new 4-digit PIN. [OK] 3 Enter the new 4-digit PIN again. [SAVE] [OFF]
Page 86 - Making/Answering Calls; Making cellular calls
86 Making/Answering Calls Making cellular calls Important: • The unit can be used to talk on 2 lines at the same time (for example, 2 cellular lines, or the landline and 1 cellular line). • Only 2 Bluetooth devices can be used with the unit at the same time (for example, 2 cellular lines, or the hea...
Page 90 - Making landline calls; Making a call using the redial list
90 Making landline calls 1 Lift the handset and then dial the phone number. • To correct a digit, press [CLEAR] . 2 Press [TALK] to make the call. • To make the call using the speakerphone, press [ ] . 3 When you finish talking, press [OFF] or place the handset on the base unit or charger. Note: • W...
Page 91 - Answering calls; Using the handset; When a call is being received, the message indicator
91 2 [ ] : Select the desired entry. 3 [TALK] Pause (for PBX/long distance service users) A pause is sometimes required when making calls using a PBX or long distance service. When storing a calling card access number and/or PIN in the phonebook, a pause is also needed. Example: If you need to dial ...
Page 93 - Incoming call
93 the base unit message indicator’s “ Incoming call ” setting is enabled (page 31). 1 Press [ ] when the unit rings. • You can also answer the cellular call by pressing [CELL 1] or [CELL 2] . 2 Speak into the microphone. 3 When you finish talking, press [ ] . Note: • While on a call, you can switch...
Page 96 - Useful features during a call; Hold
96 turned off. • You can turn the ringer on again by pressing [RINGER OFF] . Useful features during a call Hold 1 Press [MENU] during an outside call. 2 [ ] : “ Hold ” [SELECT] 3 To release hold on the cellular line: Press [CELL] .*1 • Another handset user can take the call by pressing [CELL] .*1 ...
Page 98 - To return to the call, press; Flash for landline calls; on the handset or
98 2 To return to the call, press [ERASE/MUTE] . Flash for landline calls Handset / Base unit [FLASH] on the handset or [FLASH/CALL WAIT] on the base unit allows you to use the special features of your host PBX such as transferring an extension call, or accessing optional telephone services. Note: •...
Page 101 - Call share; You can join an existing outside call.; To join the conversation, press; Base unit; or
101 Call share You can join an existing outside call. Handset While another unit is on a cellular call: 1 To join the conversation, press [CELL] . • You can join the conversation in the following situations. – Only 1 cellular phone is paired. – A specific line is set to make cellular calls. 2 [ ] ...
Page 105 - From a cellular phone to the handset
105 Note: • Depending on your cellular phone type, you may need to set the cellular phone to be ready to talk before transferring. For example, if your cellular phone has a top cover, open it beforehand. From a cellular phone to the handset During a conversation using a cellular phone, the call ca...
Page 108 - Intercom
108 displayed, select the desired cellular line and press [SELECT] . Base unit Press [ ] , then press [ ] while the 2nd call is being received. • Note that the current call is disconnected. Intercom Intercom calls can be made: – between handsets – between a handset and the base unit Note: • When pag...
Page 111 - Call Block; Call block; Press; When you are talking on an outside call; Confirm the call block number and press; Caller blocked; ” is displayed, and the call is
111 Call Block Call block In the following situations, you can disconnect the current call and add the caller’s phone number to the call block list. – When an outside call is being received – When an outside caller’s message is being recorded – When you are talking on an outside call 1 When an outsi...
Page 112 - Storing unwanted callers; “Block a single number”:
112 Note: • If the call has no phone number, the call is blocked but it is not stored in the call block list. • The call block feature is not available: – for intercom calls or calls received by call waiting. – when a landline call (or cellular call) is being received during a cellular call (or land...
Page 113 - Blocking unwanted callers:; *1 If you do not want this one ring to sound, select; Storing a single phone number; • We recommend storing 10 digits (including the area; Adding call blocked numbers from the caller list; CID
113 Single phone numbers and ranges of numbers can be stored in the call block list up to 250 items in total. Blocking unwanted callers: When a call is received, the unit rings once *1 while caller information is being received. If the caller’s phone number matches an entry in the call block list, t...
Page 116 - ”: The first ring is muted for all calls. If this setting
116 4 Enter the desired number (2-8 digits). [SAVE] [OFF] Blocking incoming calls that have no phone number You can block calls when no phone number is provided, such as private callers or out of area calls. 1 [MENU] [#] [2] [1] [7] 2 [ ] : “ Block unknown CID ” [SELECT] 3 [ ] : Select the des...
Page 117 - Block range of; • After viewing, press
117 1 [MENU] [#] [2] [1] [7] 2 [ ] : “ One ring for blocked call ” [SELECT] 3 [ ] : Select the desired setting. [SAVE] [OFF] Viewing/editing/erasing call block numbers 1 [MENU] [#] [2] [1] [7] 2 [ ] : “ Block a single number ” or “ Block range of numbers ” [SELECT] 3 [ ] : Select the desired...
Page 119 - Phonebook; Home; – Group 4-9: You can change the group name for each
119 Phonebook Phonebook You can add 3,000 names (16 characters max.) and phone numbers (24 digits max.) to the phonebook, and assign each phonebook entry to the desired group. The following groups are available: – Group 1: “ Home ”*1 (default) – Group 2: “ Cell 1 ”*1 – Group 3: “ Cell 2 ”*1 – Group ...
Page 120 - Enter the party’s name.; Entering characters
120 Adding phonebook entries 1 [ ] [MENU] 2 [ ] : “ Add new entry ” [SELECT] 3 Enter the party’s name. [OK] 4 Enter the party’s phone number. [OK] 5 [ ] : Select the desired group. [SELECT] 2 times [OFF] Note: • In step 3, you can switch the language for entering characters. [#] [ ] ...
Page 123 - When a cellular phone is not paired:; Edit
123 until the phone number is shown in the desired format. 3 [SAVE] 4 [ ]: “Phonebook” [SELECT] 5 Continue from step 3, “Editing entries”, page 130. When a cellular phone is not paired: 1 [ ] CID 2 [ ] : Select the desired entry. [MENU] • To edit the number: [ ]: “ Edit ” [SELECT] Press [E...
Page 126 - : Scroll through the phonebook if necessary.; To search by query; To search for the name, enter the first characters
126 3 [ ] : Scroll through the phonebook if necessary. To search by query You can narrow down the search to enter the first characters of a name. 1 [*] 2 To search for the name, enter the first characters (up to 4) in uppercase (page 120). OK 3 [ ] : Scroll through the phonebook if necessary. 3 ■ ...
Page 128 - During an outside call, press
128 3 [ ] : Select the desired group. [SELECT] 4 [ ] : “ Yes ” [SELECT] 5 [ ] : “ Yes ” [SELECT] [OFF] Chain dial This feature allows you to dial phone numbers in the phonebook while you are on a call. This feature can be used, for example, to dial a calling card access number or bank accoun...
Page 129 - Memory dial; Adding phone numbers to memory dial keys
129 • If you have rotary/pulse service, you need to press [*] before pressing [ ] in step 1 to change the dialing mode temporarily to tone. When adding entries to the phonebook, we recommend adding [*] to the beginning of phone numbers you wish to chain dial. Memory dial For easy dialing, you can ...
Page 134 - Programming; Menu list; Scrolling through the display menus
134 Programming Menu list To access the features, there are 2 methods. Scrolling through the display menus 1 [MENU] 2 Press [ ] or [ ] to select the desired main menu. [SELECT] 3 Press [ ] or [ ] to select the desired item from the next sub-menus. [SELECT] 4 Press [ ] or [ ] to sel...
Page 136 - Greeting
136 Main menu: “Answering device” Sub-menu 1 Sub-menu 2 Settings Code Play new message – – #323 Play all message – – #324 Erase all message *1 – – #325 Greeting Record greeting*1 – #302 Check greeting – #303 Pre-recorded *1 (Reset to pre-recorded greeting) – #304 New message alert *1 – Outgoing call...
Page 137 - Remote code
137 Sub-menu 1 Sub-menu 2 Settings Code – Remote code Base unit beep On <Off> #339 Settings Ring count *1 Toll saver 2-7 rings <4 rings> #211 Recording time*1 <3 min> 1 min Greeting only*2 #305 Remote code *1 <111> #306 – Screen call Handset <On> Off #310 – Screen call ...
Page 140 - Alert tone
140 Sub-menu 1 Sub-menu 2 Settings Code CID)> On (without Talking CID) Off #6142 *6 Alert settings – Alert On/Off*1 <On> Off #6101 *5 #6102 *6 Alert settings – Voice alert*1 <On> Off #6031 *5 #6032 *6 Alert settings – Alert tone <Tone 1> *5 <Tone 2> *6 #6041 *5 #6042 *6 Pa...
Page 141 - Unpair
141 Sub-menu 1 Sub-menu 2 Settings Code *6 Unpair – #6111 *5 #6112 *6 Phonebook transfer – – #618 Headset Add new device*4 – #621 Connect*1/ Disconnect*1 – #622 Pair – #621 Unpair – #612 Settings Auto connect *1 Off <1 min> 3 min 5 min 10 min #632
Page 143 - Memo alarm
143 Sub-menu 1 Sub-menu 2 Settings Code *1 Trunk prefix *1 – #119 Main menu: “Set date & time” Sub-menu 1 Sub-menu 2 Settings Code Date and time*1 – – #101 Memo alarm Alarm 1-3 <Off> Once Daily Weekly #720 Time adjustment *1, *10 – <Caller ID auto> Manual #226
Page 148 - Boost speech On
148 Sub-menu 1 Sub-menu 2 Settings Code Boost speech On <Off> #783 Key tone – Handset Off <Low> High #165 Key tone – Base unit*1 Off <Low> High #G165 Interrupt tone – Handset*11 <On> Off #201 Interrupt tone – Base unit *1, *11 <On> Off #G201 Set date & time Date and...
Page 149 - Weekly
149 Sub-menu 1 Sub-menu 2 Settings Code Weekly Time adjustment *1, *10 <Caller ID auto> Manual #226 Key detector setting *12 – 1: Add new device (for Detector1) *13 – 2: Add new device (for Detector2) – 3: Add new device (for Detector3) – 4: Add new device (for Detector4) Change name *1 Detect...
Page 150 - Call block *1 Block a single
150 Sub-menu 1 Sub-menu 2 Settings Code #6582*14 #6583*14 #6584*14 Call block *1 Block a single number – #217 Block range of numbers – Block unknown CID (CID: Caller ID) Block <Unblock> #240 One ring for blocked call <Yes> No #173 Memory dial – – #261 Record greeting*1 – – #302 Voicemail...
Page 151 - Display name –
151 Sub-menu 1 Sub-menu 2 Settings Code access# *1 (VM: Voicemail) VM tone detect *1 <On> Off #332 LCD contrast (Display contrast) – Level 1–4 <2> #145 Handset name – – #104 Display name – On <Off> #105 Message indicator Handset – Incoming call <On> Off #278 Handset – New mes...
Page 153 - alert
153 Sub-menu 1 Sub-menu 2 Settings Code alert Caller ID edit (Caller ID number auto edit) – <On> Off #214 Auto talk *15 – On <Off> #200 Set tel line Set dial mode *1 <Tone> Pulse #120 Set flash time *1, *16 80 ms 90 ms 100 ms 110 ms 160 ms 200 ms 250 ms 300 ms 400 ms 600 ms #121
Page 154 - Registration Register
154 Sub-menu 1 Sub-menu 2 Settings Code <700 ms> 900 ms Set line mode *1, *17 A <B> #122 Call sharing *1 – <On> Off #194 Registration Register handset – #130 Deregistration *2 – #131 Headset type – <Headset> Neckloop with Mic Neckloop w/o Mic #786 Change language Display <...
Page 157 - Alarm
157 detector (KX-TGA20). Read the installation manual for more information on the key detector. *13 For models with supplied key detectors, the display shows “ 1: Detector1 ”. *14 If you register 2 or more key detectors. *15 If you subscribe to a Caller ID service and want to view the caller’s infor...
Page 158 - ” setting is enabled.
158 function). You can also configure the alarm to display a text memo. You can set 3 separate alarms for each handset. Each alarm can be set to sound once, daily, or weekly. When an alarm sounds, the message indicator flashes rapidly if the handset message indicator’s “ Alarm ” setting is enabled. ...
Page 160 - Silent mode
160 Note: • Press [STOP] to stop the alarm completely. • When the handset is in use, the alarm will not sound until the handset is in standby mode. • Press any dial key or [SNOOZE] to stop the sound but keep the snooze function activated. • If you want to make an outside call when the snooze functio...
Page 162 - Changing the start and end time; Continue from step 3, “; Turning silent mode; ” is displayed next to the selected group
162 Changing the start and end time 1 For handset: [MENU] [#] [2] [3] [7] For base unit (using a handset): [MENU] [#] [*] [2] [3] [7] 2 Continue from step 3, “ Turning silent mode on/off ”. Selecting groups to bypass silent mode 1 For handset: [MENU] [#] [2] [4] [1] For base unit (using a handset): ...
Page 163 - Other programming; Changing the handset name; The default handset name is “; Handset 1; ” to; Handset 6; ”. You can customize the name of each; Displaying the handset name
163 Other programming Changing the handset name The default handset name is “ Handset 1 ” to “ Handset 6 ”. You can customize the name of each handset (“Bob”, “Kitchen”, etc.). This is useful when you make intercom calls between handsets. To display the handset name in standby mode, turn on the hand...
Page 164 - Registering a unit; Operating additional units
164 Registering a unit Operating additional units Additional handsets Up to 6 handsets can be registered to the base unit. Important: • See page 16 for information on the available model. Registering a handset to the base unit The supplied handset and base unit are pre-registered. If for some reason...
Page 165 - Deregistering a handset; • All handsets registered to the base unit are
165 Deregistering a handset A handset can cancel its own registration to the base unit, or other handsets registered to the same base unit. This allows the handset to end its wireless connection with the system. 1 [MENU] [#] [1] [3] [1] • All handsets registered to the base unit are displayed. 2 : S...
Page 166 - Caller ID Service; Using Caller ID service; Caller ID features
166 Caller ID Service Using Caller ID service Important: • This unit is Caller ID compatible. To use Caller ID features, you must subscribe to a Caller ID service. Contact your phone service provider for details. Caller ID features When an outside call is being received, the caller information is di...
Page 167 - • If the unit is connected to a PBX system, caller; Missed calls; Missed call; ” disappears from the standby display if; Phonebook name display
167 • If the unit is connected to a PBX system, caller information may not be properly received. Contact your PBX supplier. Missed calls If a call is not answered, the unit treats it as a missed call. The display shows “ Missed call ”. When there is a missed call, the message indicator flashes slowl...
Page 168 - Talking Caller ID; – subscribe to a Caller ID service of your phone
168 Talking Caller ID Handset / Base unit This feature lets you know who is calling without looking at the display. To use this feature, you must: – subscribe to a Caller ID service of your phone service provider. – turn this feature on. When caller information is received, the handsets and/or base ...
Page 169 - Phonebook name announcement; Caller list; Viewing the caller list and calling back
169 Phonebook name announcement When caller information is received and it matches a phone number stored in the phonebook, the stored name in the phonebook is announced. Caller list Important: • Make sure the unit’s date and time setting is correct. Viewing the caller list and calling back Using a...
Page 172 - Caller ID number auto edit feature; – When the call is being received, the Caller ID
172 Caller ID number auto edit feature Once you call back an edited number, the unit which was used to call back remembers the area code and format of the edited number. The next time someone calls from the same area code, caller information is customized by the unit as follows: – When the call is b...
Page 173 - Erasing selected caller information
173 Note: • Phone numbers from the 4 most recently edited area codes are automatically edited. Erasing selected caller information 1 [ ] CID 2 [ ] : Select the desired entry. 3 [ERASE] [ ] : “ Yes ” [SELECT] [OFF] Erasing all caller information 1 [ ] CID 2 [ERASE] [ ] : “ Yes ” [SELECT...
Page 174 - Using Bluetooth® Devices; • Your cellular phone must support Phone Book Access
174 Using Bluetooth® Devices Copying phonebook from a cellular phone (phonebook transfer) You can copy phonebook entries from the paired cellular phones or other cellular phones (not paired) to the unit’s phonebook. A cellular phone must be compatible with Bluetooth wireless technology. Important: •...
Page 178 - Link to Cell app; For AndroidTM users
178 1 [MENU] 2 To store “ International code ”: [#] [1] [1] [7] To store “ Country code ”: [#] [1] [1] [8] To store “ Trunk prefix ”: [#] [1] [1] [9] 3 Enter the desired number. [SAVE] [OFF] Note: • After you copy the entries, confirm that the numbers were transferred correctly. Link to Cell app...
Page 179 - information; Phone Settings
179 Application (App) Alerts On/Off This feature alerts your DECT phone when your paired Android phone receives the following alert information: – [Google Calendar]™ – [Email] – [Gmail]™ – [Text messages] – [Facebook] – [Twitter] – [Instagram] – [Low Battery] information You can turn each type of ...
Page 180 - *1 When your paired Android phone is within the base; Installing the Link to Cell app
180 – [International code] , [Country code] , and [Trunk prefix] *1 When your paired Android phone is within the base unit’s range, the date and time information is updated on the handset’s display, if time adjustment feature is activated on your Android phone. Installing the Link to Cell app Downlo...
Page 181 - Starting the app for the first time; Make sure that your Android device’s Bluetooth
181 Starting the app for the first time 1 Make sure that your Android device’s Bluetooth feature is turned on and that your Android device is paired to the base unit. 2 Start the Link to Cell app by tapping its icon. 3 Follow the on-screen instructions. Important: • For further information, refer to...
Page 183 - • Your cellular phone must support MAP (Message; iPhone and BlackBerry Phone:; Bluetooth must
183 Requirements • An Android device (Android 2.1 or later) Text message (SMS) alert For iPhone® and BlackBerry® users This feature alerts you on your DECT phone when your paired cellular phone receives SMS messages. The Link to Cell app is not required for iPhone and BlackBerry users. Important: • ...
Page 184 - • If this feature does not work, turn on your device’s; Alert settings for your DECT phone; Application alert
184 • If this feature does not work, turn on your device’s Bluetooth feature, unplug the base unit’s AC adaptor, and remove the batteries from the base unit. Then, reconnect AC adaptor and insert the batteries into the base unit. Alert settings for your DECT phone If your cellular phone is paired to...
Page 185 - ”: Voice announcement is not available as alert.
185 Turning alert on/off Once this feature is turned on, it will alert you on the handset when your cellular phone receives notifications. – “ On ” (default): The handset alerts you. – “ Off ”: The handset does not alert you. 1 For CELL 1: [MENU] [#] [6] [1] [0] [1] For CELL 2: [MENU] [#] [6] [1] [0...
Page 186 - Selecting the alert tone; • Your Bluetooth headset must support the Headset
186 2 [ ] : Select the desired setting. [SAVE] [OFF] Selecting the alert tone 1 For CELL 1: [MENU] [#] [6] [0] [4] [1] For CELL 2: [MENU] [#] [6] [0] [4] [2] 2 [ ] : Select the desired setting. [SAVE] [OFF] Using a Bluetooth headset (optional) By pairing a Bluetooth headset to the base unit,...
Page 188 - Connecting/disconnecting a Bluetooth headset
188 headset’s operating instructions. 4 Press [OK] , then wait until a long beep sounds. 5 [OFF] • When the Bluetooth headset is ready for use: – is displayed on the handset (H: Bluetooth headset), – the CELL 2/HEADSET indicator on the base unit lights up. Connecting/disconnecting a Bluetooth headse...
Page 190 - Answering landline calls with your headset
190 referring to your headset’s operating instructions. Note: • If you cannot hang up the call using your headset, press [ ] on the base unit 2 times. Answering landline calls with your headset To answer a landline call, press your headset’s button referring to your headset’s operating instructions....
Page 191 - While the handset is on a landline call:; To join the conversation with the handset, press
191 To switch to your headset: Turn on the headset referring to your headset’s operating instructions. To switch to the base unit: Press [ ] on the base unit. Call sharing between your headset and the handset Important: • To activate this feature, you should set call sharing mode to on beforehan...
Page 193 - Answering system for landline; Greeting only; ” as the recording time setting (page; Messages full; ” is shown on the handset display.
193 Answering system for landline Answering system for landline The answering system can answer and record calls for you when you are unavailable to answer the phone. You can also set the unit to play a greeting message but not to record caller messages by selecting “ Greeting only ” as the recordin...
Page 194 - Turning the answering system on/off
194 – The message counter and the ANSWER ON/OFF indicator ( ) on the base unit flashes if the answering system is turned on. – If you use the pre-recorded greeting message, the unit automatically switches to another pre-recorded greeting message asking callers to call again later. – If you recorded ...
Page 195 - Note for base unit and handset:; • When the answering system is turned on,; Greeting message; After a beep sounds, hold the handset about 20 cm
195 Note for base unit and handset: • When the answering system is turned on, – the ANSWER ON/OFF indicator ( ) on the base unit lights up. – the message counter on the base unit displays the total number of messages (old and new). Greeting message When the unit answers a call, a greeting message is...
Page 196 - Using a pre-recorded greeting message; The unit provides 2 pre-recorded greeting messages:; Resetting to a pre-recorded greeting message
196 Using a pre-recorded greeting message The unit provides 2 pre-recorded greeting messages: – If you reset to pre-recorded greeting or do not record your own greeting message, the unit plays a pre-recorded greeting asking callers to leave a message. – If the message recording time (page 77) is set...
Page 197 - Listening to messages; Using the base unit
197 Listening to messages Important: • When using the base unit or handset to listen to messages, the noise reduction feature (page 41) is activated automatically in spite of the setting ( is not displayed). Using the base unit When new messages have been recorded: – The new message/play indicator (...
Page 201 - Call back
201 *3 You can also erase as follows: [PAUSE] [ ] : “ Erase ” [SELECT] [ ] : “ Yes ” [SELECT] Calling back (Caller ID subscribers only) Using a landline: 1 Press [PAUSE] during playback. 2 [ ] : “ Call back ” [SELECT] Using a cellular line: 1 Press [PAUSE] during playback. 2 [ ] : “ Ca...
Page 203 - Advanced new message alerting features; ” setting is turned on. The default setting is
203 Erasing all messages 1 [MENU] [#] [3] [2] [5] 2 : “ Yes ” [SELECT] [OFF] Advanced new message alerting features Audible message alert This feature allows the base unit to beep to inform you of a new message arrival when new messages are recorded. The base unit beeps 2 times every minute unti...
Page 204 - Notification to
204 new message. To use this feature, you must: – store a phone number to which the unit makes the call to. – turn on the new message alert setting. After you answer the new message alert call, you can listen to messages from that call. This feature is only available for landline. Important: • A new...
Page 205 - OK; Turning on/off the new message alert setting
205 4 [ ] : Select the desired phonebook entry. [SAVE] [OFF] By entering a phone number: 1 [MENU] [#] [3] [3] [8] 2 [ ] : “ Notification to ” [SELECT] [ADD] 3 [ ] : “ Manual ” [SELECT] 4 Enter the desired name (16 characters max.). [OK] 5 Enter the desired number (24 digits max.). OK...
Page 206 - • The new message alert setting is turned off.
206 Editing the set phone number 1 [MENU] [#] [3] [3] [8] 2 [ ] : “ Notification to ” [SELECT] 3 [MENU] [ ] : “ Edit ” [SELECT] 4 Edit the name if necessary (16 characters max.). [OK] 5 Edit the phone number if necessary (24 digits max.). [OK] [SELECT] [OFF] Erasing the set phone numbe...
Page 207 - ”: You can listen to the message by; Activate; ”: You must enter your remote access
207 Activating/inactivating the remote access code to play messages If you activate this feature, you must enter the remote access code to play the new message from the new message alert call. This is so that unauthorized parties cannot listen to your messages. The default setting is “ Inactivate ”....
Page 208 - Remote operation
208 When the remote access code is set to “Inactivate”: Press [4] to play the new message during the announcement. When the remote access code is set to “Activate”: 1 Enter the remote access code during the announcement. 2 Press [4] to play the new message. Note: • Within 10 seconds after listen...
Page 212 - Turning on the answering system remotely; Answering system settings; Call screening
212 *3 For Spanish voice guidance only Turning on the answering system remotely 1 Dial your phone number from a touch-tone phone. 2 Let the phone ring 15 times. • A long beep is heard. 3 Enter your remote access code within 10 seconds after the long beep. • The greeting message is played back. • You...
Page 213 - ” before the unit answers calls. You can; Toll saver; The default setting is “; rings; ”: The unit’s answering system answers at
213 1 For handset: [MENU] [#] [3] [1] [0] For base unit (using a handset): [MENU] [#] [3] [1] [0] 2 [ ] : Select the desired setting. [SAVE] [OFF] Number of rings before the unit answers a call You can change the number of times the phone rings “ Ring count ” before the unit answers calls. You c...
Page 215 - Useful Information; Voicemail service for landline; Voicemail is an answering service
215 Useful Information Voicemail service for landline In addition to your unit’s answering system you may also have voicemail service from your phone service provider. Voicemail is an answering service that may be offered by your phone service provider. This service can also record calls when you ar...
Page 216 - • You need to store the voicemail access number in; Storing the voicemail (VM) access number; • When storing your voicemail access number and
216 call first. Important: • You need to store the voicemail access number in order to light the handset and base unit’s message indicator when a new voicemail is received. Storing the voicemail (VM) access number In order to listen to your voicemail messages, you must dial your phone service provid...
Page 217 - To erase the voicemail access number; Press and hold
217 Example: To erase the voicemail access number 1 [MENU] [#] [3] [3] [1] 2 Press and hold [CLEAR] until all digits are erased. [SAVE] [OFF] Voicemail (VM) tone detection Your phone service provider sends special signals (sometimes called “voicemail tones” or “stutter tones”) to the unit to let...
Page 220 - Wall mounting; • Make sure that the wall and the fixing method are
220 Wall mounting Note: • Make sure that the wall and the fixing method are strong enough to support the weight of the unit. 1 Lead the AC adaptor cord and telephone line cord through the hole in the wall mounting adaptor in the direction of the arrow.
Page 223 - Adjust the adaptor to hold the base unit, then push
223 4 Adjust the adaptor to hold the base unit, then push it in the direction of the arrow until it clicks into place.
Page 226 - To remove the wall mounting adaptor
226 To remove the wall mounting adaptor While pushing down the release levers (1), remove the adaptor (2).
Page 227 - Error messages; Display message; Busy
227 Error messages Display message Cause/solution Ask phone company for VM access # • You have not stored the voicemail access number. Store the number (page 217). Busy • No cellular phone is paired to the base unit. Pair a cellular phone (page 74). • The called unit is in use. • Other units are in ...
Page 228 - Failed
228 Display message Cause/solution the connections (page 28). • If you do not connect the telephone line cord and use only cellular lines, set the cellular line only mode (page 76). Error!! • Recording was too short. Try again. • Someone is using a cellular line or Bluetooth headset. Try again later...
Page 229 - Invalid
229 Display message Cause/solution line or headset. Try again later. – Make sure that the cellular phone or headset is not connected to other Bluetooth devices. Invalid • There is no handset registered to the base unit matching the handset number you entered. • The handset is not registered to the b...
Page 231 - Troubleshooting; General use
231 Troubleshooting If you still have difficulties after following the instructions in this section, disconnect the base unit’s AC adaptor, then reconnect the base unit’s AC adaptor. Remove the batteries from the handset, and then insert them into the handset again. If the base unit batteries for po...
Page 232 - Problem
232 Problem Cause/solution • Unplug the base unit’s AC adaptor to reset the unit. Reconnect the adaptor and try again. • The handset has not been registered to the base unit. Register the handset (page 164). I cannot pair a cellular phone to the base unit. • Depending on the compatibility of the cel...
Page 233 - and on your cellular phone.
233 Problem Cause/solution and on your cellular phone. • If your cellular phone is already connected to another Bluetooth device such as a Bluetooth headset, turn it off or disconnect it from your cellular phone. • Some cellular phones may require you to enter the Bluetooth PIN to pairing. Confirm t...
Page 235 - unit and
235 Problem Cause/solution cellular phone and on the other Panasonic DECT phone. I cannot hear a dial tone. • Make sure that the CELL indicator lights up on the base unit and is displayed on the handset (page 44, 39). • The base unit’s AC adaptor or telephone line cord is not connected. Check the co...
Page 239 - Clean the battery ends (
239 Menu list Problem Cause/solution The display is in a language I cannot read. • Change the display language (page 51). I cannot register a handset to a base unit. • The maximum number of handsets (6) is already registered to the base unit. Cancel unused handset registrations from the base unit (p...
Page 240 - Move closer to the base unit.
240 Problem Cause/solution or – the operating time seems to be shorter. Making/answering calls, intercom Problem Cause/solution is displayed. • The handset is too far from the base unit. Move closer. • The base unit’s AC adaptor is not properly connected. Reconnect AC adaptor to the base unit. • The...
Page 251 - Confirm that the
251 Problem Cause/solution An error tone is heard when I try to program the Bluetooth feature. • The Bluetooth feature cannot be accessed immediately after connecting the AC adaptor to the base unit. Wait a few seconds and try again. • The headset has not connected to the base unit yet, even though ...
Page 255 - Enter the new 4-digit PIN; Voicemail; ” is
255 Bluetooth PIN Problem Cause/solution I cannot remember the PIN. • Change the PIN using the following method. 1 [MENU] [#] [6] [1] [9] 2 [*] [7] [0] [0] [0] 3 Enter the new 4-digit PIN. [OK] 4 Enter the new 4-digit PIN again. [SAVE] [OFF] Voicemail Problem Cause/solution “ Voicemail msg. vi...
Page 256 - until; Liquid damage
256 Problem Cause/solution voicemail number provided by your phone service provider (for most cases, this will be your own phone number), and follow the voice instructions. Depending on your phone service provider, you may need to remove all messages from your voice mailbox to remove the notificatio...
Page 257 - • To avoid permanent damage, do not use a; FCC and other information
257 Problem Cause/solution unit are completely dry, reconnect the AC adaptor and telephone line cord. Insert the batteries and charge fully before use. If the unit does not work properly, contact an authorized service center. Caution: • To avoid permanent damage, do not use a microwave oven to speed...
Page 263 - FCC RF Exposure Warning:
263 FCC RF Exposure Warning: • This product complies with FCC radiation exposure limits set forth for an uncontrolled environment. • To comply with FCC RF exposure requirements, the base unit must be installed and operated 20 cm (8 inches) or more between the product and all person’s body. • This pr...
Page 265 - To deactivate the charge only mode:
265 2 Disconnect the telephone line cord, the AC adaptor plug, and remove the batteries from the base unit. 3 Press and hold [ ] , [ ] , and [ERASE] at the same time, then insert the AC adaptor plug to the base unit. Keep on pressing these keys until a beep tone sounds. 4 Release these keys. • The...
Page 266 - Appendix; Customer services; Customer Services Directory
266 Appendix Customer services Shop Accessories! for all your Panasonic gear Go to http://shop.panasonic.com/support Get everything you need to get the most out of your Panasonic products Accessories & Parts for your Camera, Phone, A/V products, TV, Computers & Networking, Personal Care, Hom...
Page 267 - Telephone
267 Limited Warranty (ONLY FOR U.S.A.) Panasonic Products Limited Warranty Limited Warranty Coverage (For USA Only) If your product does not work properly because of a defect in materials or workmanship, Panasonic Corporation of North America (referred to as “the warrantor”) will, for the length of ...
Page 268 - Online Repair Request
268 rechargeable batteries, antennas, and cosmetic parts (cabinet). This warranty only applies to products purchased and serviced in the United States. This warranty is extended only to the original purchaser of a new product which was not sold “as is”. Mail-In Service --Online Repair Request Online...
Page 269 - Limited Warranty Limits and Exclusions
269 Sales Receipt/Proof Of Purchase Indicating Date Of Purchase, Amount Paid And Place Of Purchase. Customer Will Be Charged For The Repair Of Any Unit Received Without Such Proof Of Purchase. Limited Warranty Limits and Exclusions This warranty ONLY COVERS failures due to defects in materials or wo...
Page 271 - 61 Independence Pkwy
271 Consumer Affairs Department Panasonic Corporation of North America 661 Independence Pkwy Chesapeake, VA 23320 Parts And Service, Which Are Not Covered By This Limited Warranty, Are Your Responsibility. As of June 2015
Page 272 - Index; with your headset, 190; Auto talk; Available volume; Block unknown CID
272 Index Index 3 3-way conference , 102 A Accessibility, 54 Alarm, 4, 47, 65, 143, 152, 157, 158 Alert settings, 140 Alert settings for your DECT phone, 184 ANSWER ON/OFF , 44 Answering, 106 Answering calls, 3, 91 Answering landline calls with your headset, 190 Answering system settings, 212 Auto b...
Page 273 - Connecting/disconnecting; Custom tone; Greeting message, 195
273 Caller ID number, 172 Caller’s recording time, 214 Calling back, 201 Cellular line, 80 Chain dial, 128 Charge only mode, 264 Charging , 30 Connecting/disconnecting , 79 Connections, 28 Control type, 41 Controls, 39 Custom tone , 55 D Date and time, 52 Dialing mode, 53 Display language, 51 E eco ...
Page 274 - Handset battery; Operating the answering
274 H Handset , 10, 39 Handset battery charging, 29 Handset battery installation, 32 Handset noise reduction, 100 I Indicators, 44 Intercom , 3, 102, 108, 109, 138, 144, 145 K Key detector, 9 L landline calls, 90 Language, 51 LCD contrast, 151 line mode, 154 Link to Cell, 3, 4, 64, 71, 178, 179, 180...
Page 275 - Setting the headset type,; Soft keys
275 Other information, 25 Other settings, 53 P Pairing, 72 Pairing a Bluetooth, 187 Pause, 91 performance, 23 Phonebook, 119, 123 Power backup, 34, 48 Power connection, 16 Power source , 27 Programming, 134 R Recording time, 137 redial list, 90 Registering a unit, 164 Registration, 149 Remote access...
Page 276 - Temporary handset; Unpairing a Bluetooth,
276 Temporary handset , 92 Tone control, 3, 40, 43, 46, 54, 55 tone detection, 217 Turning on/off, 205 U Unpairing a Bluetooth, 189 Unpairing a cellular phone, 74 V Voice guidance, 210 Voicemail, 215 Volume booster, 57 W Wall mounting, 220
Page 277 - troubleshooting; page in the; Operating
277 IMPORTANT! If your product is not working properly... 1 Disconnect AC adaptor and remove batteries from base unit. 2 Reconnect AC adaptor and reinsert batteries into base unit. 3 Check if telephone line cord is connected. 4 Use rechargeable Ni-MH batteries. (Alkaline/Manganese/Ni-Cd batteries CA...
Page 278 - For your future reference; Attach your purchase receipt here.
278 For your future reference We recommend keeping a record of the following information to assist with any repair under warranty. Serial No. Date of purchase (found on the bottom of the base unit) Name and address of dealer Attach your purchase receipt here. Panasonic Corporation of North America T...


 Panasonic KX-DT321
Manual
Panasonic KX-DT321
Manual
 Panasonic KX-NT343RU / KX-NT346RU
User Manual
Panasonic KX-NT343RU / KX-NT346RU
User Manual
 Panasonic KX-NT366RU
User Manual
Panasonic KX-NT366RU
User Manual
 Panasonic KX-NT400
User Manual
Panasonic KX-NT400
User Manual
 Panasonic KX-NT700
User Manual
Panasonic KX-NT700
User Manual
 Panasonic KX-PRX120RU
User Manual
Panasonic KX-PRX120RU
User Manual
 Panasonic KX-PRX150RU
User Manual
Panasonic KX-PRX150RU
User Manual
 Panasonic KX-T7735
Manual
Panasonic KX-T7735
Manual
 Panasonic KX-TCD156RUB
User Manual
Panasonic KX-TCD156RUB
User Manual
 Panasonic KX-TCD215RU / KX-TCD225RU
User Manual
Panasonic KX-TCD215RU / KX-TCD225RU
User Manual
 Panasonic KX-TCD235RU / KX-TCD245RU
User Manual
Panasonic KX-TCD235RU / KX-TCD245RU
User Manual
 Panasonic KX-TCD286RU / KX-TCD296RU
User Manual
Panasonic KX-TCD286RU / KX-TCD296RU
User Manual
 Panasonic KX-TCD325RU
User Manual
Panasonic KX-TCD325RU
User Manual
 Panasonic KX-TCD345RUS
User Manual
Panasonic KX-TCD345RUS
User Manual
 Panasonic KX-TCD420
User Manual
Panasonic KX-TCD420
User Manual
 Panasonic KX-TCD460RUS
User Manual
Panasonic KX-TCD460RUS
User Manual
 Panasonic KX-TCD465RU
User Manual
Panasonic KX-TCD465RU
User Manual
 Panasonic KX-TCD556RUV
User Manual
Panasonic KX-TCD556RUV
User Manual
 Panasonic KX-TCD566RUS
User Manual
Panasonic KX-TCD566RUS
User Manual