Panasonic FV 0511VF1 - Manuals
Panasonic FV 0511VF1 – User Manual, Manual, Installation Manual in PDF format online.
Manuals:
User Manual Panasonic FV 0511VF1


Summary
1 . S p e c i f i c a t i o n 1 Specification for base Model fans HVI Certified performance based on HVI Procedures 915, 916, and 920.
2 . P a r t s I d e n t i f i c a t i o n M a i n B o d y S e c t i o n F V- 0 5 11 V F 1 C ( 5 p c s ) A ( 3 p c s ) 2 1 2 A A ( 2 p c s ) A B 3 4 5 7 8 9 1 0 C ( 2 p c s ) 11 1 2 1 3 6
2 . P a r t s I d e n t i fi c a t i o n 3 M a i n P C B S e c t i o n F V- 0 5 11 V F 1 1 4 1 5 D ( 2 p c s ) 1 6 1 7 M a i n L a b e l Secure screwtightly forground continuity Vissez fermementpour la continuitéde la mise à la terre 1 8 1 9 2 0 2 1
Manual Panasonic FV 0511VF1



Summary
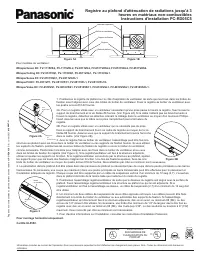
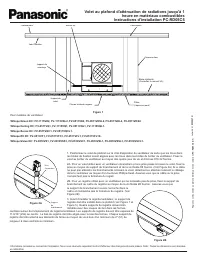
1. Position the ceiling radiation damper on the inlet side of the fan such that the holes in the damper mounting flanges line up with the holes in the flange of the fan housing. Secure the damper to the fan housing using four #10-32 screws and nuts supplied. 2A. For a damper used with a fan requirin...
Up to 1 hour combustible assemblies ceiling radiation damper PC-RD05C5 installation instructions C om bu st ib le C ei lin g R ad ia tio n D am pe rs P C -R D 05 C 5 (3 /9 ) M -5 44 47 -H Information is correct at time of printing. However, we reserve the right to make changes without notice. Note: ...
1. Coloca la compuerta de radiación en la parte interior del aspa de manera que los huecos del borde de montaje de la compuerta encajen con los huecos en el borde de la caja del aspa. Asegura la compuerta a la caja del aspa utilizando 4 tornillos/tuercas #10-32 suministrados.2A. Para una compuerta u...
Installation Manual Panasonic FV 0511VF1


Summary
To reduce the risk of injury, loss of life, electric shock, fire, malfunction, and damage to equipment or property, always observe the following safety precautions. Denotes a potential hazard that could result in seriousinjury or death. Denotes a hazard that could result in minor injury. The followi...
WARNING GENERAL SAFETY INFORMATION CONTINUED CAUTION Make sure that the electric service supply voltage is AC 120 V, 60 Hz. Do not disassemble the unit for reconstruction. It may cause fire or electric shock. The ceiling joist must be able to withstand a static load of at least five times the weight...
Grille Self-drilling screw Installation instructions Warranty sheet Machine screw (M4X8) Quick Start Guide 3 inch duct reducer (optional part) Part name Appearance Quantity Part name Appearance Quantity TM Flex-Z Fast bracket (with 4 tapping screws -ST4.2X20) DESCRIPTION These products are listed by...
Panasonic Manuals
-
 Panasonic RB F10
User Manual
Panasonic RB F10
User Manual
-
 Panasonic SC HTB200
User Manual
Panasonic SC HTB200
User Manual
-
 Panasonic CS Z25UFRAW CU Z25UBRA
Manual
Panasonic CS Z25UFRAW CU Z25UBRA
Manual
-
Panasonic CS Z25UFRAW CU Z25UBRA
Installation Manual
-
 Panasonic CS Z50UFRAW CU Z50UBRA
User Manual
Panasonic CS Z50UFRAW CU Z50UBRA
User Manual
-
 Panasonic DMW BLK22
User Manual
Panasonic DMW BLK22
User Manual
-
Panasonic DMW BLK22
Manual
-
 Panasonic NI WL55
Manual
Panasonic NI WL55
Manual
-
 Panasonic DMP BD903
Manual
Panasonic DMP BD903
Manual
-
Panasonic DMP BD903
User Manual
-
Panasonic DMP BD903
Installation Manual
-
 Panasonic NN ST23QM
Manual
Panasonic NN ST23QM
Manual
-
 Panasonic FV-1115VK3
User Manual
Panasonic FV-1115VK3
User Manual
-
 Panasonic EH NA0J
Manual
Panasonic EH NA0J
Manual
-
 Panasonic FV 30BG3
Manual
Panasonic FV 30BG3
Manual
-
 Panasonic RE7 59
User Manual
Panasonic RE7 59
User Manual
-
 Panasonic NE C1275
Manual
Panasonic NE C1275
Manual
-
 Panasonic RG T810LHA
User Manual
Panasonic RG T810LHA
User Manual
-
 Panasonic CF SR
User Manual
Panasonic CF SR
User Manual
-
 Panasonic RZ B110W
User Manual
Panasonic RZ B110W
User Manual