Panasonic CSCU-Z80TKR - Manuals
User Manual Panasonic CSCU-Z80TKR


Summary
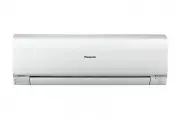
2 Provides maximum comfort and clean air with optimal energy saving methods. Use remote control within 8 m from the remote control receiver of the indoor unit. Quick Guide Inserting the batteries 1 2 3 1 Pull out the back cover of remote control. 2 Insert AAA or R03 batteries. 3 Close the cover. A C...
3 Table of contents Safety precautions ………… 4-7 How to use ……………………… 8-9 To learn more …………… 10-11 Cleaning instructions ……… 12 Troubleshooting ………… 13-15 Information……… Back cover Accessories • Remote control• AAA or R03 batteries × 2• Remote control holder• Screws for remote control holder × 2 The...
4 Safety precautions To prevent personal injury, injury to others or property damage, please comply with the following: Incorrect operation due to failure to follow instructions below may cause harm or damage, the seriousness of which is classi fi ed as below: This appliance is not intended for acce...
Panasonic Air Conditioners Manuals
-
 Panasonic CS/CU-Z9RKR
User Manual
Panasonic CS/CU-Z9RKR
User Manual
-
 Panasonic CSCUE12PKR
User Manual
Panasonic CSCUE12PKR
User Manual
-
 Panasonic CSCUE15PKR
User Manual
Panasonic CSCUE15PKR
User Manual
-
 Panasonic CSCUE18PKR
User Manual
Panasonic CSCUE18PKR
User Manual
-
 Panasonic CSCUE21PKR
User Manual
Panasonic CSCUE21PKR
User Manual
-
 Panasonic CSCUE28PKR
User Manual
Panasonic CSCUE28PKR
User Manual
-
 Panasonic CSCUE9PKR
User Manual
Panasonic CSCUE9PKR
User Manual
-
 Panasonic CSCUS12PKR
User Manual
Panasonic CSCUS12PKR
User Manual
-
 Panasonic CSCU-Z12RKR
User Manual
Panasonic CSCU-Z12RKR
User Manual
-
 Panasonic CSCU-Z15RKR
User Manual
Panasonic CSCU-Z15RKR
User Manual
-
 Panasonic CSCU-Z18RKR
User Manual
Panasonic CSCU-Z18RKR
User Manual
-
 Panasonic CSCU-Z21RKR
User Manual
Panasonic CSCU-Z21RKR
User Manual
-
 Panasonic CSCU-Z24RKR
User Manual
Panasonic CSCU-Z24RKR
User Manual
-
 Panasonic CSCU-Z25TKR
User Manual
Panasonic CSCU-Z25TKR
User Manual
-
 Panasonic CS-CU-Z25VKR
User Manual
Panasonic CS-CU-Z25VKR
User Manual
-
 Panasonic CS-CU-Z25XKR
User Manual
Panasonic CS-CU-Z25XKR
User Manual
-
 Panasonic CSCU-Z28RKR
User Manual
Panasonic CSCU-Z28RKR
User Manual
-
 Panasonic CSCU-Z35TKR
User Manual
Panasonic CSCU-Z35TKR
User Manual
-
 Panasonic CS-CU-Z35VKR
User Manual
Panasonic CS-CU-Z35VKR
User Manual
-
 Panasonic CS-CU-Z35XKR
User Manual
Panasonic CS-CU-Z35XKR
User Manual