Page 2 - Trademarks and registered trademarks; Description of This Manual; Preface
2 EN • This manual is subject to change without notice. For the latest information such as the product name and model number, contact our customer support center. • The illustrations of LCD screens and the recorder in this manual may differ from the actual product. Although every effort has been mad...
Page 3 - I N D E X
3 EN Preface P.2 Overview of Recorder P.11 Startup P.21 Recorder Mode P.32 Multi-Track Mode P.53 About the Tuner, the Lissajous, and the Metronome P.66 Menus P.72 About the PC P.117 For Quick Reference P.123 1 2 3 4 5 6 7 8 I N D E X ▌
Page 4 - Table of Contents
4 EN Preface Description of This Manual ••••••••••••••••• 2 Safety precautions ••••••••••••••••••••••••••• 6 Checking Accessories•••••••••••••••••••••• 10 Chapter 1Overview of Recorder Main Features ••••••••••••••••••••••••••••••• 12 Name of Each Part •••••••••••••••••••••••••• 13 Connecting with Ex...
Page 6 - Important safety instructions; Danger; Instructions for use; Safety precautions
6 EN Before using your new recorder, read this manual carefully to ensure that you know how to operate the recorder safely and correctly. Be sure to keep this manual on hand so that you can refer to it at any time. Important safety instructions ▌ • Important safety instructions are indicated by symb...
Page 7 - Recorder; Warning; Caution
7 EN Recorder ▌ f Warning Do not use the product where there may be flammable or explosive gas in the air. Doing so could cause an ignition or explosion. Do not use or store the product for a long time where there is a lot of dust, humidity, oil, smoke, or steam. Doing so could cause a fire or elect...
Page 8 - AC adapter; Battery
8 EN Safety precautions If you notice an abnormality such as abnormal sound, abnormally high tem-perature, burnt odor or smoke during use, perform the following steps: 1 Immediately remove the battery carefully. 2 C o n t a c t y o u r d e a l e r o r t h e O l y m p u s Service Station for service....
Page 9 - Disposal of rechargeable battery
9 EN Li-ion 00 Safety precautions Do not short-circuit the positive and the negative terminals of the plug. Doing so could cause a fire, burn or electric shock. If the interior is exposed due to being dropped or damaged, perform the following steps: 1 Do not touch the exposed interior. Doing so coul...
Page 10 - Checking Accessories; How to attach the strap
10 EN The accessories shown below come with the purchased product. Contact your dealer if any accessory is missing or damaged. Recorder Manual Checking Accessories Strap USB cable USB conversion connector Lithium ion battery (LI-50B) How to attach the strap ▌ USB AC adapter (A514) The AC plug is inc...
Page 11 - Chapter 1; Overview of Recorder
Page 12 - Main Features
12 EN 1 M a in Feat u re s High performance directional stereo microphone and quality amplifier circuit ▌ The newly designed stereo condenser microphone enables you to record live quality sound. Our devotion to circuit design has realized separation of audio and system boards and independent power s...
Page 13 - Name of Each Part
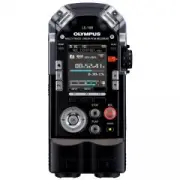
13 EN 1 Nam e o f E a ch Par t Name of Each Part Built-in stereo microphone (L/R) PEAK display lamp (L/R) Display (LCD panel) m button (Home) n button (List) MENU button (Menu) Fn buttons ( F1 / F2 / F3 ) + button 0 button OK button (Confirm) − button 9 button REC LEVEL dial These two dials can be u...
Page 15 - Connecting with External Devices
15 EN 1 C o nne c ting with E x te rn al D e v ic e s Connecting with External Devices Connect commercially available external devices suitable for your situation. Mixer Stereo Headphone ø3.5 mm ø3.5 mm ø3.5 mm Microphone ø6.3 mm Microphone Instrument XLR connector PC Remote control To USB terminal ...
Page 16 - Band practice; See page; Recorder Mode
16 EN 1 Let's us e LS -1 0 0 ! Let's use LS-100! See page 39 for details. Band practice Solo practice Concert See page 32 for details. Record your singing while listening to a recording of instruments. Dub over the previous recording to create a new file. Recorder Mode ▌ Overdubbing ▌
Page 18 - Recording Tips for Each Instrument; Recorder position examples; Voice
18 EN 1 R e co rdin g Tips fo r Ea ch Ins tr u m e n t Recording Tips for Each Instrument Recorder position examples ▌ Voice Position the recorder slightly away from the singer's face. If breathing noises are audible, adjust the filter settings. Piano When recording the sound of a grand piano, posit...
Page 19 - Acoustic guitar
19 EN 1 R e co rdin g Tips fo r Ea ch Ins tr u m e n t Recording Tips for Each Instrument Acoustic guitar Position the recorder pointing to a place slightly away from the sound hole of the guitar.For a rhythm guitar, keep a certain distance from the main body of the guitar. For solo or melody-focuse...
Page 20 - ON; XLR/standard phone combo jack
20 EN 1 C o nne c ti o n o f the XLR /S tandard P h o n e Co mb o Ja ck an d Ph anto m P o wer Sup p ly Connecting the instruments ▌ Connect a monaural instrument to the XLR/standard phone combo jack (L). The guitar, bass guitar, keyboard and other instruments can be directly connected to the XLR/st...
Page 21 - Chapter 2; Startup
Page 22 - Power Supply; Recharging the battery; Connecting the recorder to the; Inserting the battery; Slide the lock switch to [; OPEN; open the battery cover.; LOCK
22 EN 2 Pow e r S u p p ly Power Supply 2 Connect the AC cable to the AC adapter and the AC adapter to the household power supply outlet. Recharging the battery Connecting the recorder to the ▌ USB AC adapter for recharge Inserting the battery Use one Olympus lithium ion battery (LI-50B).Other batte...
Page 23 - Battery indicator; Battery low
23 EN 2 Pow e r S u p p ly Power Supply ▌ Connecting the recorder to a PC with the USB cable for recharge Notes • When the unit's [ USB Class ] is set to [ Composite ] with the [ USB setting ], charging will not start ( ☞ P. 110). • Stop or turn off the recorder before connecting the USB cable. 1 St...
Page 24 - Recharging; Operating temperature:
24 EN 2 Pow e r S u p p ly Notes • Always use the dedicated USB cable that is provided. Do not use a cable from another manufacturer. Doing so could cause a failure.In addition, do not connect the dedicated cable to another manufacturer’s product. • Carefully insert the battery facing the right dire...
Page 25 - How to Use the POWER/HOLD Switch; Turning the power on; Sleep mode; Turning the power off
25 EN 2 H o w to U se th e PO W E R /H O LD S w itch How to Use the POWER/HOLD Switch Turning the power on Slide the POWER/HOLD switch in the direction of the arrow. • The home screen appears. Sleep mode If the recorder remains stopped for 10 minutes or more (initial setting), the display turns off ...
Page 26 - Activating the hold mode; HOLD; Clearing the hold mode
26 EN 2 H o w to U se th e PO W E R /H O LD S w itch How to Use the POWER/HOLD Switch Activating the hold mode In the hold mode, the recorder remains active but does not accept button operations. This allows you to safely carry the recorder because the recorder does not operate even if a button is a...
Page 27 - Initial Settings before Using the Recorder; Select the current date or time by pressing the; button to complete setting.; OK; Select the setting item by pressing the
27 EN 2 Initial Settings before Using the Recorder When the recorder is turned on in the following cases, [Set time & date] is displayed.Set the clock according to the procedure below, beginning with step 1. • When using the recorder for the first time. • When inserting the battery after not usi...
Page 28 - How to set the voice guide; Turn
28 EN 2 Initial S e tt in gs b e fo re U sin g th e Re co rd er A • When you set “Hour” or “Minute”, the time display format switches between the 12-hour format and the 24-hour format every time the F2 button is pressed. Example: 10:38 p.m. 10:38 p.m. (initial value) 22:38 • When you set “Year”, “Mo...
Page 29 - Inserting and Removing the SD Card; Close the SD card cover.; Inserting the SD card; Press the; button to complete
29 EN 2 Inse rt in g an d Re m o v in g the SD C a rd Inserting and Removing the SD Card 2 Insert the SD card. 3 Close the SD card cover. • After closing the SD card cover, slide the lock switch to [ LOCK ]. • When the SD card is inserted, the recording media switching screen appears. Inserting the ...
Page 30 - Removing the SD card; SD card locked; SD card
30 EN 2 Inse rt in g an d Re m o v in g the SD C a rd Inserting and Removing the SD Card Removing the SD card Press the SD card all the way into the recorder and slowly pull it out. • If [ SD card ] is selected in [ Memory Select ], the [ Internal memory selected ] message is displayed. Notes • When...
Page 31 - Operations on the Home Screen; Select a mode
31 EN 2 Operations on the Home Screen When the recorder is turned on, the home screen appears.This recorder has the following five modes. Each mode can be accessed from the home screen. For each mode, refer to the relevant page. [ Recorder ] ☞ P.33 Normal, overdubbing , synchronization and voice syn...
Page 32 - Chapter 3; Recorder Mode
Page 33 - What You Can Do in the Recorder Mode; Normal; Overdub
33 EN 3 W h at Y o u Ca n D o in th e Re co rd er M o d e What You Can Do in the Recorder Mode Recorder Mode This recorder has four recording modes: [ Normal ], [ Overdub ], [ Play Sync ], and [ V-Sync. Rec ].You can select the appropriate mode for a wide range of recordings, such as recording of mu...
Page 34 - Folders; Folder A; Files and Folders; Selecting folders and files
34 EN 3 Fil e s an d Fo ld er s Folders ▌ In the recorder mode, the recording folders [ Folder A ] through [ Folder E ] are available. * Any files or folders directly under the [ Recorder ] folder will not be displayed on this recorder. Folder E Recorder MTR Folder A Folder B Folder C Folder D 001 0...
Page 35 - File Screen
35 EN 3 Fil e s an d Fo ld er s V 1 User ID: This is the user ID of this device. 2 Recording date: The date of recording is represented by 6 digits. Ex: "120201" represents February 1st of 2012. 3 File number: A serial number automatically assigned by a Digital Voice Recorder. 4 Extension: F...
Page 36 - Adjusting the recording level properly; Before Recording; Mic Gain; REC; button to enter the; Adjust the recording level with the; REC LEVEL; REC LEVEL
36 EN 3 Befo re Rec o rd in g Adjusting the recording level properly ▌ Recorded sound will be distorted if the recording level meter swings all the way to the right, or the PEAK indicator lights in orange. Adjust the recording level so that the recording level meter does not exceed [ -6dB ]. A • The...
Page 37 - Recording
37 EN 3 Reco rd in g Before starting to record, select a folder from [ Folder A ] through [ Folder E ]. We recommend that you selectively use the folders to organize your recordings based on their contents. Recording Normal Recording [Normal] 1 Select a folder for recording. 2 Press the REC button t...
Page 38 - Pausing the recording; button during recording.; Listening to the sound being; Connect headphones to the; EAR; jack of; VOLUME; Rec Monitor; Dividing a file while recording
38 EN 3 Reco rd in g Recording Pausing the recording ▌ Press the REC button during recording. • [ ≠ ] will appear on the display. • The recording standby mode will be released after two hours, and the recorder will enter the stop mode. • To resume recording, press the REC button again. Listening to ...
Page 39 - Usage Example; Playback
39 EN 3 Reco rd in g Recording Overdubbing [Overdub] In this mode, you can easily dub over a previously recorded file. This is handy when you create music or practice musical instruments, since it allows you to dub a new track over a file that is being played back. Usage Example ▌ You can dub a new ...
Page 40 - erdub
40 EN 3 Reco rd in g Recording 1 Set the [ Rec Mode ] to [ Ov erdub ] ( ☞ P. 80). 2 Connect headphones to the EAR jack of the recorder. 6 Adjust the recording level. • Adjust the recording level to balance it with the playback file. 7 Press the REC button to start recording. • Playback will start fr...
Page 42 - Rec Mode
42 EN 3 Reco rd in g Recording 1 Set the [ Rec Mode ] to [ Play Sync ] ( ☞ P. 80) . 2 Connect headphones to the EAR jack of the recorder. a Level of the input sound to be recorded b Level of the output sound that is being played back c Recording level meter 8 Press the STOP button to stop recording....
Page 44 - Important Notes on Recording; Recording using the metronome; REC Mode; Setting
44 EN 3 Reco rd in g Recording Important Notes on Recording ▌ • When you have an SD card inserted in the recorder, make sure to check if your memory selection is set to [ Internal memory ] or [ SD card ] ( ☞ P. 108). • To prevent losing the beginning of your record- ing, make sure the recording indi...
Page 45 - Searching for files; Home; SEARCH; Select the recording date with the; Select the file with the
45 EN 3 S e ar chin g fo r f ile s Searching for files You can search for recording files by date. Using the recording date to narrow down your search, you can quickly find the file you are looking for. 1 [ Home ] { [ Recorder ] 2 Press the OK button. • Enter the folder list screen. 3 Press the F1 (...
Page 46 - PLAY; button to start; STOP; button to stop; Changing the playback speed; Change the playback speed with the
46 EN 3 Pl ayb a ck Playback a b c d e Playback This recorder can play files it has recorded as well as WAV and MP3 format files transferred from other machines. 1 Select the file to play back( ☞ P. 34, P. 45). 2 Press the PLAY button to start playback. • [ • ] will appear on the display. a File nam...
Page 47 - Rewinding; Skipping to the beginning of a file
47 EN 3 Pl ayb a ck Playback Fast-forwarding ▌ Press and hold the 9 button when the recorder is stopped. • Fast-forwarding stops once you release the 9 button. Press the PLAY button to start playback from where it was stopped. Press and hold the 9 button when a file is being played back. • Playback ...
Page 48 - Placing an index mark; ERASE; button while the; Erasing an index mark
48 EN 3 Pl ayb a ck Placing an index mark An index mark will help you quickly locate a desired playback position when you fast-forward, rewind, or cue a file. A • Be sure to assign the [ INDEX ] function to the Fn button in advance ( ☞ P.107). 1 At the position you wish to place an index mark, press...
Page 49 - Segment repeat playback; Releasing the segment repeat
49 EN 3 Pl ayb a ck Playback Segment repeat playback This feature allows you to play back a part of a file in repeat. A • Be sure to assign the [ A-B ] function to the Fn button in advance ( ☞ P. 107). 1 Select the file that has the segment you wish to play back in repeat, and start playback ( ☞ P. ...
Page 50 - Erasing; Erasing a File; Select a file to erase (; with the; Erased
50 EN 3 Er asin g Erasing Erasing a File You can erase a file from its folder. You can also erase all files in a selected folder. 1 Select a file to erase ( ☞ P. 34, P. 45). 2 While the recorder is stopped, press the ERASE button. 3 Select [ All in folder ] or [ One file ] with the + / − button. 4 P...
Page 51 - Partially erasing a file; button again at
51 EN 3 Er asin g Partially erasing a file You can erase an unwanted part of a PCM format file recorded with this recorder. 1 Play the file you wish to partially erase. • Locate the beginning of the part you wish to erase. If the file is long, you can use the 9 button to locate the beginning of the ...
Page 52 - Important Notes on Erasing
52 EN 3 Er asin g Important Notes on Erasing ▌ • Once erased, files cannot be recovered. Check carefully before erasing files. • When you have an SD card inserted in the recorder, make sure to check if your memory selection is set to [ Internal memory ] or [ SD card ] ( ☞ P. 108). • Locked or read-o...
Page 53 - Chapter 4
Page 54 - What You Can Do in the Multi-Track Mode; Project; Bounce
54 EN 4 W h at Y o u Ca n D o in th e Mul ti- Tr a ck Mo d e What You Can Do in the Multi-Track Mode Multi-Track Mode The Multi-Track Mode allows you to separately record and play back different parts/sound sources (guitar, bass, drums, keyboard, vocal, etc.). You can manage up to 8 tracks under 1 p...
Page 55 - PRJ; Selecting a project and track
55 EN 4 Fil e s an d Fo ld er s Folders ▌ In the Multi-Track Mode, there are folders for managing [ PRJ ] (Project). Files are managed by the project, and each project has a number assigned. Selecting a project and track ▌ Home screen Project screen h ••• { } ••• m Multi-Track screen h ••• { } ••• n...
Page 56 - File list screen under a project
56 EN 4 Fil e s an d Fo ld er s Icon display Project number Recorder status indicator Input/outputlevel meter Function guide Elapsed recording/playback time Memory status bar/Playback position bar Output balance Key shift Track number Mute Level meter Multi-Track screen ▌ Files and Folders Output sc...
Page 57 - Select a track; Multitrack; Creating a Multi-Track Project; Adjust the recording level
57 EN 4 Creatin g a Mul ti- Tr a ck Proj e c t 3 Select a track 2 Create a project 5 Start recording 1 Select [ Multitrack ] Creating a Multi-Track Project Continued on next page 4 Adjust the recording level
Page 58 - Stop recording; Bounce the tracks
58 EN 4 Creatin g a Mul ti- Tr a ck Proj e c t 6 Stop recording 7 Check the track (playback) 8 Adjust the track 9 Add tracks Repeat steps 3 to 6 to add more sound sources to empty tracks. Creating a Multi-Track Project 10 Bounce the tracks See pages 59 to 63 for details.
Page 59 - Create a project; Use the; NEW PROJECT; TRKREC
59 EN 4 Creatin g a Mul ti- Tr a ck Proj e c t 1 Select [Multitrack] 1TRKREC 1 Select [ Multitrack ], and press the OK button. 2 Create a project In the Multi-Track Mode, recorded files (tracks) are saved under a project. 1 Use the + / - / 9 / 0 button to select [ NEW PROJECT ], and press the OK but...
Page 60 - Start recording
60 EN 4 Creatin g a Mul ti- Tr a ck Proj e c t abc Adjust the recording level 1 Press the REC button to enter the recording standby mode. 2 Adjust the REC LEVEL dial according to the sound source ( ☞ P. 36). Start recording 1 Press the REC button. • [ K ] appears on the display, and recording starts...
Page 61 - Solo; Adjust the track
61 EN 4 Creatin g a Mul ti- Tr a ck Proj e c t Creating a Multi-Track Project Check the track (playback) 7 1 Press the PLAY button. • The multiple tracks you have recorded under the project will be played back together. • You can change the pitch by pressing the p / q button while a track is selecte...
Page 62 - Add tracks
62 EN 4 Creatin g a Mul ti- Tr a ck Proj e c t Creating a Multi-Track Project 4 Output balance: Press 9 twice. You can adjust the volume for each track. Adjust the volume with the + / − button. 4 Left/right balance: Press 9 three times. You can adjust the panning of left and right audio for each tra...
Page 63 - button to stop recording; Press the preassigned; Done
63 EN 4 Creatin g a Mul ti- Tr a ck Proj e c t 5 Press the STOP button to stop recording and playback. 9 Repeat steps 3 to 6 to add more sound sources to empty tracks. 10 Bounce the tracks This recorder allows you to save up to 8 tracks under 1 project. Once you run out of empty tracks, create bounc...
Page 64 - Erasing a project; Select a project to erase.; Start; Erase a track
64 EN 4 Er asin g a Mul ti- Tr a ck Proj e c t/ Tr a ck Erasing a Multi-Track Project/Track Erasing a project Erase unnecessary projects. 1 Select a project to erase. 2 Press the ERASE button. • The erase confirmation screen appears. 3 Press the + button to select [ Start ]. 4 Press the OK button. •...
Page 65 - Select the track to erase with the
65 EN 4 Er asin g a Mul ti- Tr a ck Proj e c t/ Tr a ck 6 Press the OK button. • The display switches to [ Erasing! ], and erasing starts. [ Erased ] appears when the file is erased. Erasing a Multi-Track Project/Track Important Notes on Erasing ▌ • Once erased, projects or tracks cannot be recovere...
Page 66 - Chapter 5; About the Tuner, the
66 EN Chapter 5 About the Tuner, the Lissajous, and the Metronome
Page 67 - Using the tuner; Calibration; Tune the musical instrument by
67 EN 5 U sin g th e tu n e r Using the tuner This recorder is equipped with a tuner function which consists of the following four items: calibration, chromatic, guitar, and bass. This function enables you to perform accurate tuning according to the type of musical instrument you have selected. 1 [ ...
Page 68 - Guitar; A guitar chords chart; String number/Note name; A bass chords chart
68 EN 5 U sin g th e tu n e r 2 Adjust while looking at the tuning meter and the indicator. • Tune accurately with the needle pointing to the center of the meter. • Any electronic musical instrument should be directly connected without any additional equipment (such as an effector). Setting up the [...
Page 69 - About the Lissajous measurement; What is a phase difference?; Input Select
69 EN 5 A b o u t th e Liss aj o u s m e asurem ent About the Lissajous measurement In facilities for sound recording (such as broadcasting studios), the distance between a microphone and a sound source is automatically measured from the phase difference. The Lissajous waveform helps you obtain the ...
Page 70 - The current measurement value appears.
70 EN 5 A b o u t th e Liss aj o u s m e asurem ent 3 The current measurement value appears. • When there is no phase difference (0 degrees), it means that sound is being equally fed into the left/right channels of the microphone. If phase difference arises, the line becomes wider. At a phase differ...
Page 71 - button to start the; Using the metronome
71 EN 5 U sin g th e m e tro n o m e 1 [ Home ] { [ Metronome ] 2 Press the + / − button to adjust the tempo. 3 Press the PLAY button to start the metronome. A • Use the VOLUME dial to adjust the volume of the metronome. • Select the [ Metoronome Menu ] from the [ MENU ] to make additional settings ...
Page 72 - Chapter 6; Menus
Page 73 - How to set the menus
73 EN 6 H o w to s e t th e m e nus Items in the menus are classified by the tabs. Therefore, when shifting between items, you can quickly set the target item by selecting the tab to which it belongs. Take the following steps to set each item in the menu. How to set the menus 1 Press the MENU button...
Page 75 - in the choices field indicates the default setting.; List of menus; Menu settings for recording
75 EN 6 L is t o f me nus A in the choices field indicates the default setting. List of menus * In the Multi-Track Mode, [ Rec Mode ] and [ Pre-Recording ] do not function. ▌ Recording Menu [Rec Menu]: Menu settings for recording Set items Choices Operation mode : Setting OK × : Setting NG Stopped P...
Page 76 - Play Menu; Menu settings for playback; Menu settings that relate to files
76 EN 6 L is t o f me nus * In the Multi-Track Mode, [ Play Menu ] do not function. ▌ Play Menu [Play Menu]: Menu settings for playback Set items Choices Operation mode : Setting OK × : Setting NG Stopped Pla ying Rec ording Play mode [Play Mode] ☞ P. 89 [ One file ] [ List ] × Skip space* [Skip Spa...
Page 77 - File Divide; Menu settings that relate to the; Countdown
77 EN 6 L is t o f me nus MP3 Convert [MP3 Convert] ☞ P. 96 Converts a PCM [ 44.1 kHz/16 bit ] ( WAV ) format file into an MP3 format file. × × CD Write [CD Write] ☞ P. 98 Directly writes a PCM [ 44.1 kHz/16 bit ] ( WAV ) format file into a CD. × × Bounce** [Bounce] ☞ P. 99 Saves all the tracks in a...
Page 79 - Menu settings that relate to the device
79 EN 6 L is t o f me nus List of menus ▌ Device Menu [Device Menu]: Menu settings that relate to the device Set items Choices Operation mode : Setting OK × : Setting NG Stopped Pla ying Rec ording Fn key setting [Fn. Setting] ☞ P. 107 [ Fn. Recorder ]: [F1] [F2] [F3] [ Fn. MTR ]: [F1] [F2] [F3] T h...
Page 81 - Menu; External Mic; Lo
81 EN 6 Reco rd in g me n u Recording menu [Rec Menu] 3 Press the + / − button to select the Input source. [ Built-in Mic ] This setting adjusts the sensitivity of the built-in stereo microphone. [ External Mic ] This setting adjusts the sensitivity of the externally connected microphone. [ XLR (L) ...
Page 82 - Select a menu item by pressing; Manual; Limiter 1
82 EN 6 Reco rd in g me n u Recording menu [Rec Menu] 3 Press the + / − button to select the input microphone. 4 Press the OK button. • The setting for the selected input source appears. Recording level [Rec Level] This setting can set either automatic or manual adjustment of the recording level. In...
Page 83 - button to finish the
83 EN 6 Reco rd in g me n u Limiter*/Compressor** Recording menu [Rec Menu] 3 Press the + / − button to select the Input source. [ Built-in Mic ] Sound is input through the built-in stereo microphone. [ External Mic ] Sound is input by connecting an external microphone to the MIC jack. [ Line ] Soun...
Page 84 - switch on the recorder.; Phantom Power; Select the voltage by pressing the; By pressing the; XLR
84 EN 6 Reco rd in g me n u Recording menu [Rec Menu] 3 Press the + / − button to select a menu item. [ Phantom Power ] This setting sets the voltage of the phantom power. [ Plug-in Power ] This setting sets the power supply of the plug-in power. 4 Press the OK button. • The selected menu screen app...
Page 85 - PCM
85 EN 6 Reco rd in g me n u Recording menu [Rec Menu] 3 Press the + / − button to select the recording format. [ PCM ] This is the uncompressed phonologi-cal form that is used for music CDs. [ MP3 ] This is the International Standard that MPEG, the working group of ISO (International Organization fo...
Page 86 - Off
86 EN 6 Reco rd in g me n u Recording menu [Rec Menu] 3 Press the + / − button to select a menu item. [ 300Hz ] [Use this setting when the [ 100Hz ] setting is not sufficiently effective. [ 100Hz ] This function diminishes the noise generated by air conditions, projec-tors, and so on. It is effectiv...
Page 87 - How to use Pre-Recording; On; Rec
87 EN 6 Reco rd in g me n u Recording menu [Rec Menu] 3 Press the + / − button to select a menu item. [ On ] Recording starts a maximum of two seconds* prior to the start of recording. [ Off ] This setting stops the function. 4 Press the OK button to finish the setting. Pre-recording [Pre-Recording]...
Page 89 - One file; Forward Skip
89 EN 6 Pl ay me n u Play menu [Play Menu] 3 Press the + / − button to select a menu item. Play mode [Play Mode] This setting enables you to select your preferred play mode. 1 [ Menu ] { [ Play Menu ] { [ Play Mode ] [ One file ] Playback stops right after the current file is played. [ List ] This s...
Page 92 - Move to memory
92 EN 6 Fil e me nu File menu [File Menu] 4 Press the + / − button to select a menu item. [ Move to memory ] This menu item moves the files in the built-in memory or the SD card into a different folder in the built-in memory. [ Copy to memory ] This menu item copies the files in the built-in memory ...
Page 93 - Selected files; All files
93 EN 6 Fil e me nu File menu [File Menu] [ Selected files ] setting 1 Press the + / − button to select the file to be moved or copied and press the OK button to put a check mark in the file. 2 Repeat step 1, select a file to be moved or copied, and then press the F2 ( OK ) button. 6 Press the + / −...
Page 94 - Press; File move completed
94 EN 6 Fil e me nu 10 Press F2 ( OK ) button. • [ Moving! ] or [ Copying! ] appears on the display, and moving or copying of the file starts. • When [ File move completed ] or [ File copy completed ] is displayed, the process is completed. Notes • When the remaining space in the memory is insuffici...
Page 96 - In the Recorder Mode:
96 EN 6 Fil e me nu File menu [File Menu] Folder Select File Select Property [Property] This function enables you to check information about a file or folder. 1 Select the file or folder for which you want to display information ( ☞ P. 34, P. 45). 2 [ Menu ] { [ File Menu ] { [ Property ] Folder Sel...
Page 97 - file from the file list screen.
97 EN 6 Fil e me nu File menu [File Menu] 4 Press the + button to select [ Start ]. 5 Press the OK button. • The animation is displayed on the screen, and MP3 conversion starts. When [ Done ] is displayed, conversion is finished. • The converted file becomes the [ MP3 128kbps ] format. • MP3 Convert...
Page 98 - ess the
98 EN 6 Fil e me nu File menu [File Menu] 3 [ Menu ] { [ File Menu ] { [ CD Write ] 4 Press the OK button. CD write [CD Write] PCM (WAV) files recorded with this recorder can be directly written to an external CD drive. Note • Files that can be written to a CD are PCM format [ 44.1kHz/16bit ] files ...
Page 99 - Repeat step 1 to select other files,; and press the; press the; button to mark the file.
99 EN 6 Fil e me nu File menu [File Menu] Bounce [Bounce] Multiple tracks saved in a multi-track mode project can be grouped into a single stereo track. 1 [ Home ] { [ Multitrack ] 7 Press the + button to select [ Start ]. 8 Press the OK button. • The animation is displayed on the screen, and CD Wri...
Page 102 - Tempo; Using the metronome function
102 EN 6 Metr onome me n u Metronome menu [Metronome Menu] [ Tempo ] setting The metronome speed can be adjusted between [ 40 ] and [ 208 ]. 1 Press the + / − button to select the speed and then press the OK button. [ Sound ] setting The setting sets the metronome tone. 1 Select a menu item by press...
Page 103 - Lighting time
103 EN 6 LCD /S o u n d me n u LCD/Sound menu [LCD/Sound Menu] Backlight [Backlight] Every time a button is pressed, the display backlight turns on for approximately 10 seconds (default). 1 [ Menu ] { [ LCD/Sound Menu ] { [ Backlight ] 3 Press the + / − button to select a menu item. [ Lighting time ...
Page 108 - The registered function is
108 EN 6 Devi ce me n u 4 Press the OK button to finish the setting. Device menu [Device Menu] The registered function is ▌ called. Pressing the Fn button displays the setting screen for the registered function. [ Fn. MTR ] setting Off A function cannot be allocated to the Fn button. Input Select ☞ ...
Page 110 - PC; USB Connection
110 EN 6 Devi ce me n u USB setting [USB Settings] You can select [ PC ], which enables files to be sent/received through a connection to a PC, and [ AC Adapter ], which charges the recorder via connection of a USB connecting AC adapter (A514). 1 [ Menu ] { [ Device Menu ] { [ USB Settings ] 3 Press...
Page 111 - Select a menu item by pressing the; Storage Class; and then press the
111 EN 6 Devi ce me n u When [ USB Connection ] is selected 1 Select a menu item by pressing the + / − button and then pressing the OK button. [ PC ] This menu item sets connection to the PC. The recorder is connected as the storage or the composite. [ AC Adapter ] This is the setting used for charg...
Page 112 - Menu setting after setting reset
112 EN 6 Devi ce me n u Device menu [Device Menu] Setting reset [Reset Settings] This setting resets each function to the default setting (the setting at the time of shipping from the factory). 1 [ Menu ] { [ Device Menu ] { [ Reset Settings ] 3 Press the + button to select [ Start ]. 4 Press the OK...
Page 113 - Metronome Menu; Device menu
113 EN 6 Devi ce me n u Device menu [Device Menu] Metronome Menu Menu item Default setting [ Metronome ] ( ☞ P. 101) [ Off ] LCD/Sound Menu Menu item Default setting [ Backlight ] ( ☞ P. 103) Lighting time: [ 10sec. ] Dim lighting time: [ 30sec. ] Brightness setting: [ 02 ] [ LED ] ( ☞ P. 104) [ On ...
Page 116 - Model; Remain
116 EN 6 Devi ce me n u Device menu [Device Menu] Memory information [Memory Info.] On the menu screen, remaining space and the capacity of the recording medium can be displayed. 1 [ Menu ] { [ Device Menu ] { [ Memory Info. ] 3 After checking the information, press the OK button. Note • The recorde...
Page 117 - Chapter 7; About the PC
Page 118 - Using the recorder on your PC; Windows; The PC operating environment; Operating system; Precautions on using the recorder connected to a PC; Format
118 EN 7 U sin g th e re co rd er o n your P C Using the recorder on your PC When connected to a PC, the recorder enables you to do the following: Apart from using this recorder as a Multi-Track recorder or a music player, you can also use it as an external memory for your PC, that is, as a storage ...
Page 119 - Connecting to your PC; Turn the recorder on.
119 EN 7 U sin g th e re co rd er o n your P C Using the recorder on your PC Connecting to your PC 3 Be sure to connect the USB cable to the connecting terminal of the recorder while the recorder is in stop mode or turned off. 1 Turn the recorder on. 2 Connect the USB cable to the USB port of the PC...
Page 120 - Disconnecting from your PC; ] on the task bar located; Safely remove USB
120 EN 7 U sin g th e re co rd er o n your P C Disconnecting from your PC Windows Macintosh 1 Click [ ] on the task bar located at the lower-right corner of the screen. Click [ Safely remove USB Mass Storage Device ]. • The drive letter will differ depending on the PC being used. 1 Drag and drop the...
Page 121 - Open the Explorer window.; My Computer; Untitled; Macintosh; Drive name and folder name when a PC is connected (SD card); Transferring voice files to your PC
121 EN 7 U sin g th e re co rd er o n your P C Using the recorder on your PC Windows 1 Connect the recorder to your PC ( ☞ P.119). 2 Open the Explorer window. • When you open [ My Computer ], the recorder will be recognized by the drive name. While an SD card is inserted, it appears as [ Removable D...
Page 122 - Using the recorder as a USB microphone/speaker; Using the recorder as an external memory for your PC
122 EN 7 U sin g th e re co rd er o n your P C Using the recorder on your PC Using the recorder as a USB microphone/speaker This recorder can be used as a USB microphone or a USB speaker. Note • While the recorder is used as a USB microphone, it is available as a USB stereo microphone regardless of ...
Page 123 - Chapter 8; For Quick Reference
Page 124 - Alarm message list; Message
124 EN 8 Alar m m e ss a g e lis t Alarm message list Message Description Action [Battery low] Batter y power is getting low. Charge the batteries. If you run out of battery power soon after charging, the battery has reached its life. Replace it with a new one. ( ☞ P. 22). [File locked] Attempted to...
Page 126 - Troubleshooting; Symptom
126 EN 8 Tr o u b le sh o o tin g Troubleshooting Symptom Probable cause Action Nothing appears on the display The batter y is not loaded properly Verif y that the batter y's polarities + and - are correct ( ☞ P. 22). Batter y power is getting low. Charge the batter y or replace with a new batter ...
Page 130 - Glossary
130 EN 8 Glo ssa ry Glossary Glossary Description Sampling frequency (sampling rate) [ Hz/kHz ] The rate or frequency at which an analogue signal is analyzed to determine acoustic delicacies. The higher sampling frequency produces less difference in forward/backward sounds. Quantization bits [bit de...
Page 131 - Specifications; General points
131 EN 8 S p e cif ications Specifications General points ▌ Recorder Simultaneous recording track Recorder Mode: 2 Multi-Track Mode: 2 Simultaneous playback track Recorder Mode: 2 Multi-Track Mode: 8 M a x i m u m r e co r d i n g f i l e s i z e PCM format: 2GB MP3 format: 4GB Recording format L i ...
Page 132 - Reference input level
132 EN 8 S p e cif ications Specifications Input B u i l t- i n m i c r o p h o n e Directional microphone M I C / L I N E i n p u t Mini stereo phone jackMIC: input impedance 10kΩLINE: input impedance 12.5kΩ X L R /standard phone i n p u t XLR (balanced input)/Standard phone (unbalanced input) comb...
Page 133 - Guide to recording times; General frequency response
133 EN 8 S p e cif ications Specifications Guide to recording times ▌ 4 Linear PCM format Recording format Built-in memory (4 GB) SD card 8 GB 16 GB 32 GB 64 GB 96.0kHz /24bit Approx. 1h. 35min. Approx. 3h. 40min. Approx. 7h. 15min. Approx. 14h. 55min. Approx. 30h. 00min. 96.0kHz /16bit Approx. 2h. ...
Page 134 - Maximum recording time for a single file
134 EN 8 S p e cif ications 4 MP3 format Recording format Built-in memory (4 GB) SD card 8 GB 16 GB 32 GB 64 GB 320 kbps Approx. 22h. 30min. Approx. 53h. 00min. Approx. 104h. 00min. Approx. 214h. 00min. Approx. 432h. 00min. 256 kbps Approx. 28h. 30min. Approx. 66h. 30min. Approx. 130h. 00min. Approx...
Page 135 - Guide to battery life
135 EN 8 S p e cif ications Specifications Guide to battery life ▌ 4 lithium ion battery: (linear PCM format) Recording format Built-in stereo microphone (During recording mode) When recording with phantom power Headphone playback 96.0 kHz /24bit Approx. 9h. 30min. Approx. 2h. 15min. Approx. 12h. 30...
Page 136 - Technical assistance and support
“CE” mark indicates that this product complies with the European requirements for safety, health,environment and customer protection. For customers in Europe This symbol [crossed-out wheeled bin WEEE Annex IV] indicates separate collection of waste electrical and electronic equipment in the EU count...
Page 137 - 2 Waterloo Rd, North Ryde NSW 2113, Australia
EN-BD3589-04 AP1302 OLYMPUS IMAGING CORP. 2951 Ishikawa-machi, Hachioji-shi, Tokyo 192-8507, Japan. Tel. +81 (0)42-642-6162 http://www.olympus.com OLYMPUS IMAGING AMERICA INC. 3500 Corporate Parkway, P.O. Box 610, Center Valley, PA 18034-0610, U.S.A. Tel. 1-888-553-4448 http://www.olympusamerica.com...


 Olympus DM-10
Manual
Olympus DM-10
Manual
 Olympus DM-20
Manual
Olympus DM-20
Manual
 Olympus DM-3
Manual
Olympus DM-3
Manual
 Olympus DM-420
Manual
Olympus DM-420
Manual
 Olympus DM-450
Manual
Olympus DM-450
Manual
 Olympus DM-5
Manual
Olympus DM-5
Manual
 Olympus DM-550
Manual
Olympus DM-550
Manual
 Olympus DM-901
Manual
Olympus DM-901
Manual
 Olympus DR-1200
User Manual
Olympus DR-1200
User Manual
 Olympus DR-2100
User Manual
Olympus DR-2100
User Manual
 Olympus DR-2200
User Manual
Olympus DR-2200
User Manual
 Olympus DR-2300
User Manual
Olympus DR-2300
User Manual
 Olympus DS-10
User Manual
Olympus DS-10
User Manual
 Olympus DS-20
Manual
Olympus DS-20
Manual
 Olympus DS-2300
Manual
Olympus DS-2300
Manual
 Olympus DS-2400
Manual
Olympus DS-2400
Manual
 Olympus DS-30
Manual
Olympus DS-30
Manual
 Olympus DS-3400
Manual
Olympus DS-3400
Manual