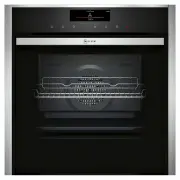
Page 2 - Table of contents; Safety; General information
en Safety 2 Table of contents INFORMATION FOR USE 1 Safety ................................................................... 2 2 Preventing material damage .............................. 5 3 Environmental protection and saving en- ergy ..............................................................
Page 3 - WARNING ‒ Risk of burns!
Safety en 3 Opening the appliance door creates a draught. Greaseproof paper may come into contact with the heating element and catch fire. ▶ Never place greaseproof paper loosely over accessories when preheating the ap- pliance and while cooking. ▶ Always cut greaseproof paper to size and use a pla...
Page 5 - Preventing material damage; Disposing of packaging
Preventing material damage en 5 2 Preventing material damage 2.1 General ATTENTION! Alcoholic vapours may catch fire in the hot cooking compartment and cause permanent damage to the ap- pliance. The appliance door may spring open due to an explosion and it may fall off. The door panels may shatter...
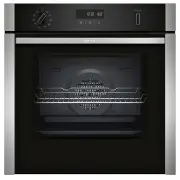
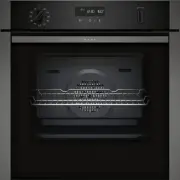
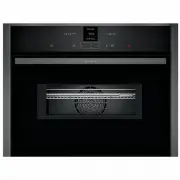
Page 6 - Familiarising yourself with your appliance; Buttons
en Familiarising yourself with your appliance 6 For longer cooking times, you can switch the appli- ance off 10 minutes before the cooking time ends. ¡ There is sufficient residual heat to finish cooking the dish. Remove any accessories that are not being used from the cooking compartment. ¡ Access...
Page 7 - Types of heating and functions
Familiarising yourself with your appliance en 7 Symbol Button Explanation Increase the setting value Rapid heating Switch the rapid heating on and off Information Display the current cooking compartment temperature Display You can see the current setting values or options in the display. The value ...
Page 8 - Cooking compartment; Shelf positions
en Familiarising yourself with your appliance 8 Symbol Type of heating or function Temperature or setting Use Circulated air grill 50-280 °C Roast meat, poultry and whole fish. The fan circulates the hot air around the food. Top/bottom heat gentle 50-280 °C For gently cooking selected types of food...
Page 9 - Other accessories
Accessories en 9 5 Accessories Use original accessories. These have been made espe- cially for your appliance. Note: Accessories may become deformed if they get hot. Deformation has no effect on function. As the ac-cessory cools down, it will regain its original shape. The accessories supplied ma...
Page 10 - Sliding accessories into the cooking; Before using for the first time
en Before using for the first time 10 Other accessories Use Wire rack ¡ Cookware ¡ Cake tins ¡ Meat, e.g. roastingjoints or steak ¡ Frozen meals Baking tray ¡ Tray bakes ¡ Small baked items Universal pan ¡ Moist cakes ¡ Baked items ¡ Frozen meals ¡ Large roasts Telescopic rail set Telescopic rail s...
Page 11 - Cleaning the appliance before using it
Before using for the first time en 11 6.2 Cleaning the appliance before using it for the first time Clean the cooking compartment and accessories be- fore using the appliance to prepare food for the first time. 1. Remove the accessories from the cooking compart-ment and remove the shelves. → Page ...
Page 12 - Basic operation
en Basic operation 12 7 Basic operation 7.1 Switching on the appliance 1. Use the function selector to set the type of heating. a Each function has a default temperature or grill set-ting. 2. Use the temperature selector to select the temperat-ure or grill setting. a The appliance starts heating. ...
Page 13 - Switch on the rotary spit; Time-setting options
Time-setting options en 13 2. Place the rotary spit onto the rotary spit frame andunscrew the handle. 3. Slide the universal pan into shelf position 1 andplace the rotary spit into the motor bracket. 4. Pour some water into the universal pan to bettercatch any fat that drips out. 5. Close the appli...
Page 14 - Switching off the signal tone; Setting the duration; Setting the end time; Turning off the operation; 0 Child safety lock; Activating the child safety lock
en Child safety lock 14 Switching off the signal tone ▶ To switch off the signal tone, press any button oropen the appliance door. Note: After a short time, the signal tone stops automat- ically. 9.3 Setting the time If required, you can change the time, e.g. from summer time to winter time. Requi...
Page 15 - 1 Basic settings; Overview of the basic settings; Changing the basic settings
Basic settings en 15 11 Basic settings You can configure the basic settings for your appliance to meet your needs. 11.1 Overview of the basic settings Here you can find an overview of the basic settings and factory settings. The basic settings depend on the features of your appliance. Display Basi...
Page 16 - 2 Cleaning and servicing; Cleaning products
en Cleaning and servicing 16 12 Cleaning and servicing To keep your appliance working efficiently for a long time, it is important to clean and maintain it carefully. 12.1 Cleaning products To avoid damaging the various surfaces on the appli- ance, do not use any unsuitable cleaning agents. WARNIN...
Page 17 - Cleaning the appliance
Cleaning and servicing en 17 Area Suitable cleaning agents Information Glass cover for the interior lighting ¡ Hot soapy water ¡ Oven cleaner Clean with a dishcloth and dry with a soft cloth. Use oven cleaner to remove very heavy soiling. Door panels Hot soapy water Clean with a dishcloth and dry w...
Page 18 - 3 Cleaning function; Easy Clean cleaning aid; Setting Easy Clean
en Cleaning function 18 12.4 Replacing the cooking compartment bulb If the cooking compartment light has failed, replace the cooking compartment bulb. Note: Heat-resistant, 230 V, 40 W, G9 halogen bulbs are available from customer service or specialist retail-ers. Only use these bulbs. Hold the ne...
Page 19 - Removing heavy deposits of dirt; Preparing the appliance for the cleaning; Setting the cleaning function
Cleaning function en 19 2. Remove the remaining water with an absorbentsponge cloth. 3. Clean the smooth surfaces in the cooking compart-ment with a dish cloth or a soft brush. Stubbornresidues can be removed using a stainless steelscouring pad. 4. Remove limescale with a cloth soaked in vinegar.Th...
Page 20 - Cancelling the cleaning function; Detaching the rails; 5 Appliance door
en Rails 20 Cleaning level Duration in h 1 2:30 2 3 3 3:30 a One minute after the cleaning cycle for the pyrolyticself-cleaning begins, the appliance door is locked toprevent it from being opened. The indicator light shows the activation of this door opening mechan-ism. Once the door lock has been...
Page 21 - Removing the door panels; Fitting the door panels
Appliance door en 21 15.1 Removing the door panels To facilitate cleaning, you can remove the glass panels from the appliance door. WARNING ‒ Risk of injury! Scratched glass in the appliance door may develop into a crack. ▶ Do not use any harsh or abrasive cleaners or sharp metal scrapers to clean ...
Page 22 - Attaching the appliance door; 6 Troubleshooting
en Troubleshooting 22 3. Grip the appliance door on either side with bothhands and close it by approx. 30 degrees. Do not close the appliance door fully. The hingescould become bent and the enamel could be dam-aged. 4. Lift the appliance slightly and pull it out completely. 15.4 Attaching the appli...
Page 24 - Disposing of old appliance; 8 Customer Service
en Disposal 24 Fault Cause and troubleshooting A message with ap-pears on the display. Malfunction ▶ Set the function selector to the off position.If the error message does not disappear, contact customer service. 17 Disposal 17.1 Disposing of old appliance Valuable raw materials can be reused by ...
Page 26 - Tips for next time you bake
en How it works 26 Food Weight in kg Shelf position Type of heating Temperature in °C/grill setting Duration in mins Pizza 1 1 280 1 8 – 9 Bread 1 2 190 – 200 1 25 – 30 Focaccia 1 2 180 – 190 1 20 – 25 Bundt cake 1 2 160 1 55 – 60 Fruit pie 1 2 160 1 35 – 40 Cheesecake 1 2 160 – 170 1 45 – 55 Short...
Page 27 - Tips for next time you roast; Baking
How it works en 27 Issue Tip Your cake is cooked on the outside but is not fully baked through on the in- side. ¡ Reduce the bakingtemperature and in-crease the bakingtime. ¡ Add less liquid. For cakes with a moisttopping: ¡ Pre-bake the base. ¡ Sprinkle the bakedbase with almonds orbreadcrumbs. ¡ ...
Page 28 - Grilling; 0 Installation instructions; Safe installation
en Installation instructions 28 Food Accessories Shelf position Type of heating Temperature in °C Duration in mins Shortbread strips, 2 levels Universal pan + baking tray with greaseproof pa- per 2 + 4 160 1 26 – 28 Small cakes Universal pan 2 150 1 21 – 23 Small cakes, 2 levels Universal pan + bak...
Page 29 - Appliance dimensions
Installation instructions en 29 ¡ Proceed in accordance with the installation sheets for installing accessories. ¡ Fitted units must be heat-resistant up to 90 °C, and adjacent unit fronts up to 70 °C. ¡ Do not install the appliance behind a decor- ative panel or unit door. There is a risk of overh...
Page 30 - Installation in a tall unit; Electrically connecting an appliance without a; Installing the appliance
en Installation instructions 30 Secure the worktop to the built-in unit. Observe the in- stallation instructions for the hob. 20.5 Installation in a tall unit Observe the installation dimensions and the safety clearances in a tall unit. ¡ Ensure that the intermediate floor has a gap to theinstallat...
Page 31 - Removing the appliance
Installation instructions en 31 3. Remove the cover. 4. Screw the appliance tightly onto the unit. 5. Put the protective cover on. Note: Never close the gap between the worktop and the appliance using additional battens. 20.9 Removing the appliance 1. Disconnect the appliance from the power supply...
Page 32 - Register your product online
Register your product online neff -home.com BSH Hausgeräte GmbH Carl-Wery-Straße 3481739 München, GERMANY *9001867888* 9001867888 030620 en Valid within Great Britain:Imported to Great Britain byBSH Home Appliances Ltd.Grand Union HouseOld Wolverton RoadWolverton, Milton KeynesMK12 5PTUnited Kingdom