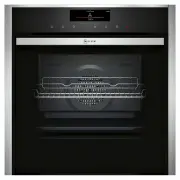
Neff B5AVM7AG0A - Manuals
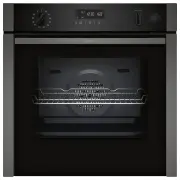
User Manual Neff B5AVM7AG0A


Summary
en Safety 2 Futher information and explanations are available online: Table of contents INFORMATION FOR USE 1 Safety ................................................................... 2 2 Preventing material damage .............................. 5 3 Environmental protection and saving en- ergy ....
Safety en 3 1.4 Safe use Always place accessories in the cooking com- partment the right way round. → "Accessories", Page 10 WARNING ‒ Risk of fire! Combustible objects that are left in the cook- ing compartment may catch fire. ▶ Never store combustible objects in the cooking compartment. ...
Preventing material damage en 5 If the door seal is damaged, a large amount of heat is generated around the door. ▶ Do not scrub or remove the seal. ▶ Never operate the appliance if the seal is damaged or missing. WARNING ‒ Risk of serious harm to health! The appliance gets very hot when the clean-...
Neff Ovens Manuals
-
 Neff B15E42N0RU
User Manual
Neff B15E42N0RU
User Manual
-
 Neff B15E54N0
User Manual
Neff B15E54N0
User Manual
-
 Neff B15E74N0RU
User Manual
Neff B15E74N0RU
User Manual
-
 Neff B15M42J3
User Manual
Neff B15M42J3
User Manual
-
Neff B15M42J3
Installation Manual
-
 Neff B15P42N3
User Manual
Neff B15P42N3
User Manual
-
 Neff B16P42N0
User Manual
Neff B16P42N0
User Manual
-
 Neff B16P42N3
User Manual
Neff B16P42N3
User Manual
-
 Neff B17CR32N1B
User Manual
Neff B17CR32N1B
User Manual
-
 Neff B45C42N3RU
User Manual
Neff B45C42N3RU
User Manual
-
 Neff B46C74N0
User Manual
Neff B46C74N0
User Manual
-
 Neff B46E74N0RU
User Manual
Neff B46E74N0RU
User Manual
-
 Neff B47FS26G0
User Manual
Neff B47FS26G0
User Manual
-
 Neff B47FS36N0B
User Manual
Neff B47FS36N0B
User Manual
-
 Neff B48FT78H0B
User Manual
Neff B48FT78H0B
User Manual
-
 Neff B57CR22G0B
User Manual
Neff B57CR22G0B
User Manual
-
 Neff B57CR22N0B
User Manual
Neff B57CR22N0B
User Manual
-
 Neff B57VR22N0B
User Manual
Neff B57VR22N0B
User Manual
-
 Neff B57VS26N0B
User Manual
Neff B57VS26N0B
User Manual
-
 Neff B58VT68H0B
User Manual
Neff B58VT68H0B
User Manual