Page 3 - Table of Contents
01 01 02 Table of Contents Table of Contents Safety Instructions Structure of the Robot 03 a. Robot 03 b. Dustbin 04 c. Charging dock 04 Robot Operation 05 a. Charging Preparation b. Turning on the Robot c. Charging Status d. Robot Operation 06 e. Introduction of the charging dock 07 Product Feature...
Page 4 - Safety Instructions; � Warning
Safety Instructions Before using this product, please read the following safety instructions and follow all routine safety precautions! ■ Please read these instructions carefully. ■ Please keep this book of instructions. ■ Any operation not in compliance with this book is likely to cause damage to t...
Page 5 - Structure of the Robot; Unit top; Unit bottom
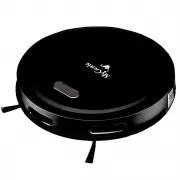
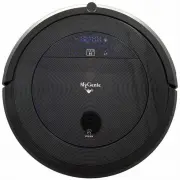
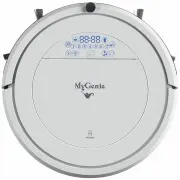
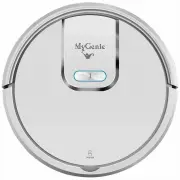
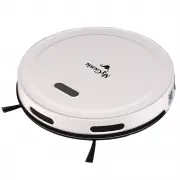
Structure of the Robot a. Robot Unit top 1 1e-- --- DC recharging port Power switch Unit bottom Recharging pole piece Down view sensor Side brush --- -'¥. ",?-� J:::Jl' Universal wheel Down view sensor � '('ifci)f)'j � � �� � Forf ��-- Recharging pole piece B attery box cover Down view sensor 1 ...
Page 6 - Cleaner and Accessories; GJ
Structure of the Robot Cleaner and Accessories GJ Vacuum Cleaner Power Adapter Dustbin HEPA b. Dustbin !I----- Filter "'>--A- - Dustbin conductive pole i.t;,11'7------ -- Dustbin button c. Charging dock IR signal emission window ------J.-- Cha rging dock station Side brush -- Power adapter ja...
Page 7 - Robot Operation; a. Charging preparation
Robot Operation a. Charging preparation 1. Connect the power adapter jack to the charging dock. 2. Locate an electrical outlet on the wall close to the ground and plug in the power adapter. 3. Place the charging dock in a position flat on the ground with the back pushed up against a wall. There shou...
Page 8 - Attention
Robot Operation d. Robot Operation 1. Press the right button for 2 seconds, then the robot will be set to stand by mode. Then press the button again, the robot starts to clean, then the blue light turns bri ghter. Press the right button for 5 seconds, then the robot will turn off. (Figure 1) 2. Pres...
Page 9 - e. Introduction of the Charging Dock
Robot Operation e. Introduction of the Charging Dock 1. Before using the dock station, please make sure it is connected to the power supply and adaptor. 2. Place the charging dock in a position flat on the ground with the back pushed up against a wall. There should be no other objects with strong re...
Page 10 - Product Features; a.Automatic Cleaning Mode
Product Features a.Automatic Cleaning Mode b. In the standby mode, press the right button or intelligent model button on APP, the robot enters automatically cleaning. c. In the automatic cleaning mode, press the left or right button or intelligent model in APP, the robot enters standby mode. ( F igu...
Page 11 - Removal and Cleaning of the robot; a. Removal and Cleaning of the dustbin; b. Removal and Cleaning of the side brush
Removal and Cleaning of the robot a. Removal and Cleaning of the dustbin 1. Press the dustbin button on the panel, take out the dustbin. 2. Open the upper cover of the dustbin, pour out the dirt and other junk. b. Removal and Cleaning of the side brush 1. Gently pick up the robot and lay it with its...
Page 12 - Common Failures and Troubleshooting
Common Failures and Troubleshooting NO. Cause Warning Sound Indicator light T r oubl eshooting 1 Drive wheel 1 sound The red indicator Check the wheel if tangled, failure 3 times light is on remove the obstacle Side brush 2 sound The red indicator Check if the side brush is failure 3 times light is ...
Page 13 - Dimensions and Parameters; Technical Specification for the Cleaner; My genie smart; My genie smart
Dimensions and Parameters Technical Specification for the Cleaner No. Item Index parameter 1 My genie smart 2 Rated voltage DC 14V 3 Rated power :rnw 4 Operatino temperature ranoe -10r-45r 5 Input voltaoe/current 14V/0.5A 6 lnfmrP.rl rP.mntP. mntrnl 38KHZ 7 Dimension cb310*68mm 8 Weioht ? Kf. 9 Batt...
Page 14 - Wifi Manual
Wifi Manual 1.Scan the bar code below to download Tuya WIFI APP-- "smart life" . 2.0pen APP "smart life" , registered your account by phone number or email etc. 3.Enter "Add device" surface. 4.Enter "Add Manually" , click one of icon to add, any icon is OK . .. + .;:G...
Page 16 - Consumer Warranty; Warranty Period; Registering Your Purchase; Procedure for claiming under warranty; Please retain your original receipt as proof of purchase
www.mygenieshop.com.au Consumer Warranty MyGenie would like you to enjoy your new purchase. This warranty card is provided to ensure that you get satisfaction . Our goods come with guarantees that cannot be excluded under Australian Consumer Law. You are entitled to a replacement or refund for a maj...