Page 2 - Table of Contents
Table of Contents 1.Safety Regulations 3 2.Product Composition 5 2.1 Component Name 2.2 Technical Parameter 8 3.Product Composition 9 3.1 Considerations 9 3.2 Rapid Operations 10 3.3 Mode Selection 13 3.4 Use of Water Permeable Rag 15 3.5 Roller Brush Assembly 16 4.Maintenance 17 4.1 Dust Box and Fi...
Page 3 - Safety Regulations
1.Safety Regulations When using the product, please keep your vigilance and follow below information . Please read the manual carefully before using the product. Please keep instruction. 1 ) Products cannot be used by children under 8 years of age or people with mental disabilities. If you need to u...
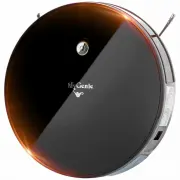
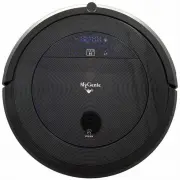
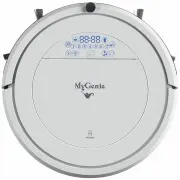
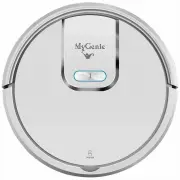
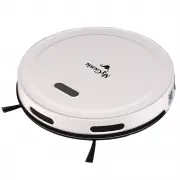
Page 5 - Product Composition; ► Master
2.Product Composition 2.1 Assembly Name ► Master Key (Start or Pause) - - - - Lower Vision Sensor Universal Wheel ---- � --- Charging Pole Piece --- ---= �B�� � �ir:::::'1���:-- --- Left Brush Right Brush Dust Box / Water Tank Switch - - --\c--------+11--111UI j _....,.�� L__ _ _ Infrared buffer bu...
Page 6 - ► Charging Stand Assembly; Setting time
2.Product Composition ► Charging Stand Assembly ► Remote Control � - - - Indicator Light - - Power Adapter � - - - - Power Adapter Slots -+-+----11----- Screen Forward---+---1--:==:::::;--� Setting time / Schedule-------H-+--4,!;!V Left-----11--1-+;n Right Stop/Start ------ir---r------;r;7'1------l....
Page 7 - ► Dust Box; ► Water Permeable Rag Assembly
2.Product Composition ► Dust Box Primary Filter-- - - � ��:"'51 - - Efficient Bracket Lower Cover Filter Sponge -- Dust Box Upper Cover ► Water Permeable Rag Assembly Water Rag - - - �- ====--� 7
Page 8 - Technical Parameters; Master; Battery and Specifications
2.Product Composition 2.2 Technical Parameters Master Working Voltage: 1 0.89 V = Charging Stand Rated Input Voltage: 19 V = Battery and Specifications Adapter : Output parameter 100-240V ~50/60HZ Input parameter 19VDC/0.6A 8 Power Rating: 20W Rated output current: 0.6A Lithium Battery 2600mAh
Page 9 - Product Composition; the turning on the unit for a more efficient clean.
3.Product Composition 3.1 Considerations Please refer to the following guidelines to check the cleaning area before the turning on the unit for a more efficient clean. 0 Power lines and other debris scattered on the ground may trip up and must be removed before . • _J -- • • \.a� ,_, � - A gap of le...
Page 10 - Rapid Operation; Charging Preparation; fJ Install the Side Brushes
3.Product Composition 3.2 Rapid Operation Charging Preparation D Connect the adapter to the charging stand . Place the charging stand flat against the wall. Do not place objects in the left and right 1 M and the front 2M, and do not have objects with strong reflection surfaces such as mirrors. Place...
Page 11 - Start to charge
3.Product Composition Start to charge . D Turn on the Master . Tum on the side power switch, "I" is the tum on, "O" is the tum off. After the master finishes working, it is recommended not to shut down; keep the master in a state of charge so that it can perform its next job better. ...
Page 12 - Start Cleaning; nnnn; OU LJ LJ; Stop Working
3.Product Composition Start Cleaning Start the Automatic Cleaning Mode with the master's @ key or remote control ®key [J D nnnn l!lll!lj OU LJ LJ Before starting the mode, make sure that the outer ring of the @ key is red/blue and the master is in the state of being awakened. If the master does not ...
Page 13 - Edge Mode; Return Charging Mode
3.Product Composition 3.3 Mode Selection In order to adapt to different ground conditions and achieve deeper clean, this product has a variety of cleaning modes, which can be selected by remote control as needed. The remote control can switch any mode directly. Before starting the mode, make sure th...
Page 14 - Turbo Mode; Time and Date Settings
3.Product Composition Turbo Mode Robot will increase suction. Suitable for a very dirty floor or a thick carpet. Qrurbo mode cannot be accessed while using the mop cleaning method. Time and Date Settings 1. Programming the Time and Date a . Settings of current weekday: D In the standby mode, press t...
Page 15 - Use of Water Permeable Rag; STEP; STEP; STEP; lllllllJ; ouuu
3.Product Composition 3.4 Use of Water Permeable Rag This product is equipped with a water tank assembly. After the cleaning work is completed, if there is a demand for mopping, the dust box can be replaced with a water tank assembly. For the cleaning method, please refer to the [Maintenance] sectio...
Page 16 - Roller Brush Assembly; Assembly Choices; set the roller brush and cover the board and then press
3.Product Composition 3.5Roller Brush Assembly Assembly Choices Roller brush assembly: Scratch the floor, sweep effectively. Set roller brush assembly : set the roller brush and cover the board and then press to lock. >> 16
Page 17 - Dust Box and Filter
4.Maintance 4.1 Dust Box and Filter When cleaning and maintaining the master and its accessories, turn off the master and unplug the charging stand. ■ Remove the dust box, open the dust box cover, and clean the garbage . )) STEP 01 ■ Remove dust filter. HEPA is not recommended for washing. Please pa...
Page 18 - Water Tank Assembly; Cleaning; remove the water permeable rag.; Maintenance: Rinse and dry the water rag; Cleaning the Water Reservoir
4.Maintance 4.2 Water Tank Assembly Cleaning o f Water Rag ■ Remove: After the mopping is completed, remove the water tank assembly, and remove the water permeable rag. STEP 01 ■ Maintenance: Rinse and dry the water rag STEP 02 ■ Cleaning the Water Reservoir Remove: After mopping the floor, remove t...
Page 19 - Cleaning Rolling Brush; round on the rolling brush, and facilitate cleaning.; Cleaning Side Brushes; Pull out the side brush and wipe it with a clean rag.
4.Maintance 4.3 Rolling Brush, Side Brushes ■ Cleaning Rolling Brush Remove the rolling brush cover plate, remove the rolling brush, cut off the hair round on the rolling brush, and facilitate cleaning. STEP 01 ■ Cleaning Side Brushes Pull out the side brush and wipe it with a clean rag. STEP 02 19
Page 21 - Lighting Effects And Alarm Tips; Lighting Effects; Cleaner status
5.Lighting Effects And Alarm Tips 5.1 Lighting Effects Cleaner status AUTO Disolav Status Cleaner stop cleaning Blue lamp light on Start auto charQe Purple &blue lamp liQht on Start to Spiral clean Blue lamp light on Start to wall follow cleanina Blue lamo liaht on Start recharQinQ Blue lamp fla...
Page 22 - Lighting Effects And Alarm Tips; AUTO Dis la Status; the power switch on the side of the master and restart the machine.
5 Lighting Effects And Alarm Tips 5.2Alarm Tips When the host fails, the red light of the outer ring of the host key flashes, and the buzzer sounds of different lengths will be emitted. Refer to the following table to check the cause of the fault: Cleaner status Side brush error Fan motor error Main...
Page 23 - solve it yourself by checking the queries.
6.FAQ If the following problems occur during the use of the product, you can solve it yourself by checking the queries. No Cause of Falli.n, Probable Reasons Solution Make sure that the master is fully docked with the charging poles of the cradle. 01 When the master does not work, it is off and the ...
Page 24 - Consumer Warranty; MyGenie would like you to enjoy your new purchase.; Warranty Period; The warranty is 12 months from the date of purchase; Registering Your Purchase; Please register your purchase on; Procedure for claiming under warranty; support; Please retain your original receipt as proof of purchase
www.mygenieshop.com.au Consumer Warranty MyGenie would like you to enjoy your new purchase. This warranty card is provided to ensure that you get satisfaction . Our goods come with guarantees that cannot be excluded under Australian Consumer Law. You are entitled to a replacement or refund for a maj...