Page 2 - Table Of Contents; Page 1
mrcool.com After-Sales Service .................... 15 6 Blower Speed Selection .............. 13 4 Maintenance and Care ............... 14 5 Unit Installation ........................... 6 3.1 Pre-Installation Instructions ........................... 6 3.4 Refrigerant Piping Connection ...............
Page 3 - Page 2; WARNING; NOT; equired when using the; switch with a suitable warning label.; Read Before Installation; Incorrect installation may cause serious damage or injury.; The seriousness of potential damage or injuries is classified as; WARNING; or; CAUTION; This symbol indicates that you should; perform the indicated action.; Safety Precautions
MRCOOL ® Electric Heat Kit Page 2 mrcool.com Safety Precautions WARNING Please read the manual in its entirety and be aware of all warnings and cautions before installing, operating, or repairing.DO NOT install this unit in a corrosive, inflammable, or explosive environment. DO NOT install in any env...
Page 4 - Product Introduction; Page 3; technical support at the
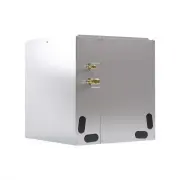
2 Product Introduction Page 3 mrcool.com To Our Customers; Thank you for choosing a MRCOOL ® home HVAC product. Please read this manual carefully before installation and operation of the Universal ® Series A-Coils to ensure correct use and handling. In addition to the safety precautions in the previ...
Page 5 - Product Information; Page 4; The Universal Series; Product Description; OPTIONAL; Additional Line Sets & Coupler Kit
Product Information Page 4 mrcool.com The Universal Series ® A-Coil offers the perfect combination of superior product quality, operating efficiency, and value for money. The evaporator unit uses the environmentally friendly refrigerant R-410A, which is chlorine-free to help prevent damage to the ozone...
Page 6 - Page 5; Cooling capacity range as shown below:; Model
Product Information Page 5 mrcool.com 2.3 Physical Dimensions Units: inch(millimeter) Model Dimension W D H A B MDUCC15024/ MDUCC15036 17-1/2 (445) 21-1/4 (540) 23 (584) 15-7/8 (403) 19-3/8 (492) MDUCC15048/ MDUCC15060 24-1/2 (622) 21-1/4 (540) 28-1/2 (724) 22-7/8 (581) 19-3/8 (492) 2.4 Cooling Capa...
Page 7 - Unit Installation; Page 6; installed in violation of any codes and/or regulations.; procedure of the system have been completed.
mrcool.com 3 Unit Installation Page 6 mrcool.com 3.1 Pre-Installation Instructions 3.1.1 Checking Product Received After receiving the product, please check it for damage that may have been caused during shipping. Shipping damage is the responsibility of the carrier. Verify the model number, specific...
Page 8 - Page 7; as much as possible.; Depending on your application (specifically the
Unit Installation Page 7 mrcool.com When installing the coil take into consideration the length of the refrigerant piping and try to minimize the distance as much as possible. DO NOT install the air handler in a location that is either above or below the condenser that violates any instructions/requ...
Page 9 - Page 8; Gas pipe; NOTE: If you are installing your A-Coil with the optional MRCOOL; valve connector.; the illustrations below.; Pipe; IMPORTANT
Unit Installation Page 8 mrcool.com 3.4.1 Specifications of Connection Pipe 3.4 Refrigerant Piping Connection Model External diameter (inch) Gas pipe Liquid pipe MDUCC15024/MDUCC15036 3/4 in 3/8 in MDUCC15048/MDUCC15060 3.4.2 Piping Preperation NOTE: If you are installing your A-Coil with the optiona...
Page 10 - Page 9; Screw Connection
Unit Installation Page 9 mrcool.com Screw Connection C onnect the pipe to the unit. Follow all instructions below. Use both a spanner and torque wrench. When connecting the tapered flare nut, first apply Polyolester oil (POE oil) on its inner and outer surface. Then, screw the first 3 or 4 threads by h...
Page 11 - INSTRUCTIONS FOR USE WITH; Complete unit replacement; NOTE ON WRENCHES
Page 1 0 mrcool.com No-Vac ® Quick Connect ® Line Set* Installation INSTRUCTIONS FOR USE WITH NO-VAC™ QUICK CONNECT® LINE SET* SOLD SEPARATELY Complete unit replacement using the No-Vac® Quick Connect® lines KINK RESISTANT, PRECHARGED, SIMPLE SECURE QUICK CONNECT, 100% CONNECTION GUARANTEE www.mrcoo...
Page 12 - or extending the pipe more than 3 times.; bend the pipes in at an angle greater than 90°.; bend the pipe excessively, otherwise it will break.; MINIMUM BEND RADIUS; When bending connective; Extend the pipe by unwinding it; As shown in the illustration to the right, use a sharp cutter; Radius; and cause condensate leakage.; fumes or odor to enter indoors and/or corrupt the unit.; to enter the unit and cause property damage and/or personal injury.; Condensate Removal
Page 11 mrcool.com Unit Installation 1. Use your hands to bend the line set. Work carefully not to collapse the pipes during bending. 2. If the pipe is repeatedly bent or extended, it will become hard and difficult to manipulate. Avoid bending or extending the pipe more than 3 times. DO NOT bend the p...
Page 13 - to the return ductwork and return air filter arrangement.; fumes/odors into the ductwork.; Each installation must include a return air filter. This filter may; operate this product without all of the ductwork attached.; Unit Installation; handler cabinet and secure it using field-provided screws.; MUST; any leaks are present.; handler cabinet to ensure a tight seal.
Unit Installation Page 12 mrcool.com 3.6 Ductwork . This coil is designed for a complete supply and return ductwork system. Inadequate ductwork, that restricts airflow, can affect performance and can lead to compressor or heater failure. Ductwork should be constructed in a manner that limits restricti...
Page 14 - Blower Speed Selection; below for the; Table 1; Width
Page 1 mrcool.com 4 Blower Speed Selection Page 13 mrcool.com Proper air volume must be provided over the evaporator coil. Select a blower motor speed that will provide 300-450 CFM per 12,000 Btu/h of cooling capacity (wet coil). Refer to the Table 1 below for the recommended airflow volume. Table 1 ...
Page 15 - Maintenance and Care; personnel in order to prolong the life of the unit.; Condensate Drain Pipe; Check the inlet and outlet of indoor units for clogs.; Maintenance After Seasonal Use; Clean dust, debris, and contaminants off of the indoor unit.; Parts Replacement
Regularly check to make sure the drain pipe is not clogged and condensate drains smoothly. A clogged condensate pipe can cause the drain pan to overflow with condensate which can lead to property damage. Page 1 mrcool.com 5 Maintenance and Care Page 14 mrcool.com Regular checks of the system, mainten...
Page 16 - the after-sales service agency designated by MRCOOL
Page 1 mrcool.com 6 After-Sales Service Page 15 mrcool.com In the event you have any issues with the quality of the unit you purchased, or just have an inquiry, please contact the after-sales service agency designated by MRCOOL ® . . . . **Warranty claims should meet the following requirements:** In...
Page 17 - UNIVERSAL