Page 2 - Contents; Page 1; Maintenance; Quick Connect
Contents Page 1 mrcool.com MC MC EU Disposal Guidelines ...... 42 5 Post Installation Checks ........... 31 3 Maintenance ............................... 33 1. Troubleshooting ....................................... 342. Error Codes ............................................... 353. Unit Maintenan...
Page 3 - Page 2; WARNING; DO NOT; let substances or gases other than the refrigerant; modified, fire or even an explosion could occur.; Read Before Installation; Incorrect installation may cause serious damage or injury.; WARNING; or; CAUTION; WARNING; This symbol indicates that you should; never; perform the indicated action.; Safety Precautions
Page 2 Safety Precautions mrcool.com WARNING Please read the manual in its entirety before installing, operating or repairing.DO NOT share the electrical circuit with other appliances. Improper or insufficient power supply can cause fire or electrical shock. When connecting refrigerant piping, DO NOT l...
Page 4 - Page 3; Note about Flourinated Gasses:; otherwise electric shock may occur.
Page 3 Safety Precautions mrcool.com Note about Flourinated Gasses: 1.2.3.4.5. 6. 7. 8. 9. 10. 11. 12. 13. 14. 6. 5. Install the unit in a firm location that can support the unit’s weight. If the installation location cannot support the weight, or the installation is performed improperly, the unit ma...
Page 5 - Page 4
Page 4 Safety Precautions mrcool.com 1.2. For units that have an auxiliary electric heater, DO NOT install the unit within 3 feet (1 meter) of combustible materials. DO NOT install the unit in a location that may be exposed to combustible gases. If combustible gas accumulates around the unit, it may...
Page 6 - Page 5; Appliance Overview
Page 5 Safety Precautions mrcool.com To Our Customers;Thank you for choosing a MRCOOL home HVAC product. Please read this manual carefully before installation and operation of the Univeral™ Series Central HVAC System to ensure corect use and handling. In addition to the safety precautions in the pre...
Page 7 - Page 6; Liquid Side Stub Kit
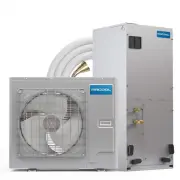
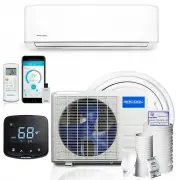
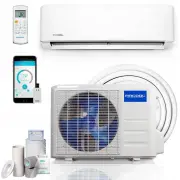
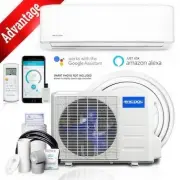
Page 6 mrcool.com Appliance Overview Fig. 1.1 3 1 1 1 Owner’s Manual Drain Plug Drainage Connector OPTIONALNo-Vac ® Quick Connect ® Lineset Gas / Liquid Pipe Assembly PART LOOKS LIKE... QUANTITY Unless otherwise stated (as “OPTIONAL”) the air conditioning system includes the following accessories. U...
Page 8 - Page 7; COOLING; Operating Range; Outdoor Temperature; Unit Dimensions; Outdoor Unit Dimensions
Page 7 mrcool.com Appliance Overview COOLING HEATING Operating Range 5°F(-15°C) ~ 130°F (54°C ) -22°F(-30°C) ~ 75°F (24°C ) Outdoor Temperature Fig. 1.2 Unit Dimensions MDUO18024036 Outdoor Unit Dimensions Width (A) x Height (C) x Depth (G) Mounting Dimensions Width (A / D) Depth (B / E) 37 x 32.25 ...
Page 9 - Page 8; Do not install the unit in a location with direct sunlight.; Unit Installation; Installation Location; The Conventional Weld Line Set Installation; The UniversalTM Series has 2 installation methods; RCO
Page 8 mrcool.com WARNING The unit must be installed in a location strong enough to support the weight of the unit and fixed securely, to avoid toppling. Install the appliance in a location where the inclination is less than 5°. Do not install the unit in a location with direct sunlight. Do not insta...
Page 10 - Page 9; Prohibited; For installation of a single condenser refer to fig 2.1 below:
Page 9 mrcool.com Unit Installation A C B D a b d c e H d H b H E A ~ E inches (”) millimeters (mm) a b c d e B — ≥ 3.94” 100mm A,B,C, — B,E — A,B,C,E — D — D,E — B,D B,D,E Prohibited Prohibited H b H d H For best performance of the outdoor unit, make sure its installation space conforms to the foll...
Page 13 - WALL
Page 12 mrcool.com Unit Installation For best performance of the outdoor unit, make sure its installation space conforms to the following installation dimensions... For installation of multiple condensers on a vertical face refer to fig 2.4 below: ≥ 7.874” 2000mm WALL ≥ 15.75” 400mm ≥ 15.75” 400mm ≥ ...
Page 14 - secure the unit. Make sure the unit stands erect and level.; Outdoor Unit Installation
Page 13 mrcool.com Unit Installation 1. 2. 3. 4. 5. If the outdoor unit is installed on a solid surface such as concrete, use M10 screw bolts and nuts to secure the unit. Make sure the unit stands erect and level. Do not install it on top of a building. If the unit vibrates and generates noise, add ...
Page 15 - INSTALLATION METHOD; dents in the piping will affect the unit’s performance.; Conventional Line Set Installation; For installation with a; No-Vac® Quick Connect® Line Set; , refer to the next section starting on page 23
Page 14 mrcool.com Unit Installation Outdoor Unit Model Liquid Pipe Gase Pipe Size of Fitting Pipe Maximum Pipe Length Maximum Drop between indoor and outdoor units 3 / 8 inch 3 / 4 inch 98.4 feet 30 m 49.2 feet 15 m MDUO18024036 INSTALLATION METHOD Connect the refrigerant lines to the unit first. Wh...
Page 16 - OIL RETURN BENDS; Add an oil return bend as described below:
Page 15 mrcool.com Unit Installation Fig. 2.6 Fig. 2.7 Install an oil return bend every 6m Oil return bend System gas pipe Outdoor unit Indoor unit Outdoor unit Non-return bend System gas pipe Oil return bend Indoor unit Install an oil return bend every 6m OIL RETURN BENDS Add an oil return bend as ...
Page 17 - Pipe Cutting; Pipe; DO NOT DEFORM PIPE WHILE CUTTING
Page 16 mrcool.com Unit Installation Oblique Rough Warped 90° Fig. 2.9 Conventional Line Set Installation Pipe Cutting Step 1: Cut Pipe 1. When preparing refrigerant pipes, take extra care to cut and flare them properly. This will ensure efficient operation and minimize the need for future maintenance....
Page 18 - Flare nut; PIPING EXTENSION BEYOND FLARE FORM; Step 3: Flare pipe ends; Pipe Flaring
Page 17 mrcool.com Unit Installation Flare nut Copper pipe Fig. 2.11 Fig. 2.12 Fig. 2.14 PIPING EXTENSION BEYOND FLARE FORM Flare form Pipe A A = ~1/16” (1.6mm) Fig. 2.13 Step 3: Flare pipe ends Proper flaring is essential to achieve an airtight seal. 1. After removing burrs from cut pipe, seal the e...
Page 19 - Replacement Condenser Only; WELD Type Complete Unit Replacement
Replacement Condenser Only Conventional Line Set Installation Unit Installation mrcool.com Page 18 Existing Air Handler Existing Air Handler in house Accessory copper 90 pipe Q+y*2 Purge with Nitrogen Weld joint Purge with Nitrogen must be 410 air handler and 410 TXV Bioflow valve MRCOOL Universal S...
Page 20 - Pipe Bending; Extend the pipe by unwinding it; Radius; MINIMUM BEND RADIUS
Page 19 mrcool.com Unit Installation 1. Use your hands to bend the pipes. Work carefully to collapse them. 2. Do not bend the pipes in at an angle greater than 90°. 3. If the pipe is repeatedly bent or extended, it will become hard and difficult to manipulate. Avoid bending or extending the pipe for m...
Page 21 - DO NOT USE EXCESSIVE TORQUE; Knockout Holes; Post Installation Checks; Pipe Connection
Page 20 mrcool.com Unit Installation Pipe diameter (in. | mm) Tightening torque (N·m) Ф1/4” | Ф6.4 Ф3/8 | Ф8.3 Ф1/2” | Ф12.7 Ф5/8” | Ф15.9 Ф3/4” | Ф19 Ф7/8” | Ф22.2 15-30 35-40 45-50 60-65 70-75 80-85 DO NOT USE EXCESSIVE TORQUE Excessive force can break the nut or damage the refrigerant piping. You...
Page 22 - Vacuum Lines; Connect the hose used for evacuation hose to the vacuum pump.; generally 30 minutes.; Return the caps to the liquid valve, gas valve and service port.
Page 21 mrcool.com Unit Installation Conventional Line Set Installation Vacuum Lines WARNING Make sure the outlet of the vaccuum pump is away from any potential source of fire and is well-ventilated. 1. Remove the caps on the liquid valve, gas valve and also the service port. 2. Connect the hose at t...
Page 24 - INSTRUCTIONS FOR USE WITH; NO-VACTM QUICK CONNECT® LINE SET; SOLD SEPARATELY; Please read and follow the instructions and diagram below; Complete unit replacement; Air Handler
Page 23 mrcool.com No-Vac ® Quick Connect ® Line Set Installation INSTRUCTIONS FOR USE WITH NO-VAC™ QUICK CONNECT® LINE SET SOLD SEPARATELY Please read and follow the instructions and diagram below � : 1. Take out matching male connectors M1 and M2. 2. Remove protective cap with the copper gasket at...
Page 25 - lower; Installation of Drain Pipe
Page 24 mrcool.com Unit Installation If the outdoor unit is located on a level lower than the indoor unit, arrange the condensate drain according Fig. 2.21 . 1. Drain hose should be placed on the ground and its end should not be immersed into water. 2. The entire lineset, including drain pipe should...
Page 26 - Condenser Field Conversion; and air handler split system to operate at 2 ton capacity.; Converting Unit From 3 Ton to 2 Ton; settings to convert the Universal Air Handler from 3 ton to 2 ton.
mrcool.com Page 25 Unit Installation Condenser Field Conversion Fig. 2.24 Location of Dip Switch on Condenser Main Board DEFAULT 3 TON 2 TON SETTING Fig. 2.23 Fig. 2.25 Follow these instructions during unit installation in order to enable a Universal Series 3 ton condenser and air handler split syst...
Page 27 - edge on the ceiling, or touch any metal burrs or sharp metal edge.; Electrical Connection; Electrical Regulations
Page 26 mrcool.com Unit Installation WARNING Before performing electrical work, read the following regulations 1. Electrical installation must be conducted only by professionals in compliance with local laws, regulations and this installation manual. Never artificially extend the length of power cord...
Page 28 - Outdoor Unit Model; Electrical Parameters; Refer to
Page 27 mrcool.com Unit Installation Outdoor Unit Model Power Supply Max. Fuse Size 208/230V 1Ph - 60Hz 35 amps (3 Ton) 20 amps (2 Ton) 24 amps (3 Ton) 18 amps (2 Ton) MDUO18024036 Min. Circuit Ampacity Electrical Connection Electrical Parameters Connecting the Power Cord & Communication Wire Fo...
Page 29 - Connecting the Power Cord & Communication Wire; the wires with wire clamps (as; shown in; Cord Clamp; Before work begins, please check to ensure the unit is powered OFF.
Page 28 mrcool.com Unit Installation Electrical Connection Connecting the Power Cord & Communication Wire Screw with special washer Round Terminal Wire Terminal Board For all terminal wiring ( Refer to Fig. 2.28 ): Lead the connection wire and power cord through the insulation tube. Then fix the ...
Page 30 - clamps and the latter ones with small clamps.; POWER
Page 29 mrcool.com Unit Installation WARNING 1. High and low voltage wires should be led through different rubber rings of the electric box cover. 2. Do not bundle up the temperature controller wire or lay them side by side, otherwise errors will occur. 3. High and low voltage wires should be secured...
Page 31 - wire and the power cord to the terminal board.
Page 30 mrcool.com Unit Installation L 1 L 1 L 2 L 2 Power Cord should enter through the lower hole Communication Wire should enter through the upper hole The wires should be bundled with a cable tie Electrical Connection Connecting the Power Cord & Communication Wire Electrical wiring of Single...
Page 32 - Refrigerant Piping Connection; List of Checks to Perform; Before Test Run; Electrical Safety Checks; – Confirm that the electrical system is safe and operating properly; Gas Leak Checks
Page 31 mrcool.com Refrigerant Piping Connection List of Checks to Perform Possible Malfunctions PASS/FAIL Outdoor (2): Indoor (2): Is the main body installed securely? Did you conduct a water leakage test? Is the unit well insulated from heat? Does water drain properly from drain hose? Is the volta...
Page 33 - Test Run Instructions; Preparation before connecting the power:; Control circuit is correct and all the wires are firmly connected.; Operation after connecting the power:; If all the above works are finished, power on the unit.; DOUBLE-CHECK PIPE CONNECTIONS; points do not have leaks.; Test Run
Page 32 mrcool.com Post Installation Checks Test Run Instructions Preparation before connecting the power: 1. Power must not be connected if the installation work is not completed. 2. Control circuit is correct and all the wires are firmly connected. 3. Cut-off valves of the gas pipe and liquid pipe a...
Page 34 - Troubleshooting; Problem
Page 33 mrcool.com Outdoor Unit Installation Maintenance 4 4 Maintenance Troubleshooting (1) If your air conditioner fails to function normally, check the following items before conducting maintenance: Problem Cause Corrective Measure The air conditioner will not activate. Inadequate cooling or heat...
Page 35 - NOTICE; MRCOOL or your installing dealer.
Page 34 mrcool.com Maintenance Problem Time of Occurrence Cause Mist comes from the conditioner. The air conditioner generates noise. The air conditioner generates smells. Dust comes from the air conditioner. During operation. System switches to heating mode after defrosting. The air conditioner is ...
Page 36 - Error Code; electric shock or a fire hazard.; Number Error Code
Page 35 mrcool.com Maintenance Error Code WARNING 1) When abnormalities occur, stop the unit immediately and disconnect power. Contact MRCOOL. If the unit continues to run abnormally, it may damage the unit and cause an electric shock or a fire hazard. 2) DO NOT attempt repairs to the appliance yours...
Page 37 - Unit Maintenance; Warning
Page 36 mrcool.com Maintenance Unit Maintenance Number Error Code Error 22 P5 Over-current protection 23 P6 Master control and driver communication errorDriver module sensor error 25 P8 Driver module high temperature protection 26 P9 Zero-crossing protection 27 PA AC current protection 28 Pc Driver ...
Page 38 - Outdoor Heat Exchanger; avoid electric shock.; Condensate Drain
Page 37 mrcool.com Maintenance Outdoor Heat Exchanger Warning 1) Before cleaning, ensure the power is off. Turn off at circuit breaker and remove the power socket, to avoid electric shock. 3) When cleaning the filter, be careful. If you need to work above the ground, please exercise caution. 2) Do n...
Page 39 - Notice on Maintenance; Service Information
Page 38 mrcool.com Maintenance Notice on Maintenance Service Information General Work Area Inform others working in the immediate vicinity about the nature of work being performed. Avoid work confined spaces. Section off the area around the workspace. Ensure conditions within the area are safe by remo...
Page 40 - Initial safety checks should include:; Electrical Device Checks; ignition of refrigerant in the atmosphere from a leak.; Intrinsically Safe Component Repair; ELECTRICAL SAFETY; ) Ensure the apparatus is securely mounted.
Page 39 mrcool.com Maintenance Initial safety checks should include: 1) Safe discharge of capacitors to avoid the possibility of sparking; 2) No live electrical components and wiring should be exposed while charging, recovering or purging the system; 3) The system is safely grounded. Electrical Devi...
Page 41 - Cabling; ) You are familiar with the equipment and its operation.; Decommissioning procedure:; ) Take extreme care to avoid refrigerant overfill.
Page 40 mrcool.com Maintenance Notice on Maintenance Cabling Charging Procedures Decommissioning Before decommissioning, it is essential that the technician become completely familiar with all of the equipment in detail. It is a recommended good practice that all refrigerants be recovered safely. Be...
Page 42 - good practice that all refrigerants are removed safely.; Labelling; label must be dated and signed.
Page 41 mrcool.com Maintenance 6) Do not exceed the maximum working pressure of the cylinder, even temporarily. 7) When the cylinders have been filled correctly and the process completed, ensure the cylinders and the equipment are removed from site promptly and all isolation valves on the equipment a...
Page 43 - Special notice; ance, the law requires special collection and treatment.; dispose of this product as household waste; EU Disposal Guidelines
Page 42 mrcool.com Refrigerant Piping Connection Special notice This appliance contains refrigerant and other potentially hazardous materials. When disposing of this appli- ance, the law requires special collection and treatment. DO NOT dispose of this product as household waste or unsorted municipa...
Page 44 - UniversalTM Series; Consult with the sales agency or manufacturer for details.; INSTALLATION LOCATION:
Universal™ Series The design and specifications of this product and/or manual are subject to change without prior notice. Consult with the sales agency or manufacturer for details. Copyright © 2019 MRCOOL, LLC . ELECTRICIAN and/or HVAC TECHNICIAN: LICENSE #: INSTALLATION DATE: INSTALLATION LOCATION: ...


 MRCOOL A-09-HP-115B-LG
User Manual
MRCOOL A-09-HP-115B-LG
User Manual
 MRCOOL A-09-HP-115B-MS
User Manual
MRCOOL A-09-HP-115B-MS
User Manual
 MRCOOL A-09-HP-115C
User Manual
MRCOOL A-09-HP-115C
User Manual
 MRCOOL A-09-HP-230B-LG
User Manual
MRCOOL A-09-HP-230B-LG
User Manual
 MRCOOL A-09-HP-230B-MS
User Manual
MRCOOL A-09-HP-230B-MS
User Manual
 MRCOOL A-12-HP-115B-LG
User Manual
MRCOOL A-12-HP-115B-LG
User Manual
 MRCOOL A-12-HP-115B-MS
User Manual
MRCOOL A-12-HP-115B-MS
User Manual
 MRCOOL A-12-HP-115C
User Manual
MRCOOL A-12-HP-115C
User Manual
 MRCOOL A-12-HP-115C-MS
User Manual
MRCOOL A-12-HP-115C-MS
User Manual
 MRCOOL A-12-HP-230B-LG
User Manual
MRCOOL A-12-HP-230B-LG
User Manual
 MRCOOL A-12-HP-230B-MS
User Manual
MRCOOL A-12-HP-230B-MS
User Manual
 MRCOOL A-18-HP-230B-LG
User Manual
MRCOOL A-18-HP-230B-LG
User Manual
 MRCOOL A-18-HP-230B-MS
User Manual
MRCOOL A-18-HP-230B-MS
User Manual